xStack® DGS-3120 Series Layer 3 Managed Gigabit Ethernet Switch Web UI Reference Guide
423
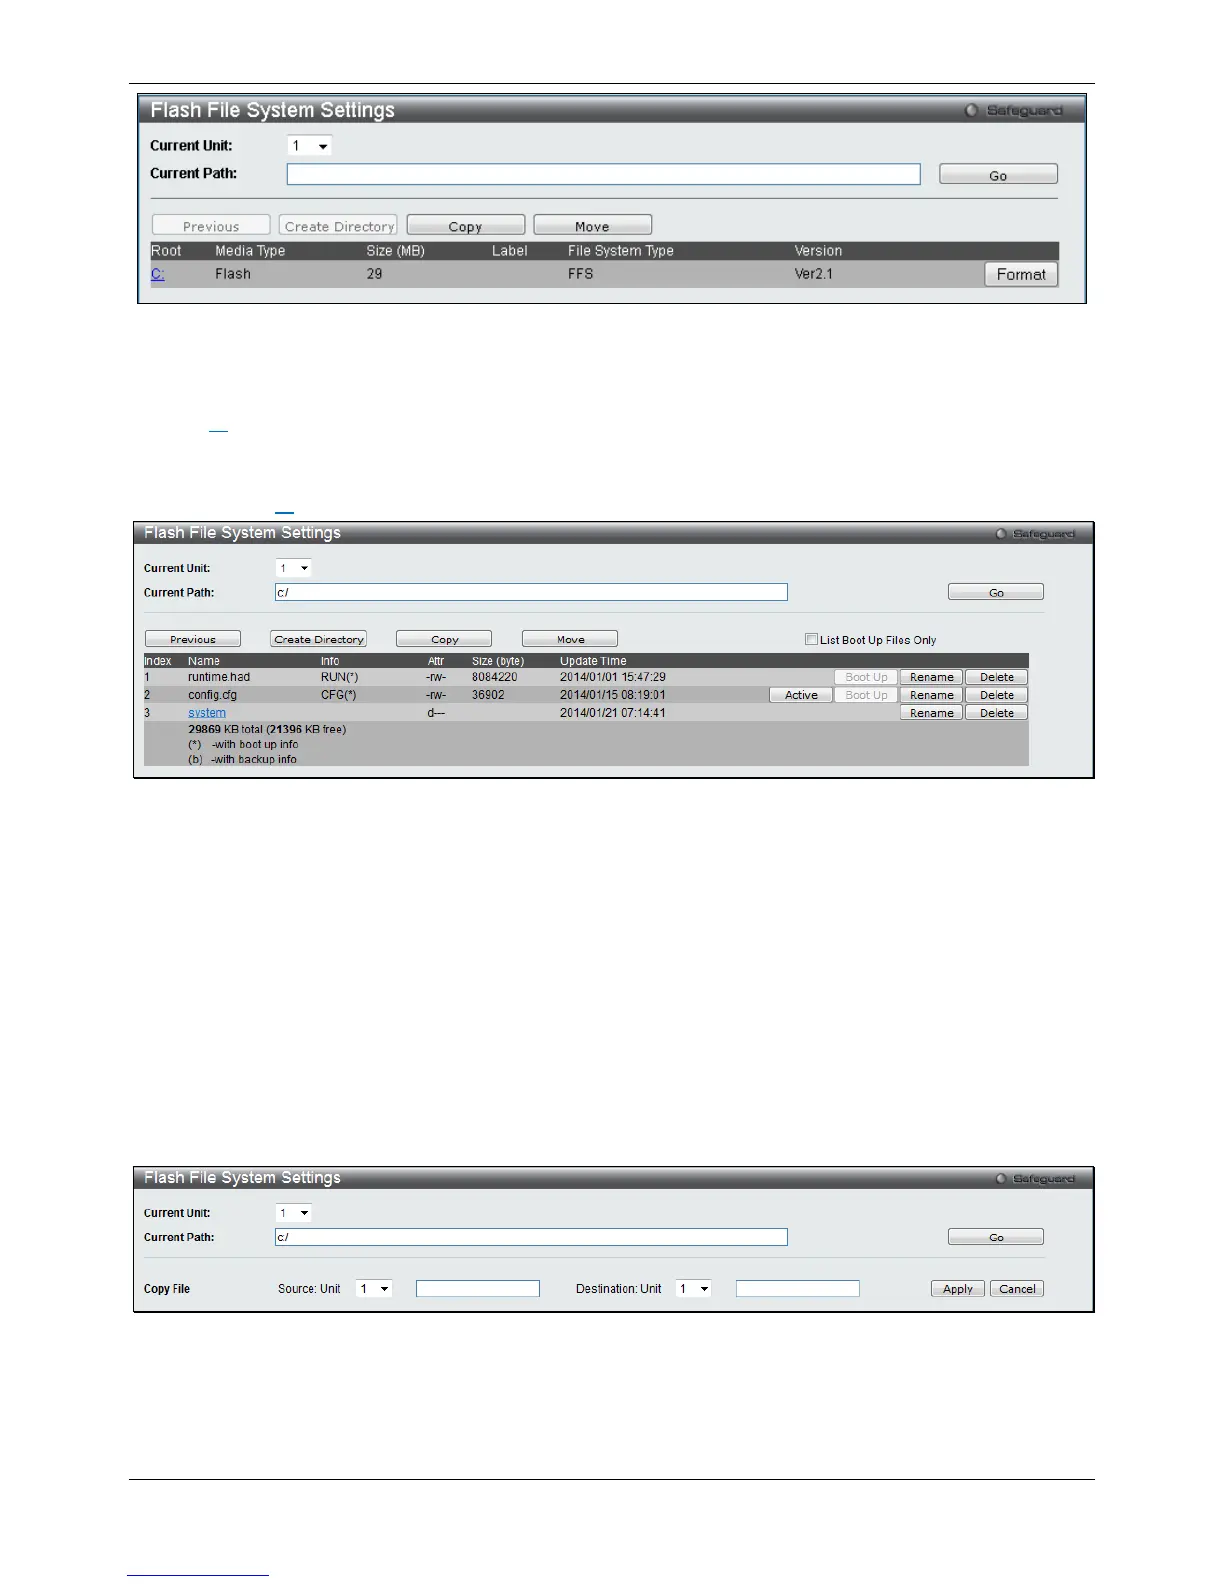
Figure 9-37 Flash File System Settings window
Select the Current Unit (EI and SI Mode Only) and enter the Current Path string and click the Go button to
navigate to the path entered.
Click the C: link to navigate the C: drive.
Click the Format button to format a removable storage drive.
After clicking the C: link button, the following window will appear:
Figure 9-38 Flash File System Setting – Search for Drive window
Click the Previous button to return to the previous page.
Click the Create Directory to create a new directory within the file system of the switch.
Click the Copy button to copy a specific file to the switch.
Click the Move button to move a specific file within the switch.
Tick the List Boot Up Files Only option to display only the boot up files.
Click the Active button to set a specific config file as the active runtime configuration.
Click the Boot Up button to set a specific runtime image as the boot up image.
Click the Rename button to rename a specific file’s name.
Click the Delete button to remove a specific file from the file system.
After clicking the Copy button, the following window will appear:
Figure 9-39 Flash File System Settings – Copy window
When copying a file to the file system of this switch, the user must enter the Source and Destination path.
Click the Apply button to initiate the copy.
Click the Cancel button the discard the process.

 Loading...