xStack® DGS-3120 Series Layer 3 Managed Gigabit Ethernet Switch Web UI Reference Guide
46
Use the drop-down menu to enable or disable IPv4 State.
Use the drop-down menu to enable or disable the Interface Admin State.
DHCP Option 12 State
Use the drop-down menu to enable or disable insertion of option 12 in the
DHCPDISCOVER and DHCPREQUEST message.
Enter the host name to be inserted in the DHCPDISCOVER and DHCPREQUEST
Click the Apply button to accept the changes made.
Click the <<Back button to discard the changes made and return to the previous page.
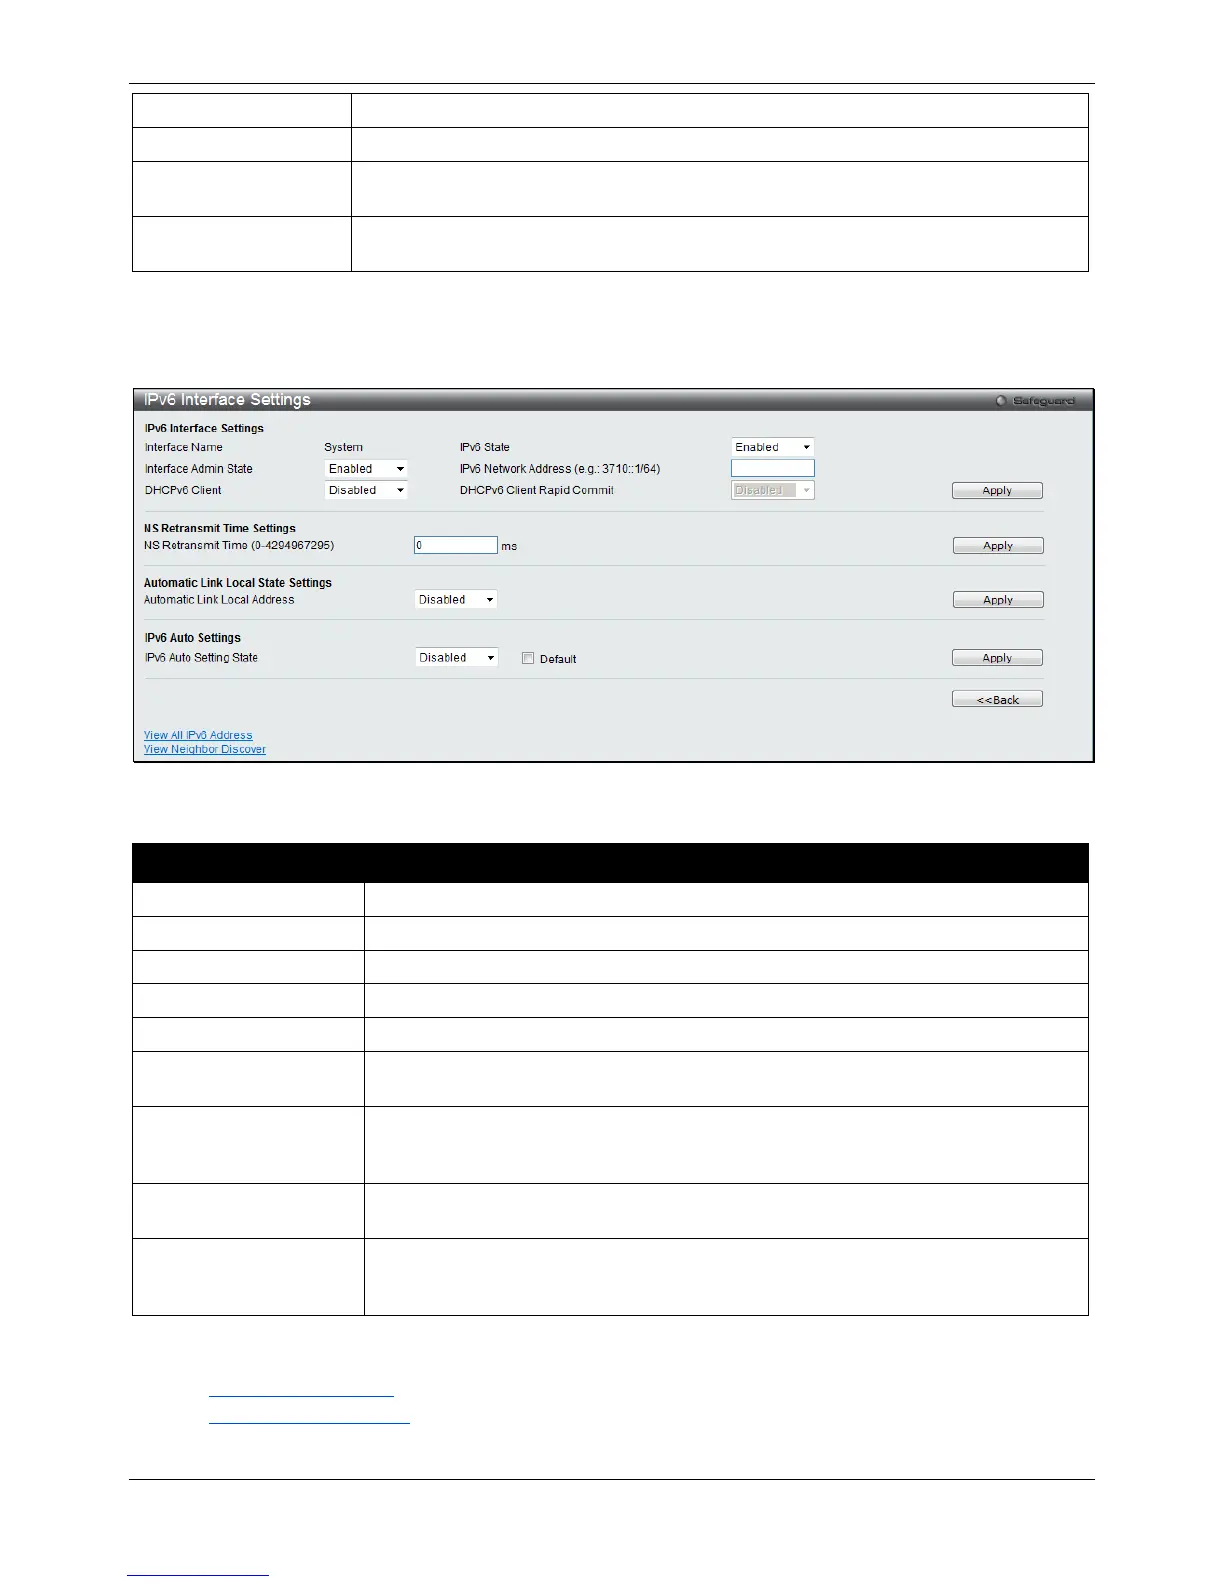
Click the IPv6 Edit button to see the following window.
Figure 3-12 IPv6 Interface Settings window
The fields that can be configured or displayed are described below:
Parameter Description
Display the IPv6 interface name.
Use the drop-down menu to enable or disable IPv6 State.
Use the drop-down menu to enable or disable the Interface Admin State.
Here the user can enter the neighbor’s global or link-local address.
Use the drop-down menu to enable or disable DHCPv6 client.
Use the drop-down menu to enable or disable DHCPv6 client rapid commit. This
provides a two-message exchange in order to configure the client faster.
NS Retransmit Time
Enter the Neighbor solicitation’s retransmit timer in millisecond here. It has the same
value as the RA retransmit time in the config ipv6 nd ra command. If this field is
configured, it will duplicate the entry into the RA field.
Use the drop-down menu to enable or disable the Automatic Link Local Address.
IPv6 Auto Setting State
Use the drop-down menu to enable or disable automatic configuration of IPv6
address. Tick the Default check box to insert a default route to the IPv6 routing
Click the Apply button to accept the changes made for each individual section.
Click the <<Back button to discard the changes made and return to the previous page.
Click the View All IPv6 Address link to view all the current IPv6 address.
Click the View Neighbor Discover link to view all the neighbor discovery information entries.

 Loading...