PROP SHAFTS
4-2
©
200508
Demounting and mounting
10
ΛΦ45/55 series
3
4. Rotate the shaft 180″ and remove the
bearing that has just been pressed out. If the
first bearing to be removed fails to come out
of the fork entirely, it can be clamped to
enable the fork to be pushed up by means of
a lever. Place the shaft back on the bush.
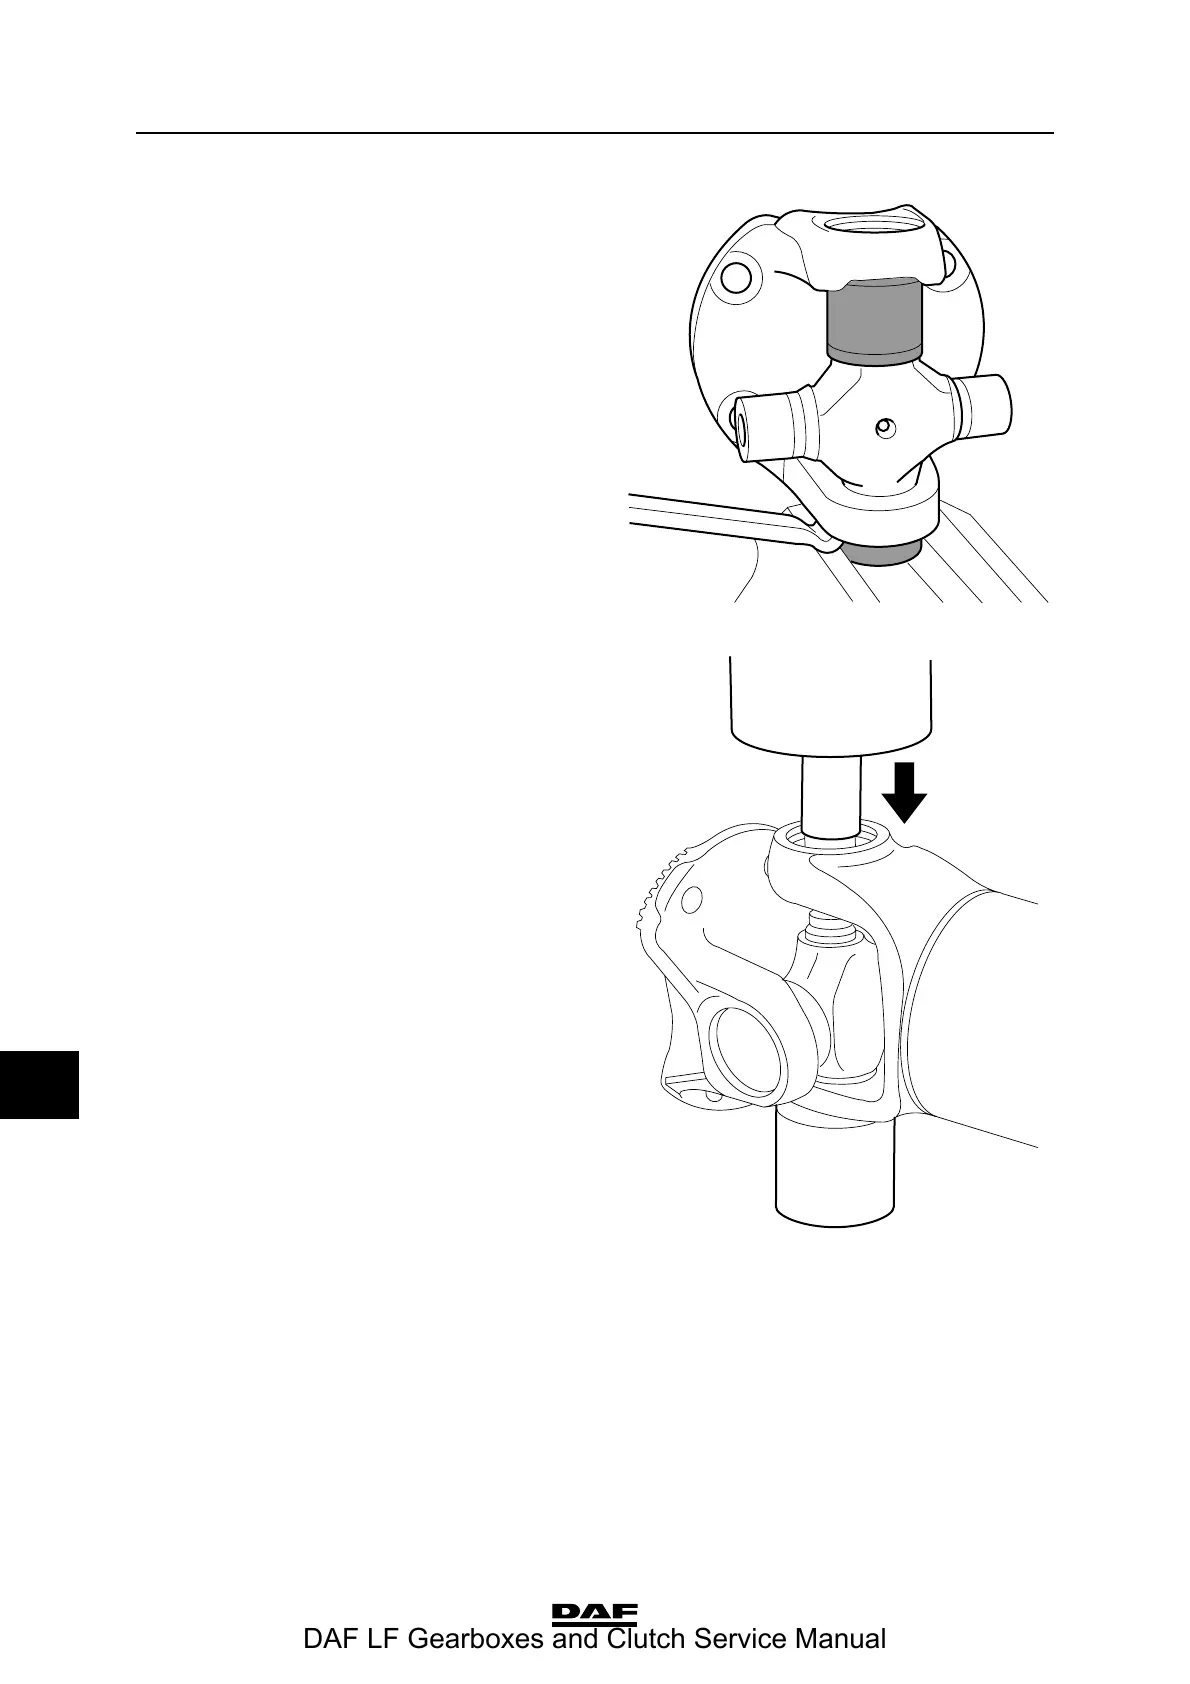
5. Push the spider down again in the direction
of the shaft fork. Again, continue until the
spider touches the fork.
6. The spider and the drive flange can now be
tipped out of the shaft fork.
7. Place the drive flange on a bush underneath
a press and press the entire spider including
bearings and drive flange down until the
spider touches the fork of the drive flange.
8. Rotate the drive flange 180″ and remove the
bearing that has just been pressed out.
Place the drive flange back on the bush.
9. Push the spider down again in the direction
of the shaft fork. Again, continue until the
spider touches the fork.
10. The spider can now be tipped out of the drive
flange fork.
Note:
When spiders are being replaced, always
replace them including their bearings.
11. Check the components to be reused for any
cracks and/or damage.
Mounting universal joint
Note:
After mounting, it must be possible to move
the drive flanges and spiders by hand. When
mounting the spider, Seeger rings of the
same thickness must be used.
W306012-2
W306011-2
DAF LF Gearboxes and Clutch Service Manual

 Loading...