GNX3000 Owner’s Manual
31
GNX3000 Owner’s Manual
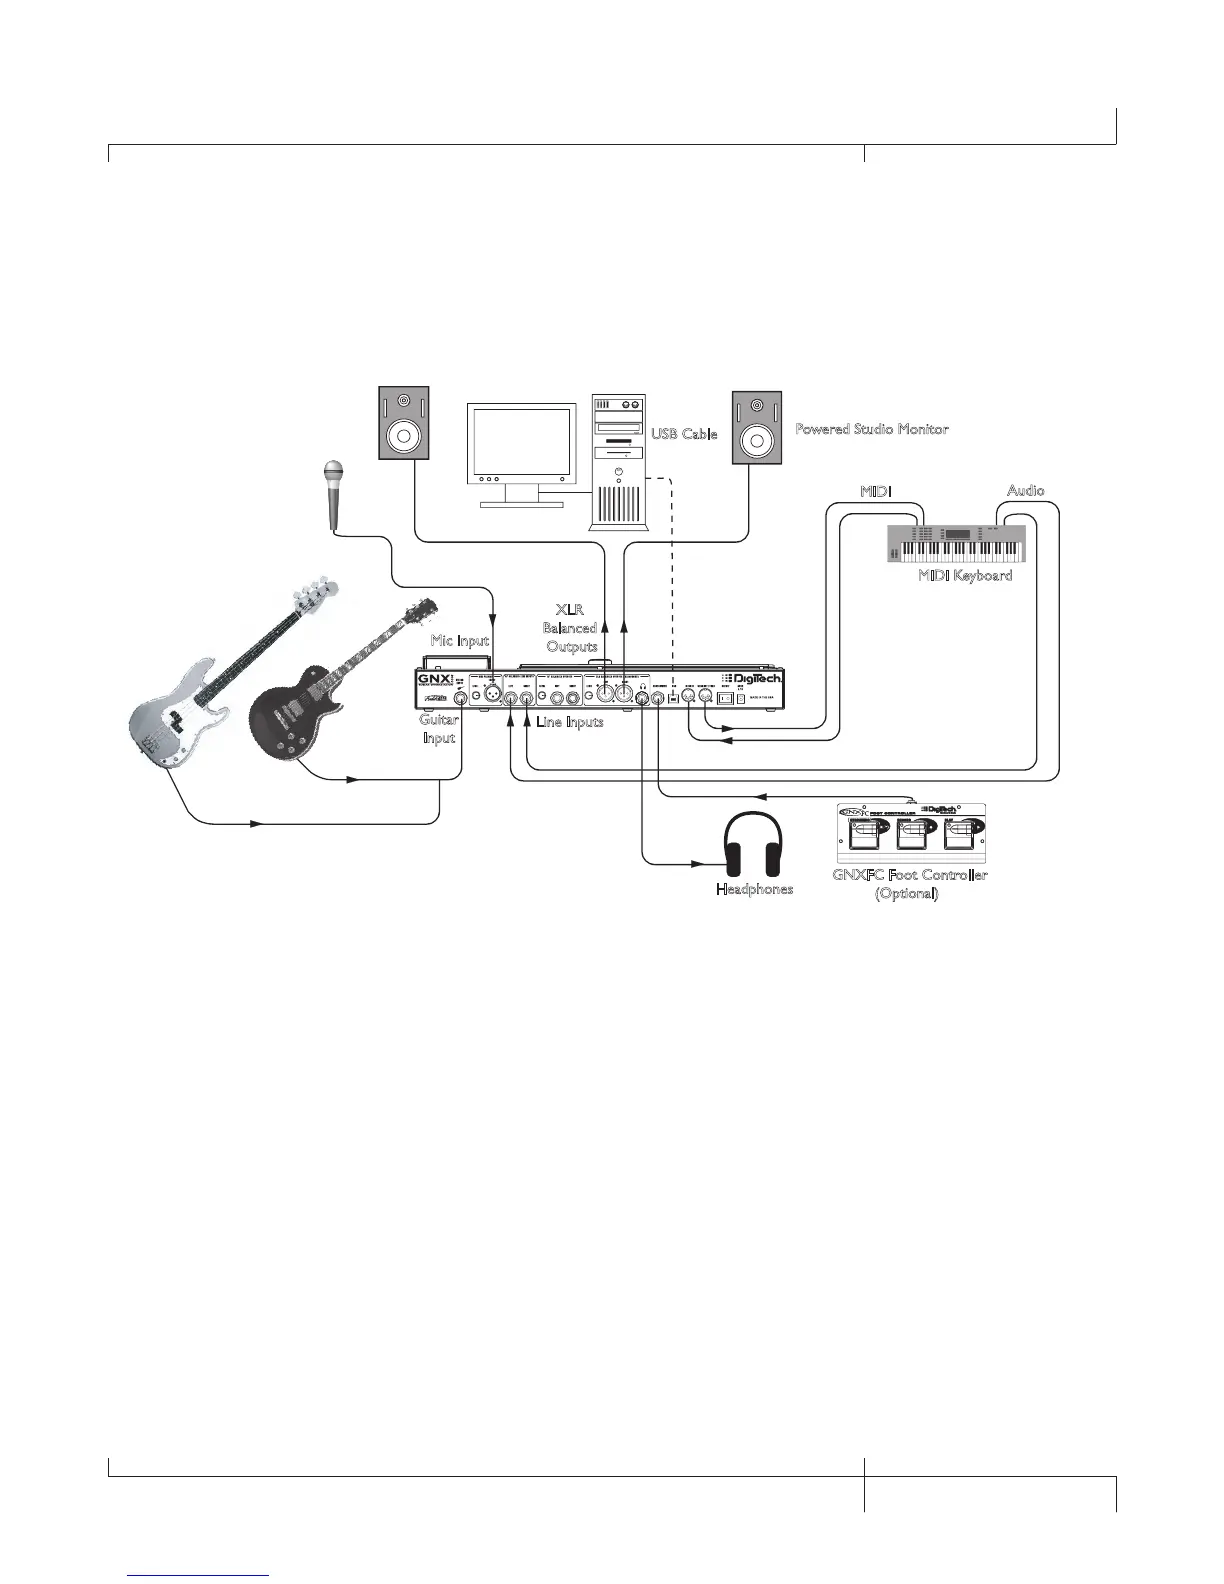
Computer Recording Setup
The GNX3000 offers tremendous flexibility for recording applications. Shown below is
a typical recording setup.
Guitar
Input
Line Inputs
XLR
Balanced
Outputs
MIDI Keyboard
MIDI
Audio
Microphone
Headphones
Powered Studio Monitor
Powered Studio Monitor
USB Cable
Computer
GNXFC Foot Controller
(Optional)
Mic Input
At the heart of your recording studio, the GNX3000 serves both as your guitar processor
and audio/MIDI interface. With MIC INPUT, LINE INPUTS, and MIDI I/O, you have a full
featured interface for recording almost any source you can think of. Connect your guitar
or bass to the GNX3000’s GUITAR INPUT and use the amp models for tracking your
guitar and bass parts. Next, plug in the mic and get your vocal or acoustic performance
nailed. You can even add line level instruments or feeds from submixes in and record
these and all of this completely hands-free. Even your MIDI keyboard performance can
be recorded so you can try the part with different synth voices later. Since the GNX3000
has professional BALANCED OUTPUTS, you can plug directly into your favorite powered
monitors and get the bonus of latency free recording to boot. For more information about
computer recording, see page 101.
1. Connect your guitar (or bass guitar) to the GNX3000’s GUITAR INPUT
.
2. Connect a microphone to the GNX3000’s MIC INPUT and use the MIC LEVEL
control knob located next to the MIC INPUT on the GNX3000’s rear panel to
adjust the microphone output level. To adjust your microphone input level for
optimal use see Mic Level Optimization
on page 26.
3. Connect a pair of stereo headphones to the HEADPHONE OUTPUT
.
GNX3000 Owner’s Manual
31
GNX3000 Owner’s Manual