Creating a Preset
Suppose you wanted to create your own HyperModel
TM
that incorporates the sweet tones of a vintage
Tweed using an British 1x12 cabinet, and the ripping distortion of a Rectified Amp with a British 4x12
cabinet. Let’s also suppose that you want to be able to toggle between an acoustic guitar simulation
and this new HyperModel with a preset that gives your single coil pickup a humbucker sound, uses no
Compression, has a Noise Gate that opens quickly, a subtle Chorus effect, no Delay, and a little bit
of a Hall reverb. The following guide steps you through the process of creating just that preset in the
GNX3000. Start by selecting Stompbox Mode (yellow), using the
MODE button.
Selecting a Preset
The first step to create a custom preset of your own is to select a starting point. You can start with
any existing preset, but for this example let’s start with Factory 1 Preset 40. Use the DATA WHEEL or
FOOTSWITCHES (when the GNX3000 is in either Preset or
Stompbox Mode) to select Factory 1 Preset
40.
Create a HyperModel
TM
For this example, we are going to use a vintage Tweed amp with an British 1x12 Cabinet, and warp it
with a Rectified Amp using a British 4x12 cabinet.
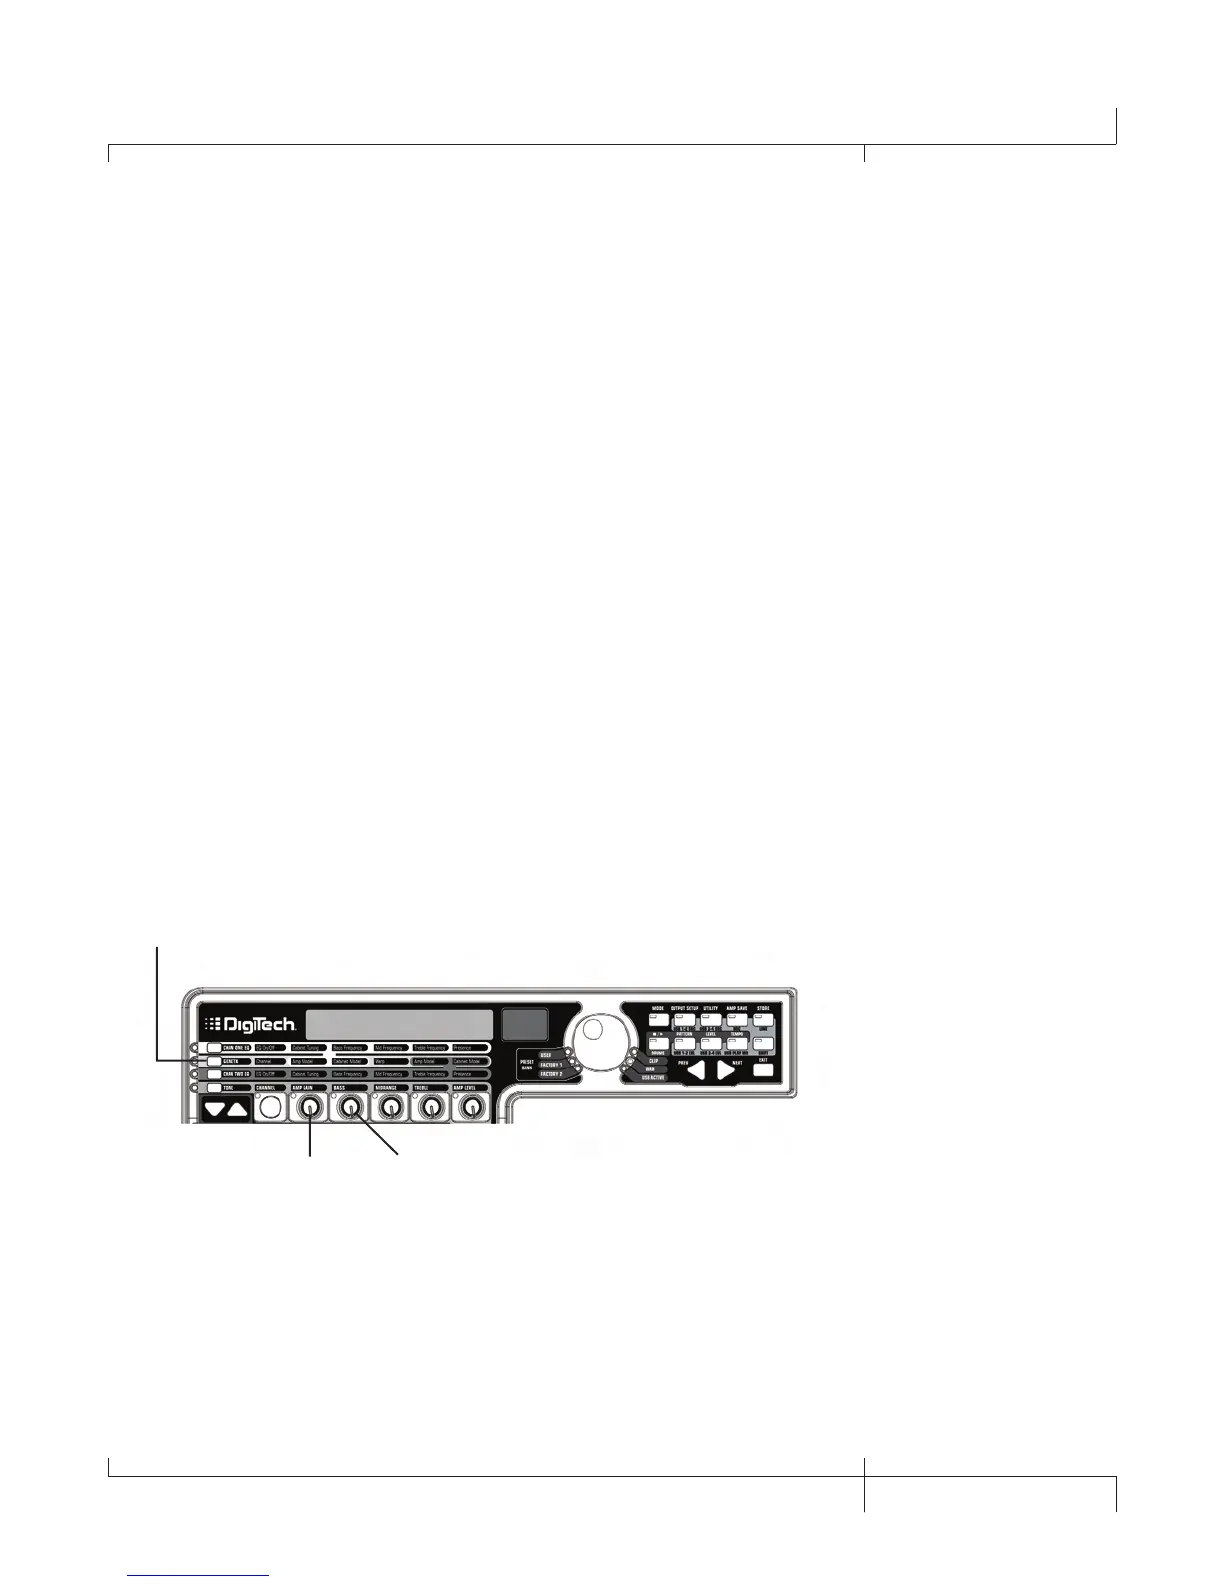
Select Channel 1 Amp and Cabinet
To assign the vintage Tweed amp to Channel 1 do the following:
1. Press the
GENETX Amp Control button to access each channel’s amp and cabinet models.
2. Rotate KNOB 1 until the display reads
57 dlux (Tweed).
3. Rotate KNOB 2 until the display reads
brit1X12 (Vox
TM
).
1. Press the GENETX
Amp Control button
2. Rotate Parameter 1 knob
until Display reads 57 dlux
3. Rotate parameter 2 knob
until Displa
y reads brit1x12
GNX3000 Owner’s Manual
81
GNX3000 Owner’s Manual