4-24
RMS Variation Limit, continued
Procedure to
record rms
variation
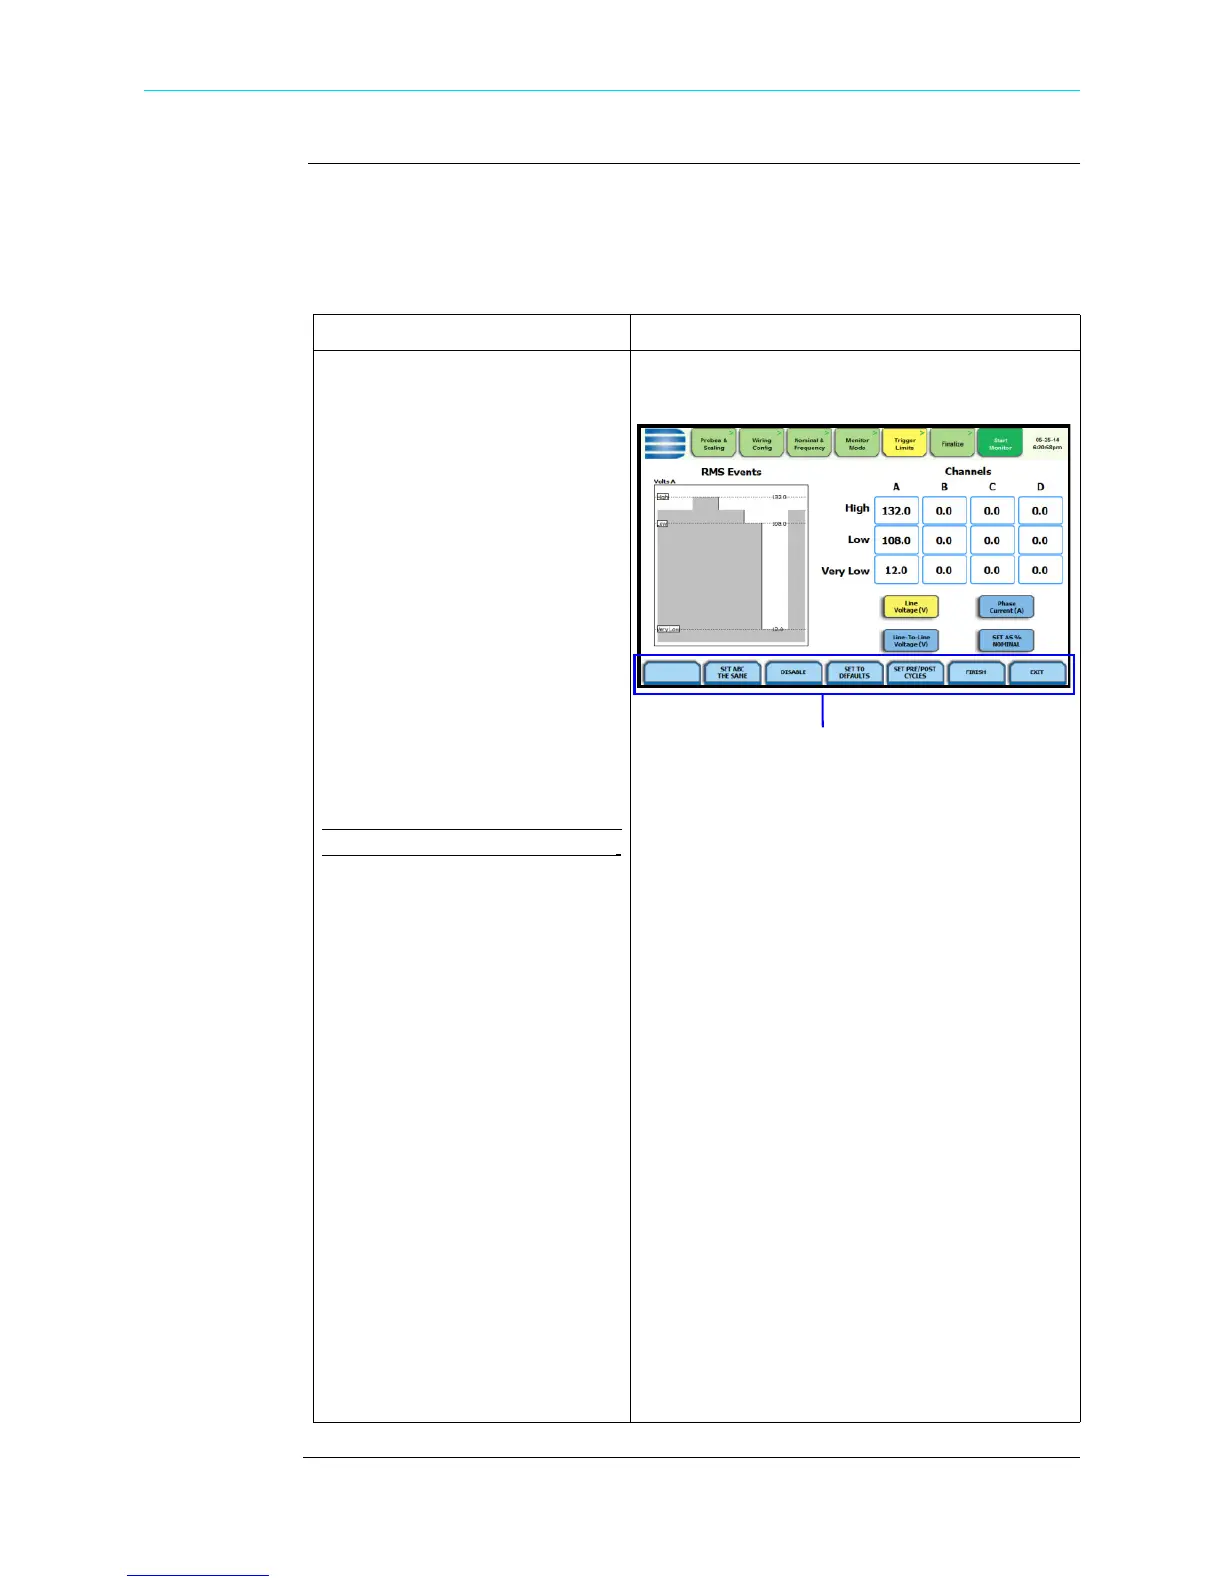
The following parameters are required to define how an rms variation is triggered:
•Low Limit
•High Limit
• Very Low Limit
Action... Result...
STEP 1: From the Trigger Limits
Setup Options screen, press Set
RMS Limits. You can always
return to the limits setup option
screen by pressing the Trigger
Limits tab.
• Use the threshold parameters
High, Low, Very Low to
change/enable or disable
threshold values.
• Use function key Set As %
Nominal to display the base
unit for entering thresholds. To
enter limits in % of nominal,
check the % of nominal
checkbox. If unchecked, limits
are entered in absolute values.
Function keys common to all rms
and transient event setup screens:
• Use function key Set ABC the
Same to set identical threshold
values for
Channels A, B and C.
• Use function key Disable to
deactivate a selected limit field.
Make sure to Enable the field
after.
• Set to Defaults - restores the
trigger channel settings to
default values.
• Set Pre/Post Cycles - defines
the number of rms and
waveform cycles to be saved.
Proceed to Step 2.
• Finish - accepts the changes
made and brings you back to
the limits setup options screen.
• Exit - prompts the Exit Setup
screen where you can either
Accept or Abort the monitoring
setups. Go to page 4-48.
HDPQ-414
Functions keys common to all rms and transient
event setup screens - refer to definitions provided
at left
Shop for Power Metering products online at:
1.877.766.5412
www.PowerMeterStore.com
 Loading...