© Edwards Limited 2017. All rights reserved. Page 79
Edwards and the Edwards logo are trademarks of Edwards Limited.
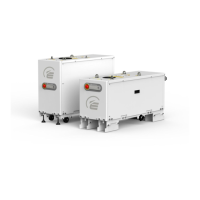
Exhaust silencer mounting assembly
M588-08-880 Issue D
6.4 Installation
6.4.1 Unpack and inspect
Remove all the packaging materials and check the silencer mounting components for signs of damage.
If the silencer mounting components are damaged, notify your supplier and the carrier in writing within three days;
state the Item number of the silencer mounting together with your order number and your supplier's invoice number.
Do not use the silencer mounting if it is damaged.
Check that your package contains the items listed in the Table 51 to 55. If any of these items are missing, notify your
supplier in writing within three days.
If the silencer mounting is not to be used immediately, store as described in Section 6.5.
6.4.2 Installation of horizontal silencer mounting assy
When fitting the exhaust silencer, ensure that the arrow on the exhaust Silencer body points in the direction of
the gas flow; away from the pump exhaust outlet.
The horizontal silencer is designed to be bolted to the side rail of the pump as shown in Figure 58.The necessary
clearance is achieved by the pump being mounted on raised supports. The raised supports should be attached to the
pump feet using the fasteners provided. The silencer brace should be bolted in position on the inside of the pump
side rail adjacent to the exhaust outlet as shown in Figure 59:
1. Fix the silencer mounting to the outside of the pump side rail using the same fixing holes as the silencer brace
(refer to Figure 58 and Figure 59). This provides a solid base for the mounting of the silencer. Do NOT fully
tighten the fasteners. This allows for fine adjustment.
2. Using suitable lifting equipment and techniques, mount the silencer to the bracket as shown in Figure 58. Align
the inlet flange on the exhaust silencer with the exhaust outlet flange on the dry pump.
3. Bolt the silencer to the support bracket using the fasteners provided. Do NOT fully tighten the fasteners. This
allows for fine adjustment.
4. Fit the trapped O-ring between the two flange connections and carefully draw the flanges together using the
clamp provided until secured in position. Attention should be given to the alignment of this connection to ensure
an efficient seal.
5. Tighten all bolts to the recommended torque.