Setup & Operation 14. Option : Teach Pendant TP1
RC620 Rev.8 95
14.3.1 Jog & Teach
This section indicates settings in the [Jog & Teach] screen.
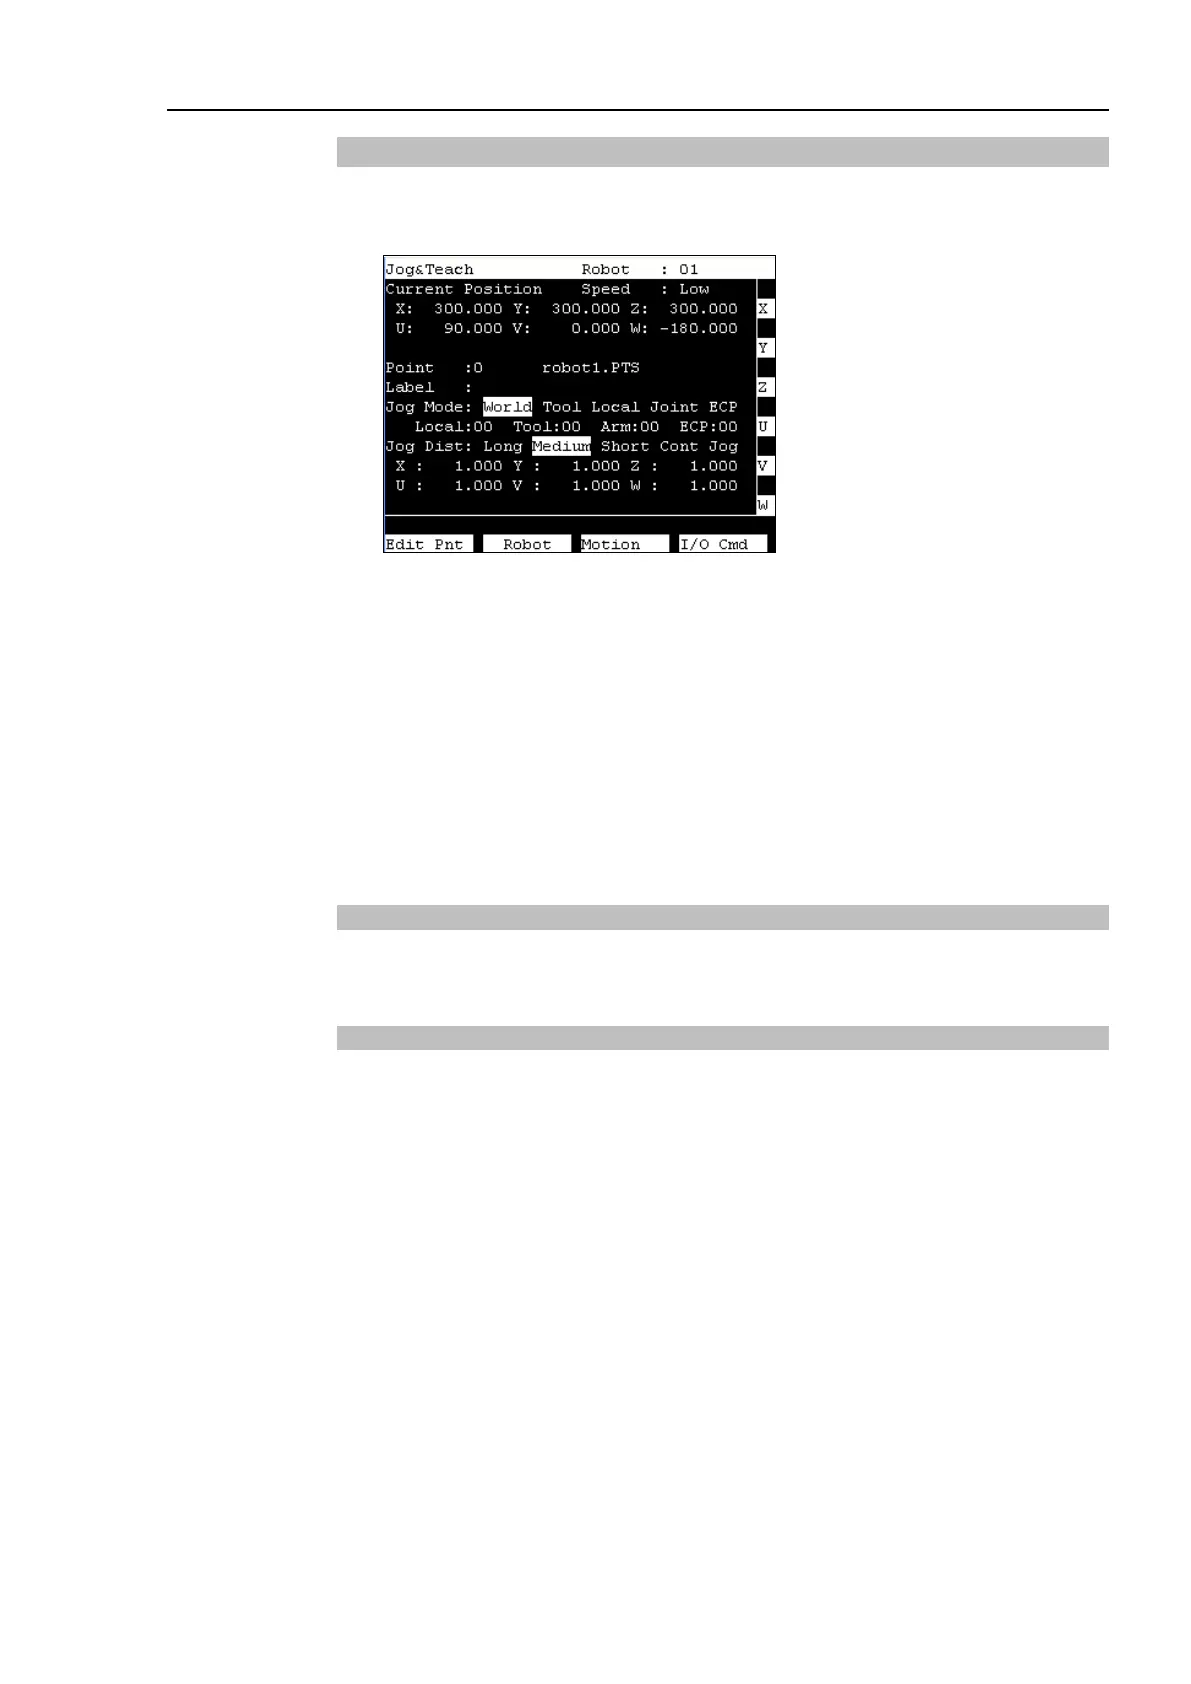
(1) Switch the mode selector key switch to “Teach” to display the following screen.
(2) Set the data items currently displayed in the [Jog & Teach] screen.
See (described hereinafter) : Specifying Point Number Specifying Jog Mode
Specifying Jog Speed Jog key
Executing Step Jog Executing Continuous Jog
(3) Note down the robot position.
See (described hereinafter) : Teaching
(4) Back up the point data to a file.
See (described hereinafter) : Saving Point File
Specifying Point Number
Change the value at [Point] using the <
↑
> and <
↓
> keys to specify a point number.
Changing the point number changes the indication at [Label].
Specifying Jog Mode
Press the <Jog Mode> key and specify the [Jog Mode]. (World, Tool, Joint, ECP)
The default setting is “World”.
World : Jogs the robot along the X, Y, Z axes in the current local, tool, arm, and ECP.
For robots with 4 DOF, you can also jog U (roll).
For robots with 6 DOF, you can jog U (roll), V (pitch), and W (yaw). This is the
default setting.
Tool : Jogs the robot in the coordinate system defined by the current tool.
Joint : Jogs each joint of the robot.
A separate set of jog buttons will appear when using joint mode when using
non-Cartesian robots.
ECP : Jogs the robot along the axes of the coordinate system defined by the current
external control point. Coordinates are World coordinates.
When the <F5-8> key lights up its LED, the toggle of <Jog Mode> key is the opposite
direction.