Maintenance 6. Maintenance Parts Replacement Procedures
158 RC620 Rev.8
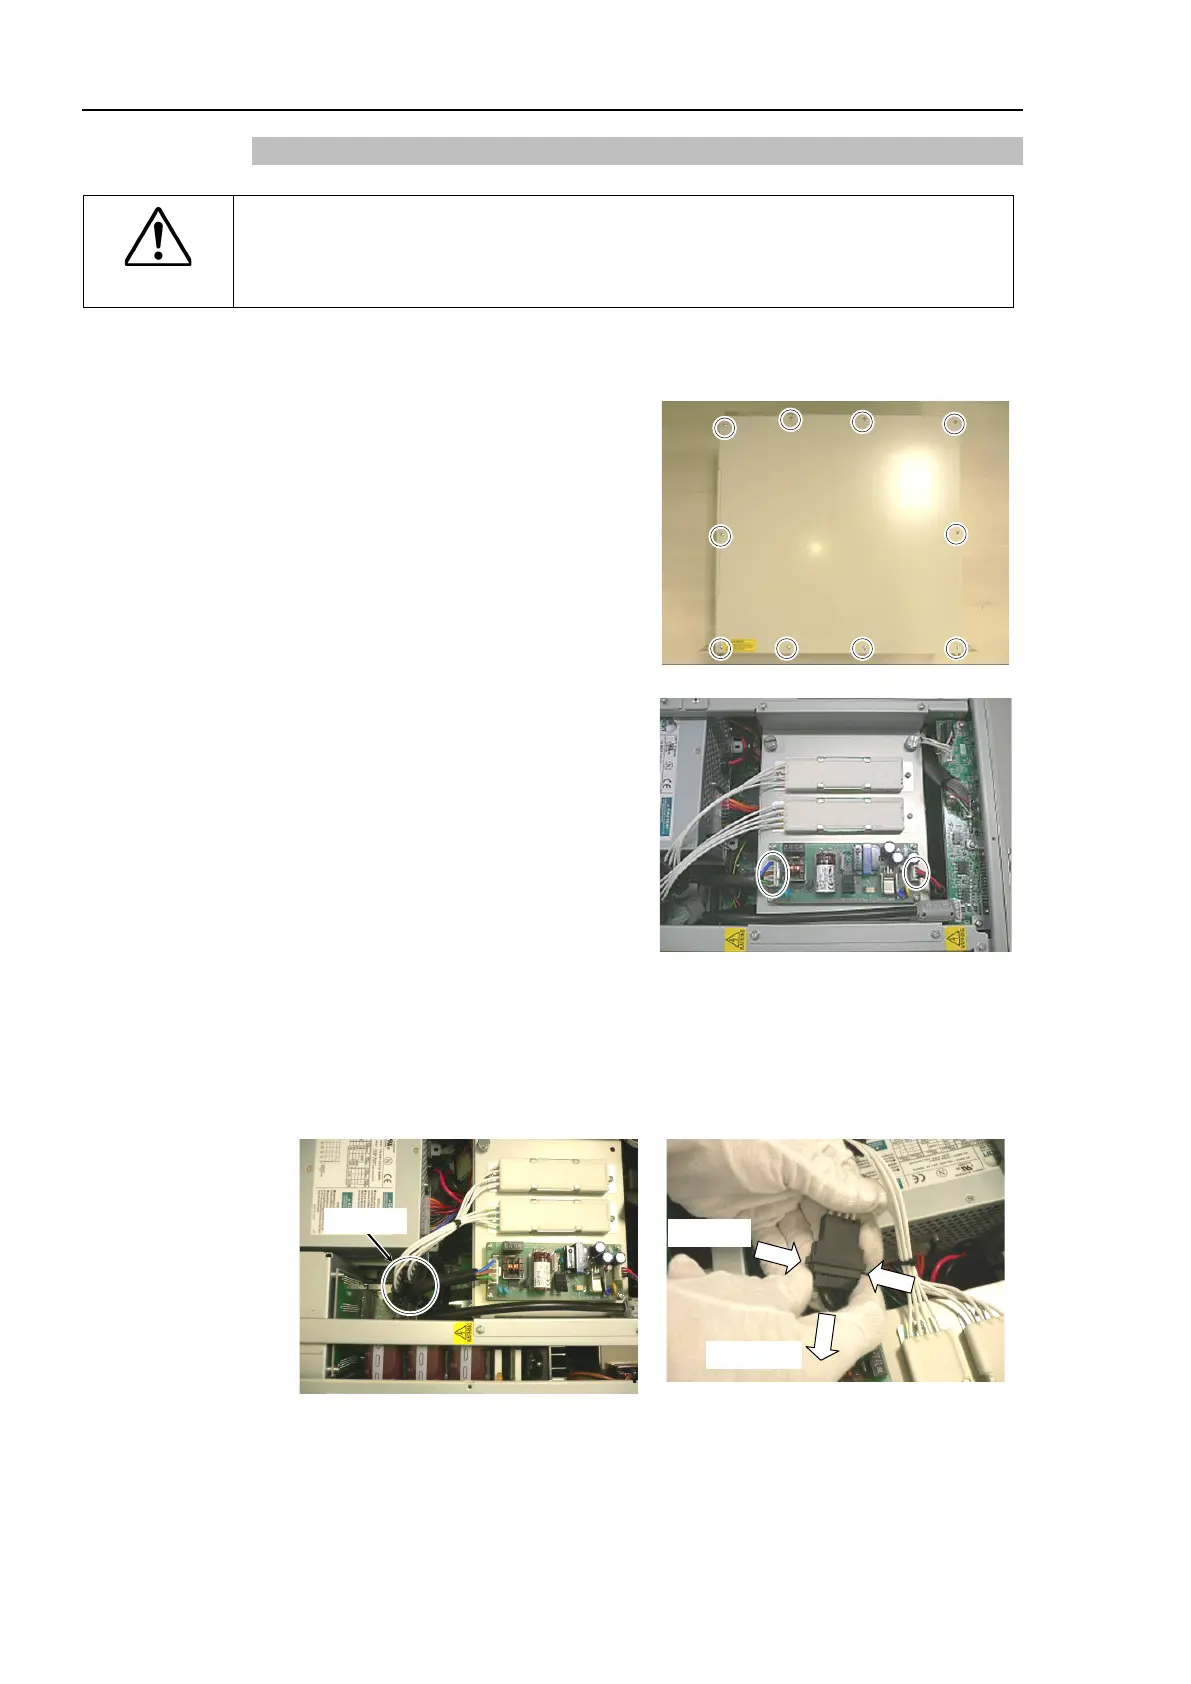
6.3.2 Replacing the Motor Driver (DMB side)
CAUTION
Record the relation of the model type and wattage when removing the motor driver
to install a new motor driver of correct wattage. If you install a motor driver of
wrong wattage, the robot system cannot operate properly.
DMB side)
Turn OFF the controller power and
disconnect the power plug.
Remove 10 screws on the top panel and
remove the top panel.
Remove 2 cables connected to the
switching power supply (15 W).
6 / C3 / RS
manipulator is connected, go on to the
removal step (5).
When G10 / G20 manipulator is
connected,
go on to the removal step
When replacing one axis (or two axes) of the
750W
motor driver, pull out the
connector of the cement resistor
pinching its both ends.
(Be sure to pull out the connector which is connected to the motor driver you are
replacing.)