In the case of a demonstration lens or a recut lens, make sure that the marking feature is perfectly
horizontal to avoid any axis deviation during centering.
For more information, consult the section performing an optical tracing > Optical tracing > Prepare the
optical tracing of a demo lens or of recut lens. (F p.28)
If need be, re-mark the points with a white colour gouache paint.
To center in re-marked micro-engravings mode
Pre-requisite: micro-engravings must be re-marked with a white felt tip pen. The diameter of the dots
must be between 0.5 and 1.5 mm.
We advise you to use the white felt tip marker supplied with the tracer-centerer-blocker to mark the
lens.
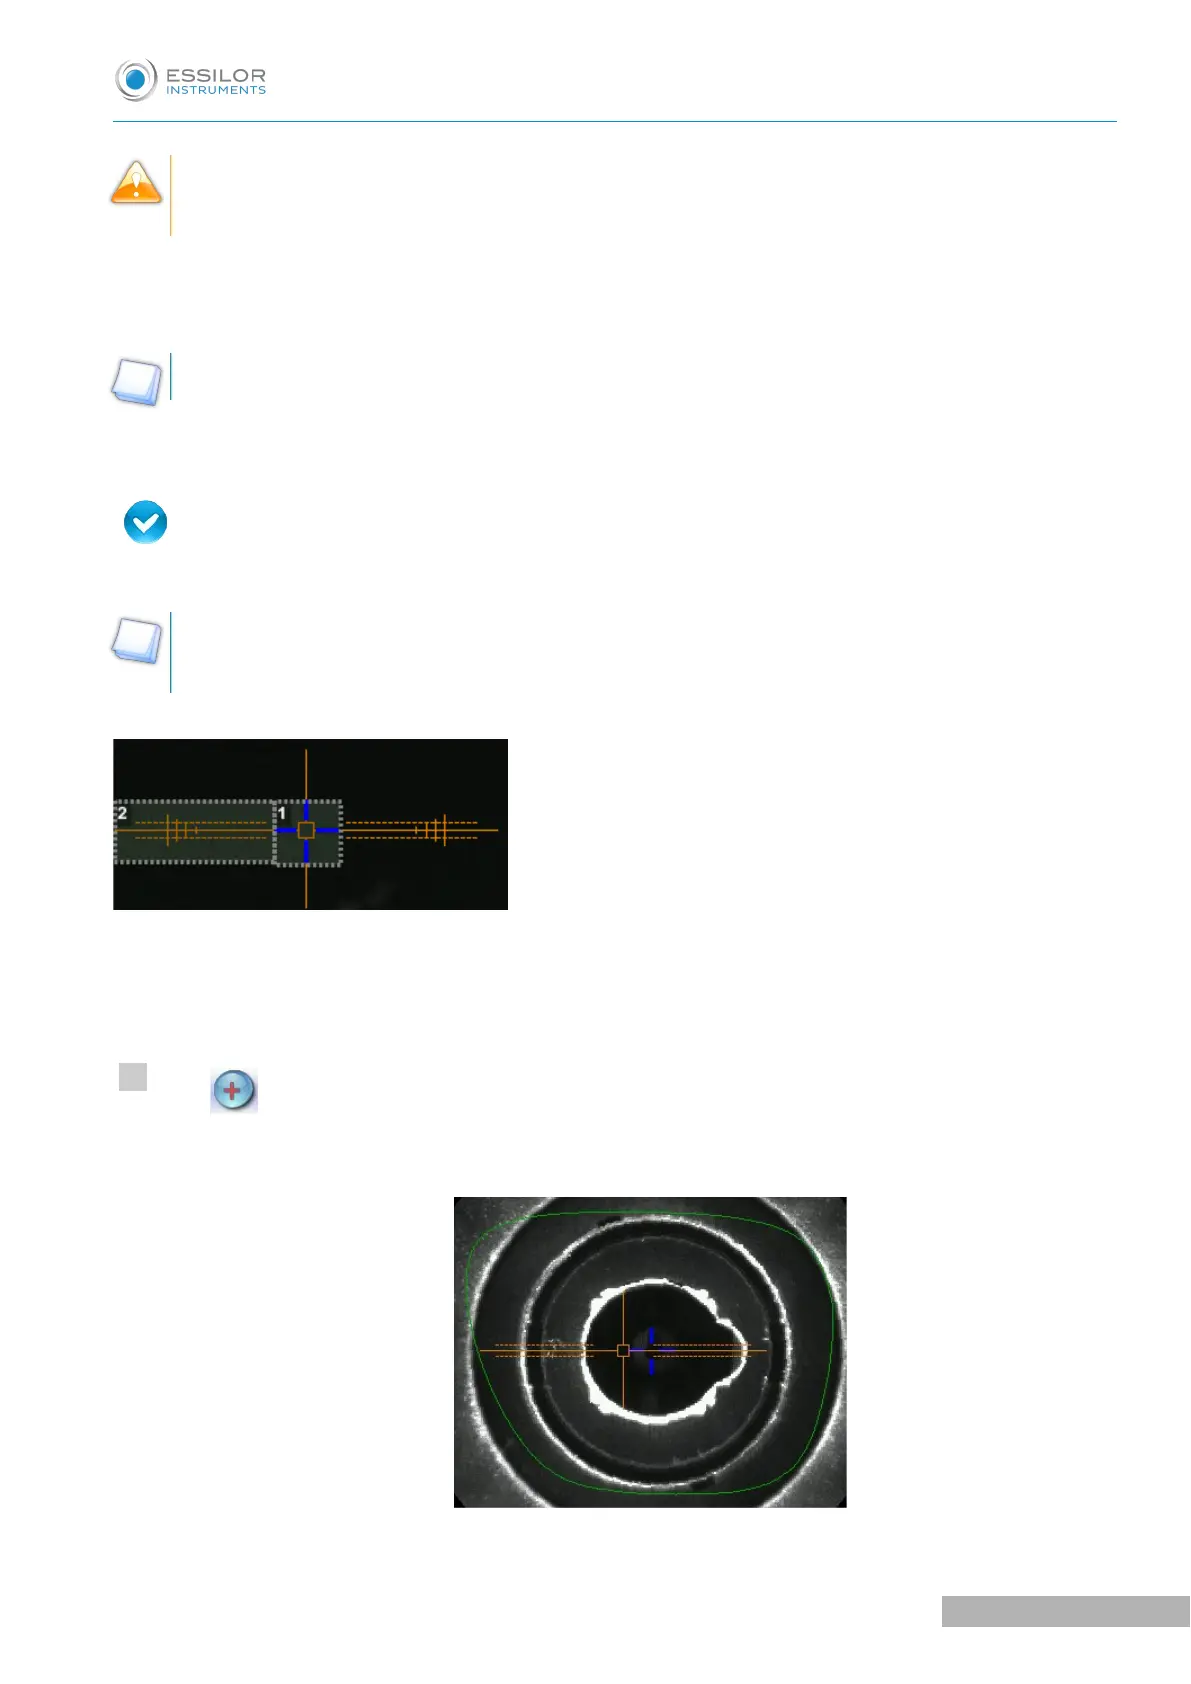
Description of the centering target
1. Optical center of the lens (orange cross) and boxing center of the shape (blue cross)
2. Centering marks
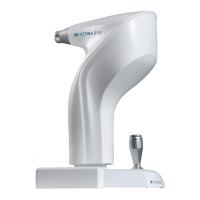
Centering the lens
Press to select the type of single vision lens.
The centering target is displayed: