3. CENTERING A PROGRESSIVE LENS
Prerequisite: before carrying out lens centering, a shape must be displayed on the centering screen.
If necessary, we recommend that you first:
• Modifying or retouching the traced shape (F p.72)
• Preparing the drilling points to be created (option) (F p.82)
• Place the stickers recommended by the manufacturer on hydrophobic lenses (F p.62)
Concerning the use of the stickers, be careful to change the centering tube with a larger diameter one
to optimise the effectiveness of the sticker.
This section describes the procedures for centering a progressive lens:
• Using re-marked micro-engravings (F p.49)
• Using manufacturer markings (F p.51)
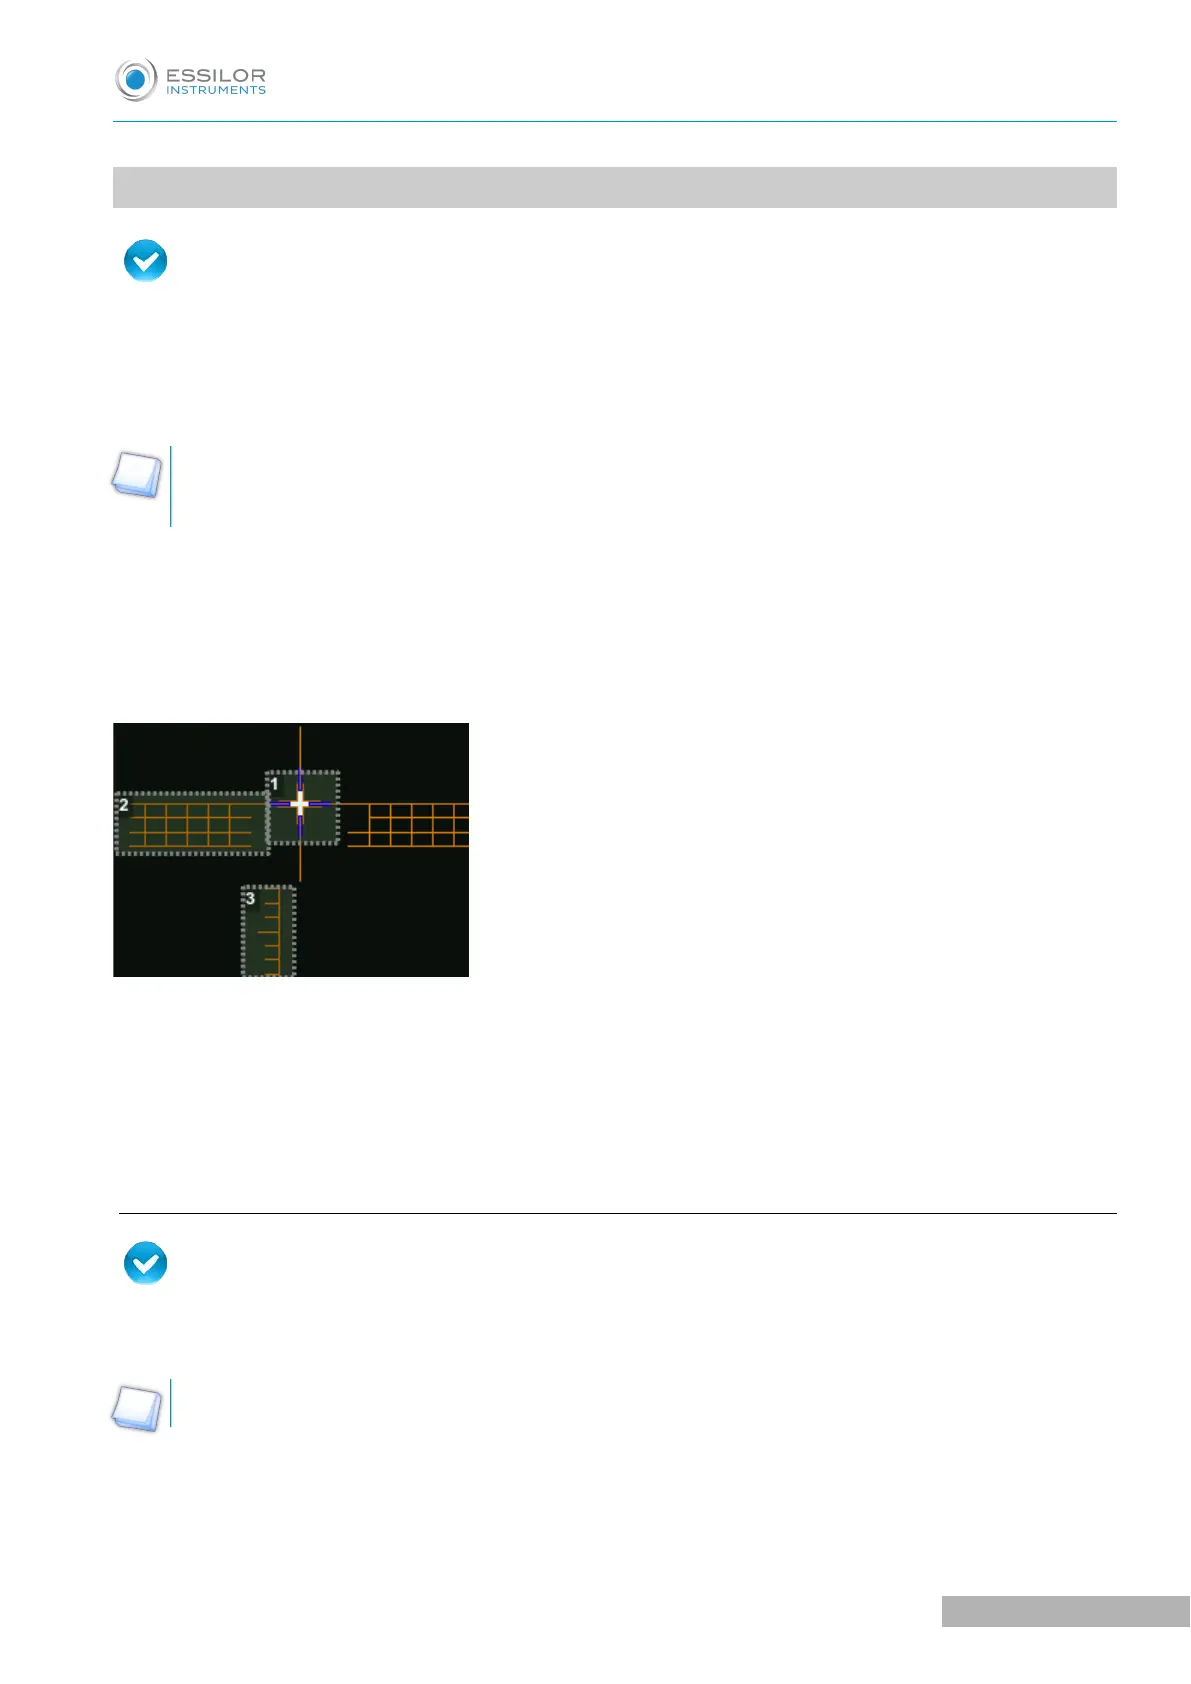
Description of the centering target
1. Centering cross (orange cross) and boxing center of the shape (blue cross)
2. Graduated axis mark
Horizontal lines are spaced 2 mm apart and allow measuring PRP (Prism Reference Point) distance.
3. Near vision mark
a. Centering a progressive lens using re-marked micro-engravings
Prerequisite:
• Remove all the original markings.
• Re-point the micro engravings on the felt; the points must have a diameter between 0. 5 and 1.5 mm
We advise you to use the white felt tip marker supplied with the centerer-blocker to mark the lens.