NOTE: Whether you are moving or copying a file, a translucent notice appears near the
pointer tool while it passes over potential destination files and folders. A small icon in
the corner of the notice indicates whether the file can be placed in that destination. For
example:
• A red circle with a diagonal line through it indicates that the file cannot be copied or
moved to itself.
• A green circle with a white arrow inside it indicates that the file can be moved to the
folder.
• A small directory icon indicates that the file will be moved or copied to that location
within the directory tree.
To copy a file or folder from any folder shown in the list to any folder in the list:
1. In the File Directory panel, click the + adjacent to a folder to expand it if needed to
locate the desired file or folder.
2. Select one or more files or folders: click on a single item to select one file or folder, or
<Shift> + click on the first and last items in a range of adjacent files or folders to select
several.
3. Press <Ctrl> while clicking on the selected items and drag them to the destination folder
(<Ctrl> + click + drag). The item or items are copied to that location.
Add a Network Share
Network servers or network-attached storage drives (network shares) can be added to the
file list so the SMP351 can access files and folders stored on shared network resources.
These shares can store background images.
NOTE: The size of network shares is initially unknown and there can be significant
performance issues if the entire contents of every network share is indexed on every
filter or search request. To provide the best performance with available resources, the
searches and filtering for network shares is limited to the layer immediately below the
level that the user manually expands. If the user fully expands the share, then it is fully
indexed, searched, and filtered.
To add a network share for the SMP351 to access:
1. Click the File Management tab at the top of the SMP351 embedded Web page.
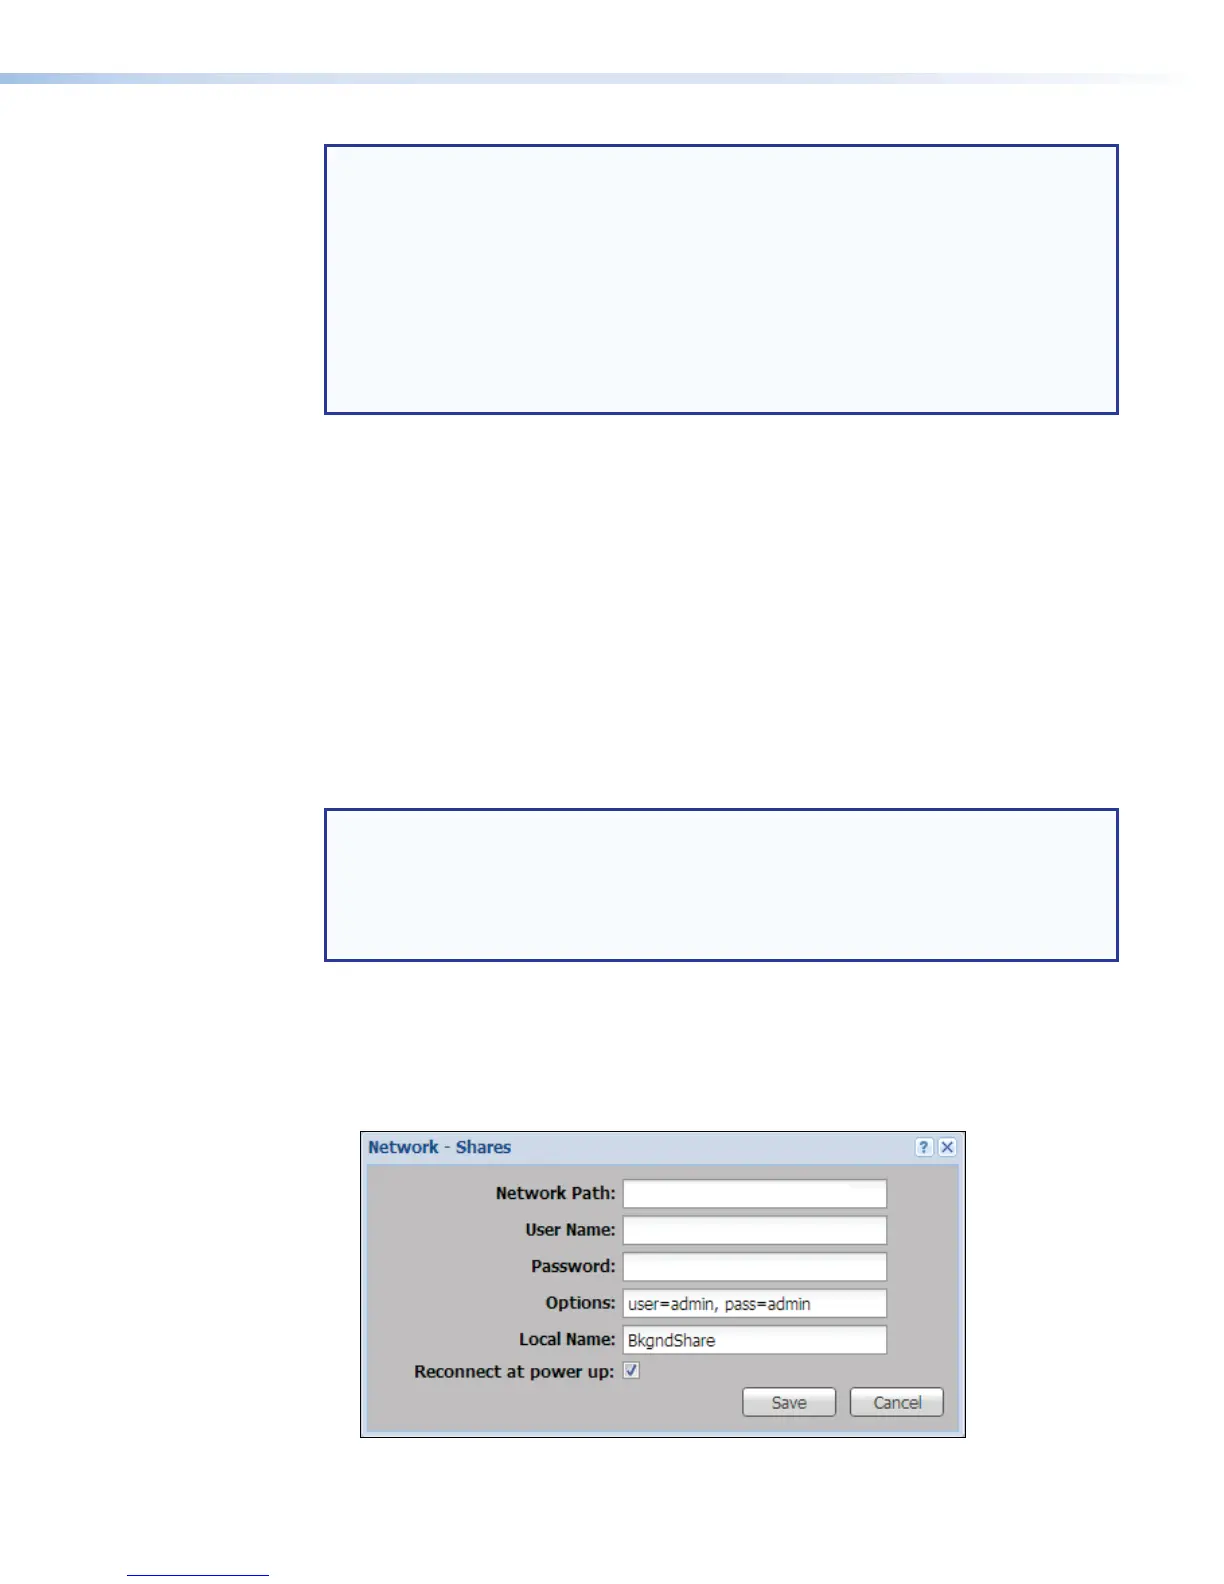
2. Click Network Shares at the bottom of the page. A Network-Shares dialog box
opens.
3. In the Network - Shares dialog enter the appropriate information as follows:
\\192.168.197.1\ImageShares
Figure 84. Network - Shares Dialog
SMP351 • Web-Based User Interface 136