IMPORTANT! For optimum welding results, the manufacturer recommends per-
forming an R/L alignment when starting the device for the first time and when
any changes are made to the welding system.
2
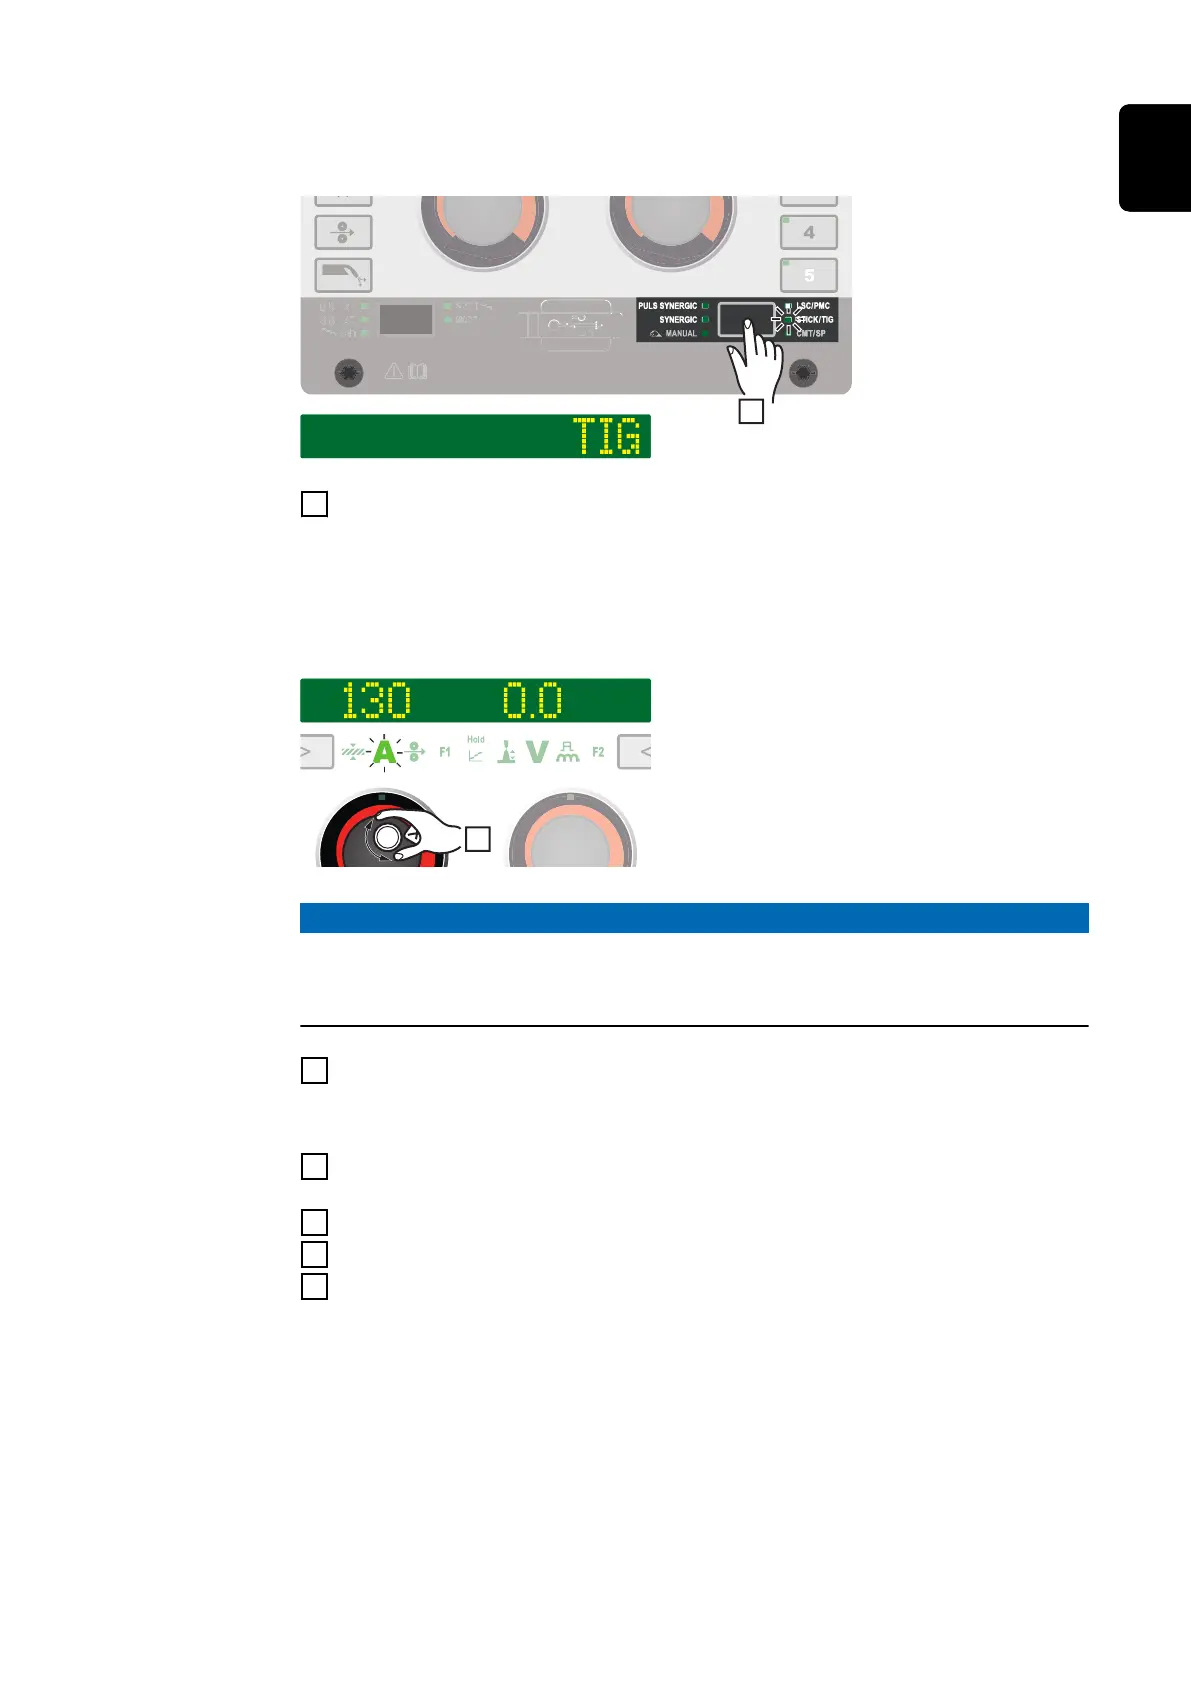
Press the "Welding process" button until the LED for the STICK/TIG welding
process lights up and "TIG" is shown on the display.
After a short time, the currently set welding current is shown on the display. The
welding current indicator lights up.
The welding voltage is applied to the welding socket with a three second time lag.
NOTE!
Parameters that have been set on a system component control panel (e.g. wire
feed unit or remote control) might not be able to be changed on the power
source control panel.
3
To change the welding current, turn the left adjusting dial
The altered welding current is applied immediately.
4
Adjust the process parameters accordingly to make user- or application-spe-
cific settings on the welding system
5
Open the gas stop valve on the TIG gas-valve torch
6
Set the desired shielding gas flow rate on the pressure regulator
7
Start welding (ignite the arc)
97
EN