5 Check Mailbox
222
Check Mailbox
5
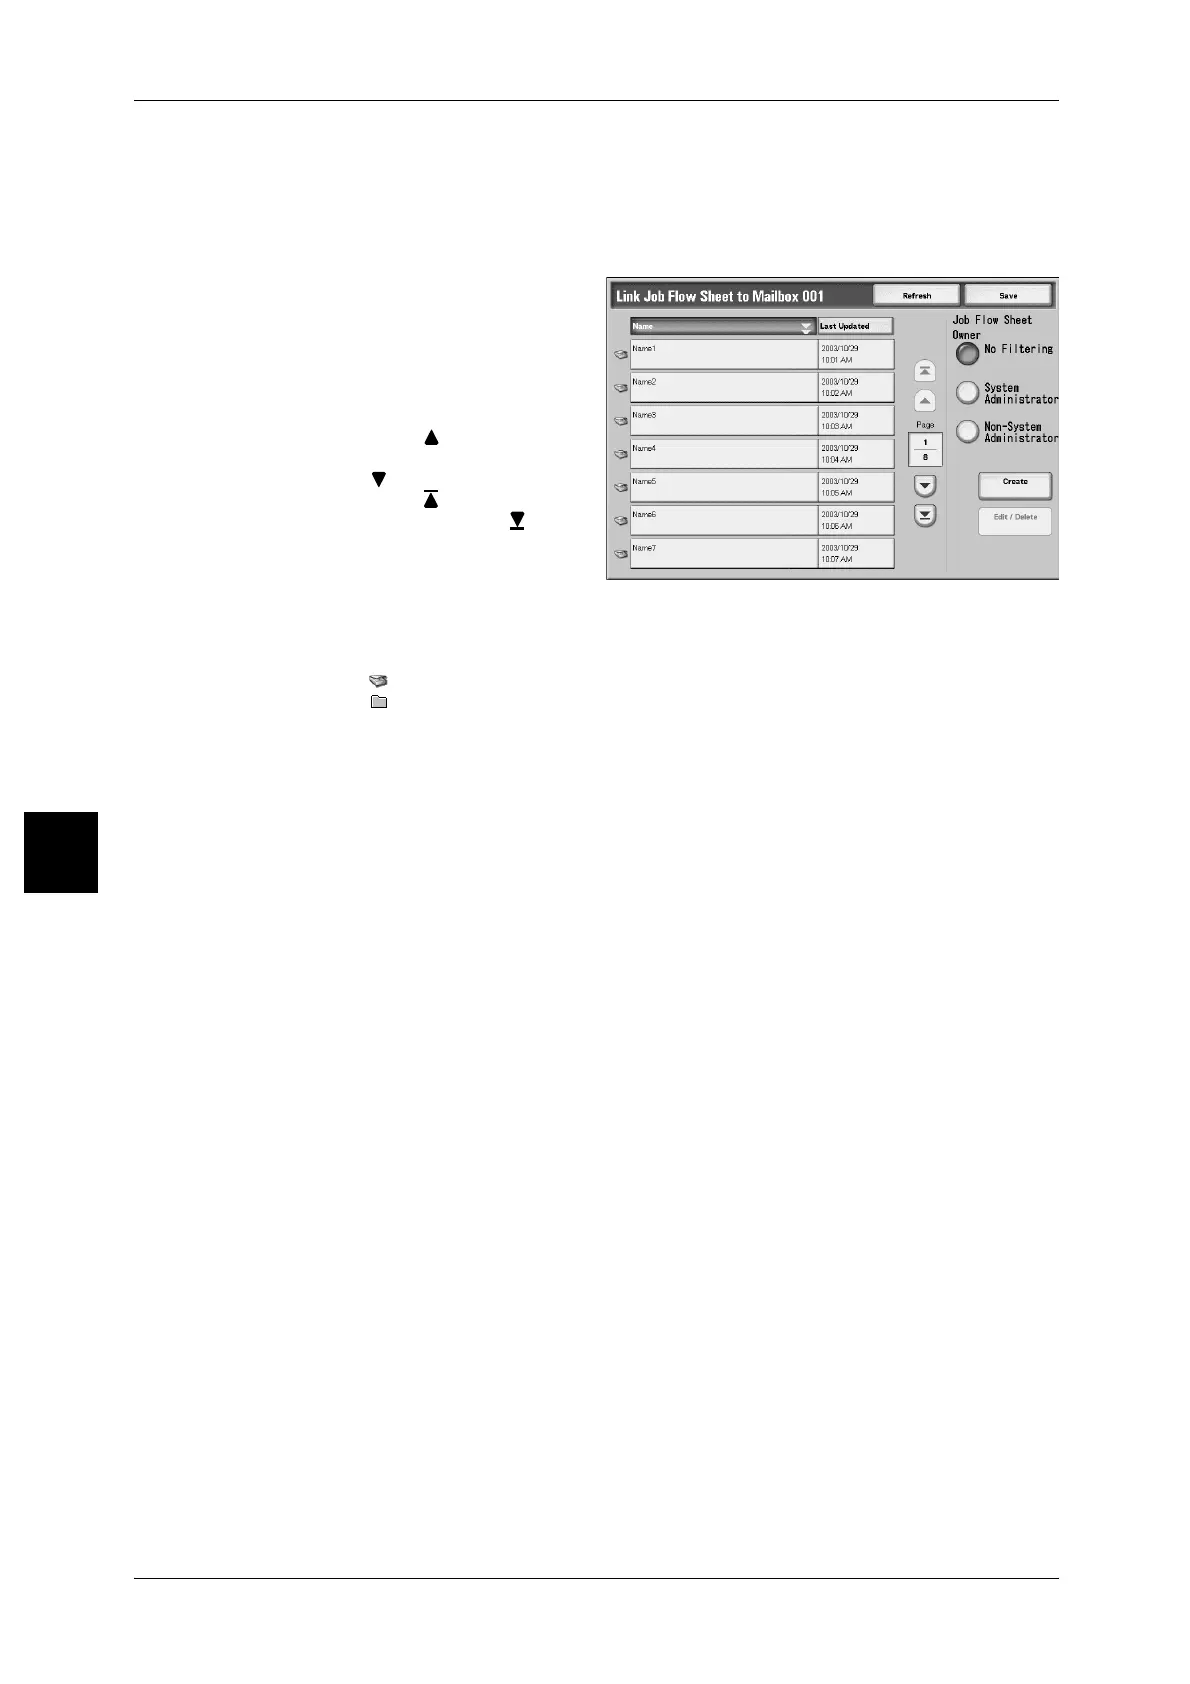
[Link Job Flow Sheet to Mailbox] Screen
You can cancel the link between a mailbox and its Job Flows.
Note • Creating and canceling links, as auto start settings can also be performed when creating a
mailbox.
1 Select the Job Flow to link.
Important • Pressing [Close] without
selecting a Job Flow does not
create a link. If the selected
Job Flow is already linked,
then the link is cancelled.
Note • Select [ ] to display the
previous screen and select
[ ] to display the next screen.
Select [ ] to display the head
screen and select [ ] to
display the last screen.
• You can sort documents in
ascending or descending
order by pressing either
[Name] or [Last Updated].
• To the left of the name is displayed an icon showing the target of the Job Flow.
:Scanned Document
:Mailbox Document
2 Select any item.
Save
You can link the selected job flow.
Job Flow Sheet Owner
You can filter the displayed Job Flows. Screen display may vary, depending on
authorization feature settings.
For more information, refer to "Job Flow Sheet Types" (P.439).
Create
[Create New Job Flow Sheet] screen is displayed.
For more information, refer to "Create New Job Flow Sheet" (P.375).
Edit/Delete
The [Edit/Delete] screen is displayed.
For more information, refer to "Content Check" (P.379).
 Loading...


