7.12 Adjusting the Paper Regi 357
10. Press the <OK> button.
The screen to enter the number of print is
displayed.
11. Press the < > button to specify the number
of prints, and then press the < > or <OK>
button to select. The print starting screen is
displayed.
12. Press the <OK> button.
The print job starts.
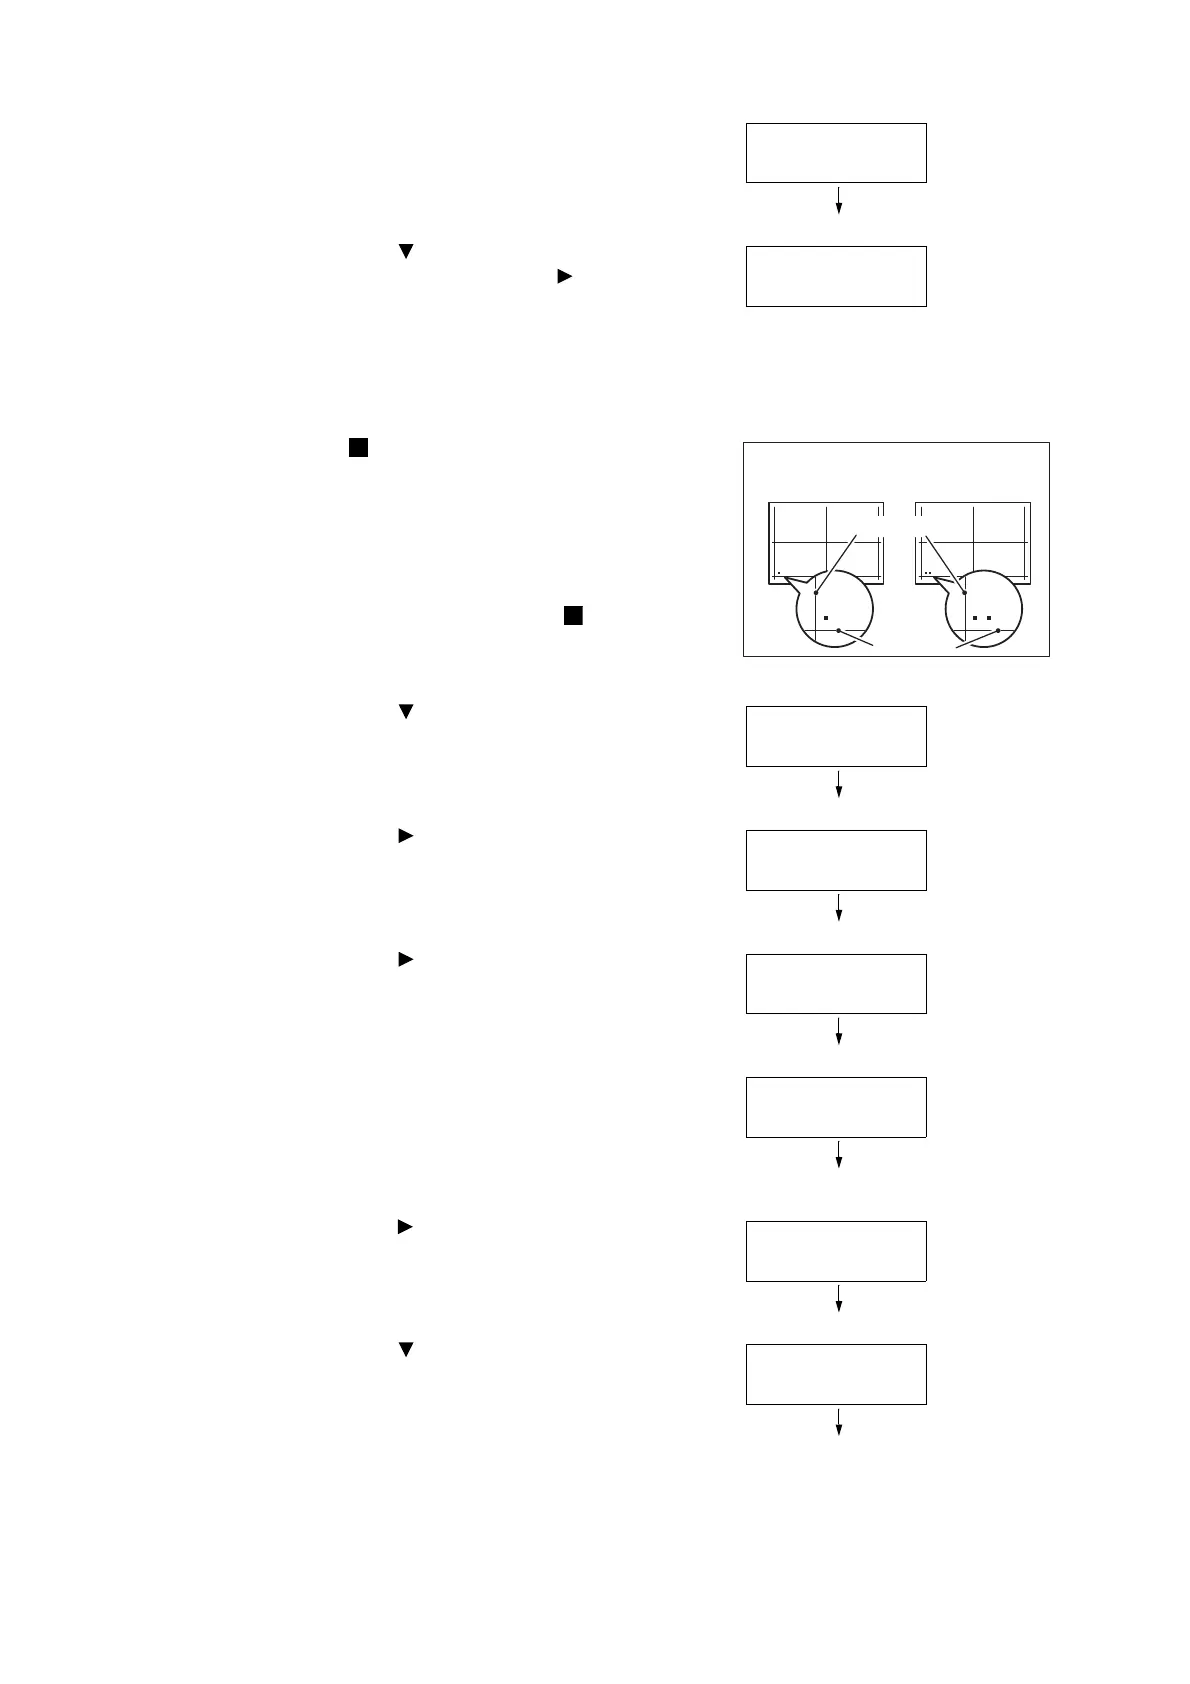
13. The [ ] (black square mark) will be printed on
the output chart (one square for face side, two
squares for the back side).
Place the chart so that the square is located
on the left bottom of the chart, and calculate
the required amount of correction based on
the gaps between the vertical and horizontal
lines and the relative position [ ] printed on
the chart. Print the data to fix the final
position.
14. Press the < > button until [
Adjust Side 1
] is
displayed.
15. Press the < > or <OK> button to select.
[Adjust Lead Regi] is displayed.
16. Press the < > or <OK> button to select.
Actual adjusted value in the vertical direction
(Lead Regi) is displayed.
17. Specify the value calculated in the step 14,
press the <OK> button. Set the plus (+) value
for moving the print image downward, the
minus (-) value for moving the print image
upward.
18. Press the < > or <OK> button to return to the
step 8 and repeat the same procedures for
adjusting the Side Regi.
19. Press the < > button until [Adjust Side Regi]
is displayed.
PrintChart-1Sided
1Set(s)
Lead Regi
Side Regi
5KFGF5KFG 5KFGF5KFG
Adjust Side 1
Adjust Lead Regi
Adjust Side 1
Adjust Lead Regi
Adjust Side 1
Adjust Side Regi

 Loading...