25
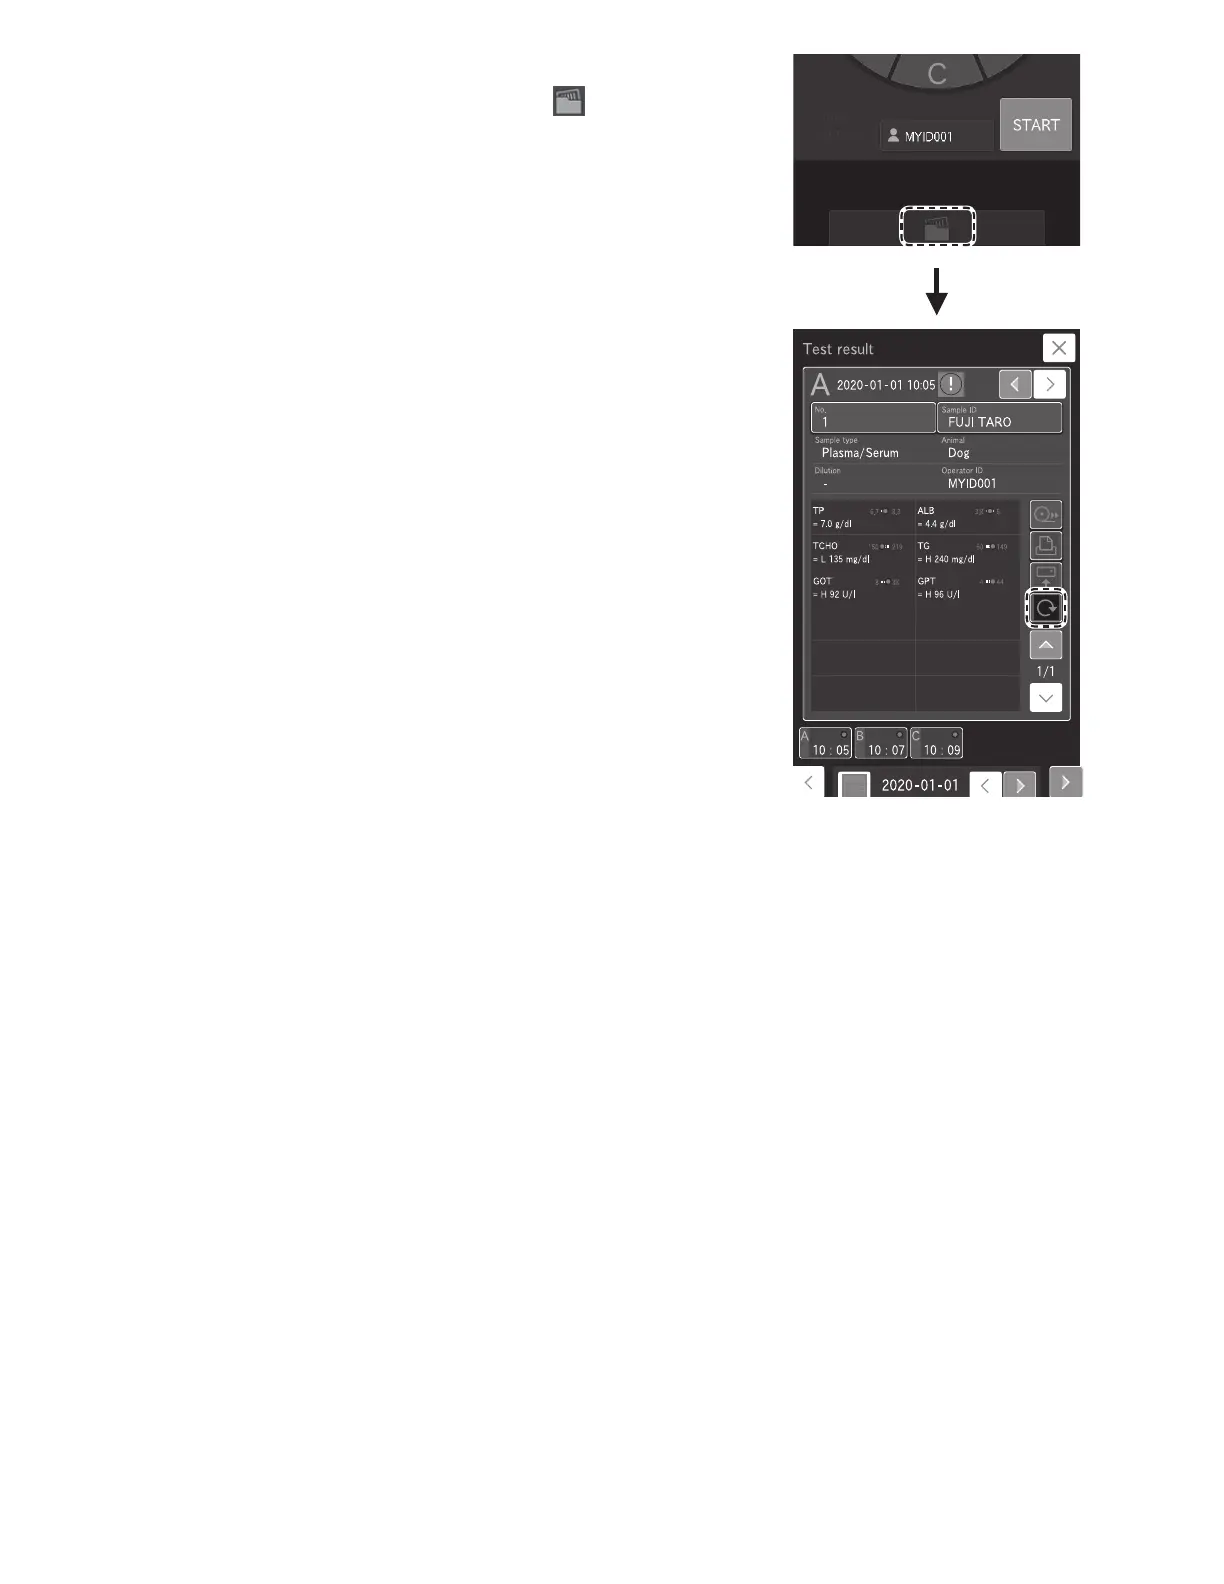
6. Checking the measurement results.
After measurement of all samples has ended, touch and
then check the measurement results.
The measurement results are printed in the order that the
slides were loaded in the cartridge, if using the internal thermal
printer.
To retest (Section 4.3), touch RERUN.
NOTE: For the details of the measurement result screen. Section 3.4.
7. Ending measurement.
To complete the measurement, open the sampler cover and
remove the measured samples.
NOTE: When a measurement is not being performed, empty the
disposal box as appropriate. The disposal box can hold 150 slides
and 75 Auto Tips. Always empty the disposal box before these
numbers are exceeded.
3.3.1 Lamp off and measurement start scheduling
By default, when this analyzer has not been used for 20 minutes while [Ready to test] is displayed on the LCD, it switches off
the light source lamp to save lamp life. After the lamp is switched on again, the start of measurement can be scheduled even
when [Lamp warming up] is displayed on the LCD.
NOTE: With dilution measurements (Section 3.6), you can schedule the start of measurement as follows: touch sample rack
display to display the sample information registration screen. After configuring the dilution factor in the [Dilution] field, touch
START [Reserve] on the Measurement-preparation screen.