66
weight
1
refsnart edilS
pedestal
5
tinu lenaP
2
tinu noitacilppa elpmaS
3
Incubator cover
4
Incubator cover
5
2
3
4
1
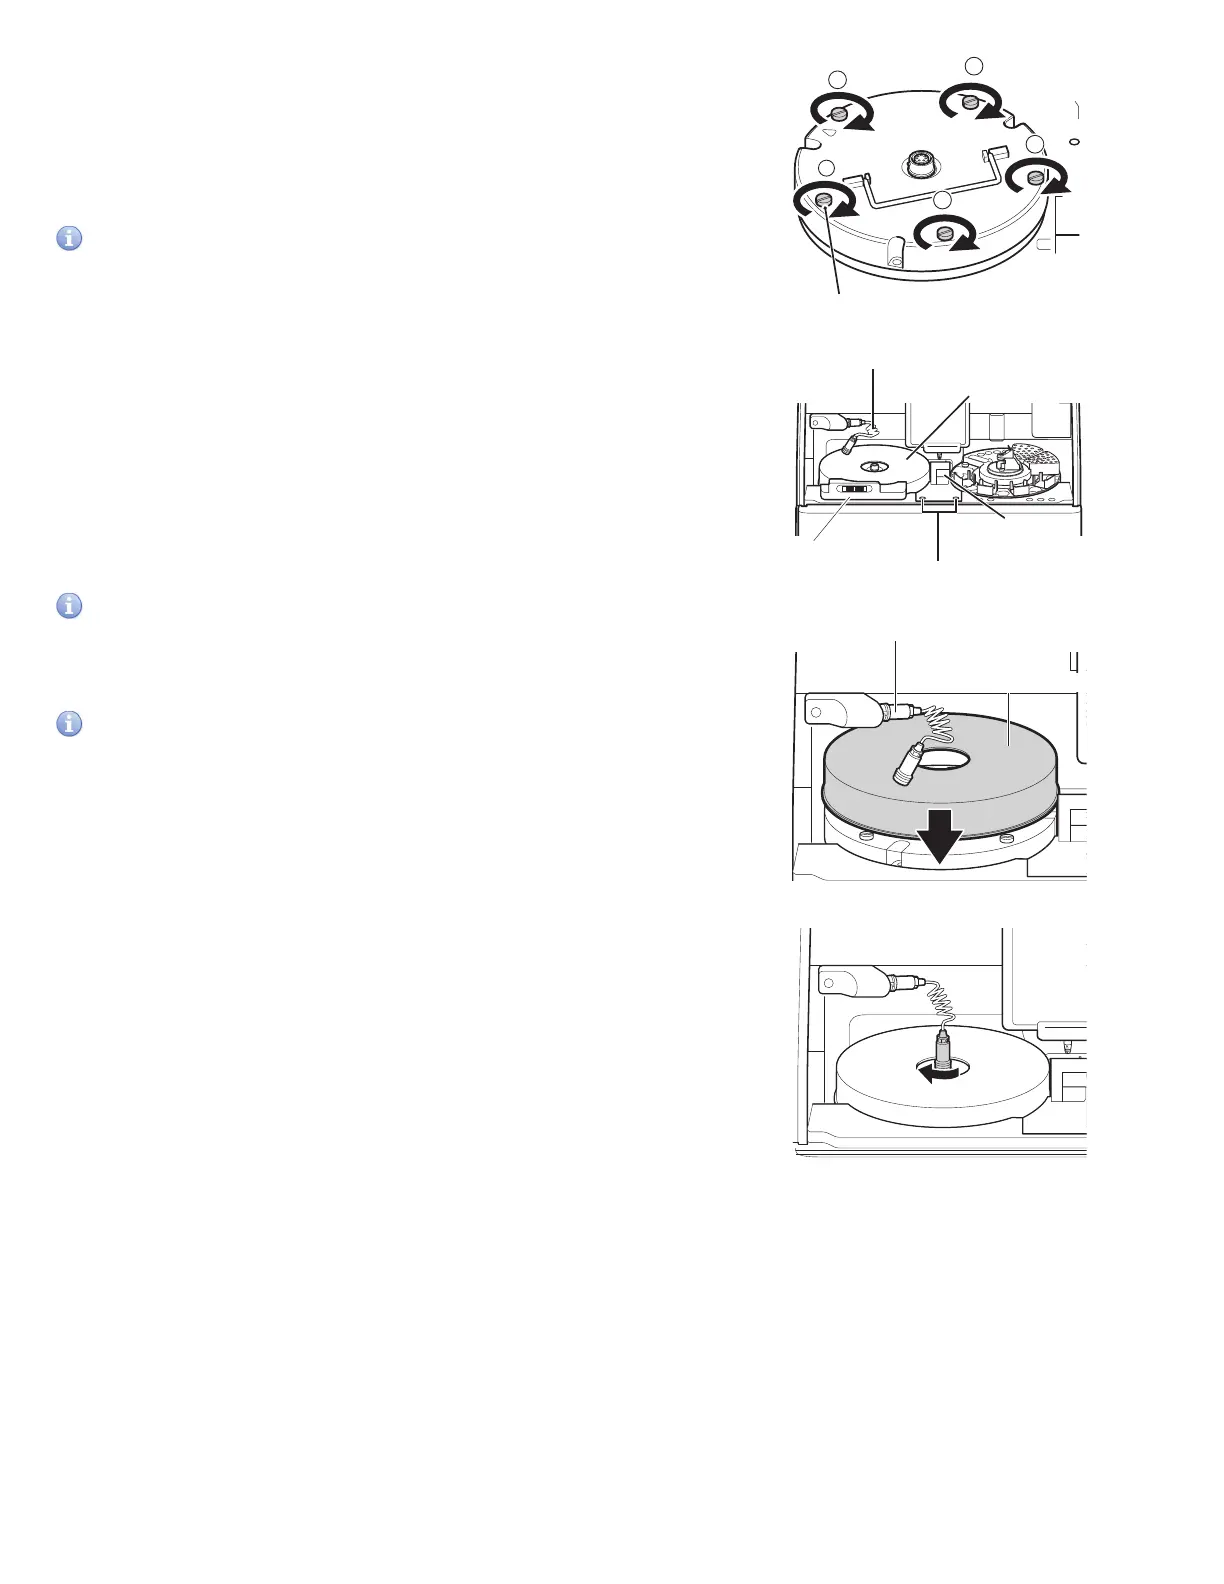
6.3.3 Reassembling parts and ending cleaning
1. Reassemble the incubator.
Align the arrow marks on the incubator and the reference plate,
and then tighten the 5 thumbscrews evenly by tightening
opposing thumbscrews in numerical order (1 to 5).
IMPORTANT
Tighten the five thumbscrews securely. Otherwise, the
measurement results may be negatively affected.
2. Reassemble each part as shown in the illustration on the left.
Set the slide transfer weights.
Set the spotting part cover and tighten the thumbscrews.
Set the incubator cover.
While aligned with the groove, plug the connector of the
incubator cable into the incubator and then lock it by
turning it to the right.
Set the panel unit pedestal.
IMPORTANT
Tighten the thumbscrews securely. Otherwise, the measurement
results may be negatively affected.
IMPORTANT
Be sure to set the incubator cover. Otherwise, the measurement
results may be negatively affected.
NOTE: When you insert the connector, make sure not to twist
or apply too much pressure to the cable. If the cable is twisted
more than once, it may break.
3. Close the panel section to end cleaning. Power analyzer on. Run
[Reference plate level check] again, and then check the results.
Section 6.3.1
NOTE: Wait until the temperature of the incubator is steady.