28
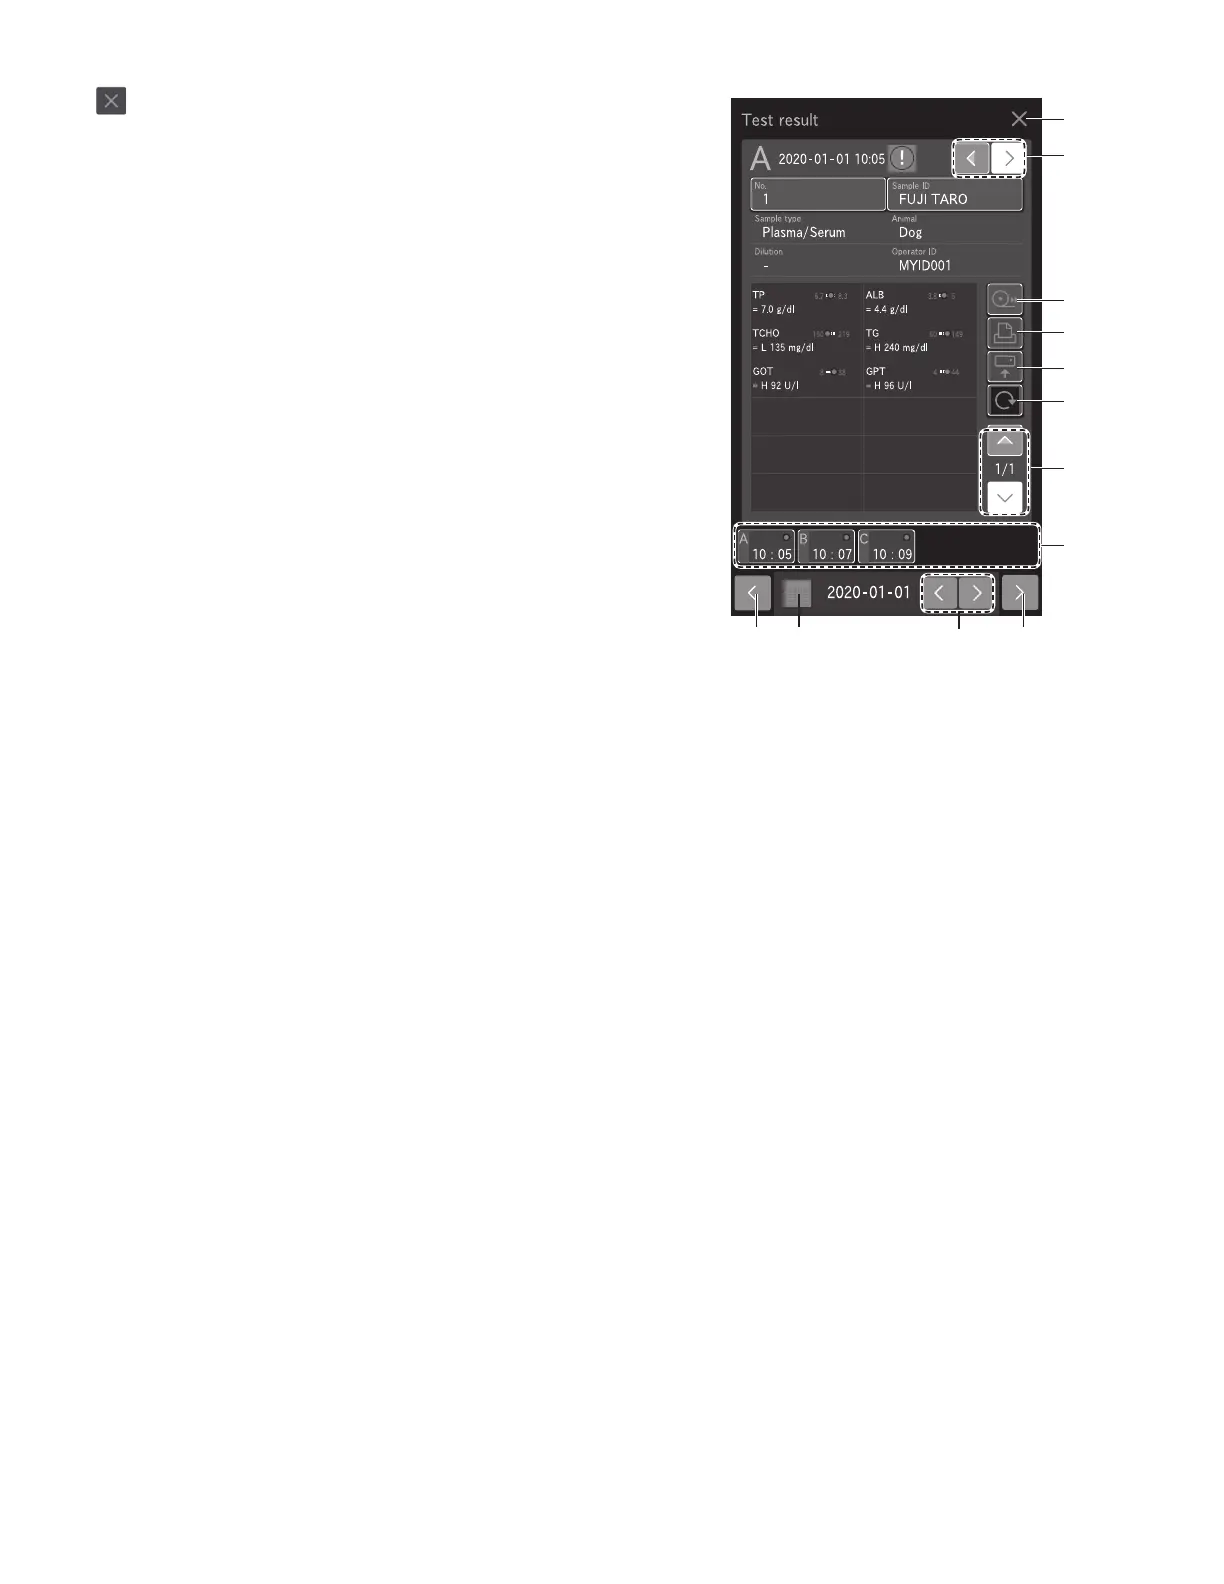
3.4.2 Measurement Results screen buttons
1. button
Close the Measurement results screen, and then return to
the Measurement preparation screen.
2. CHANGE SAMPLE NO. button
Change the sample number for which measurement results
are to be displayed.
3. FEED button
Feed the recording paper with a fixed amount.
4. PRINT button
Print all measurement results of the displayed sample.
5. SEND button
Send the measurement results of the displayed sample to a
PC.
6. RERUN button
Perform the measurement again under the same conditions
for sample number, sample ID, reference standard, and
sample type. Only the dilution factor can be changed.
Section 4.2
7. RESULT DATA scroll button
Change the display of the measurement result data of the
slide.
8. Sample No. tab
Touch to display the measurement results of the selected
sample number.
9. Sample No. tab scroll button
Change the display of the Sample No. tab. This button is
available when five or more samples have been measured.
10. Date scroll button
Change the measurement date.
11. Display calendar button
Display the calendar. If a date within the calendar is touched,
the measurement results of that day are displayed.
1
3
4
5
6
7
2
8
99 11 10