118
Cleaning the System
RM9004 Test Fixture
CAUTION
• Do not operate the up/down lever while cleaning the device. Doing so could cause the
RM9004 Test Fixture to lower while you’re cleaning it, resulting in injury or damage to
the device.
• Contacting the probes with cloth, cotton swabs, or other supplies while cleaning the
device could deform the pins, increasing the error component of measurement results
or making accurate measurement impossible.
• Use a compressed air pressure of 207 kPa (2.1 kgf/cm
2,
30 psi) or less.
• Wear a dustproof mask and dustproof goggles while cleaning the device.
IMPORTANT
• The probes are extremely thin. Do not clean them with anything other than air.
• The RM9004 Test Fixture’s probes are consumable parts. They require periodic replacement but are not
customer-replaceable. Please contact your authorized Hioki distributor or reseller for more information.
You will need:
A compressed air gun or blower (of the type used to clean
camera lenses)
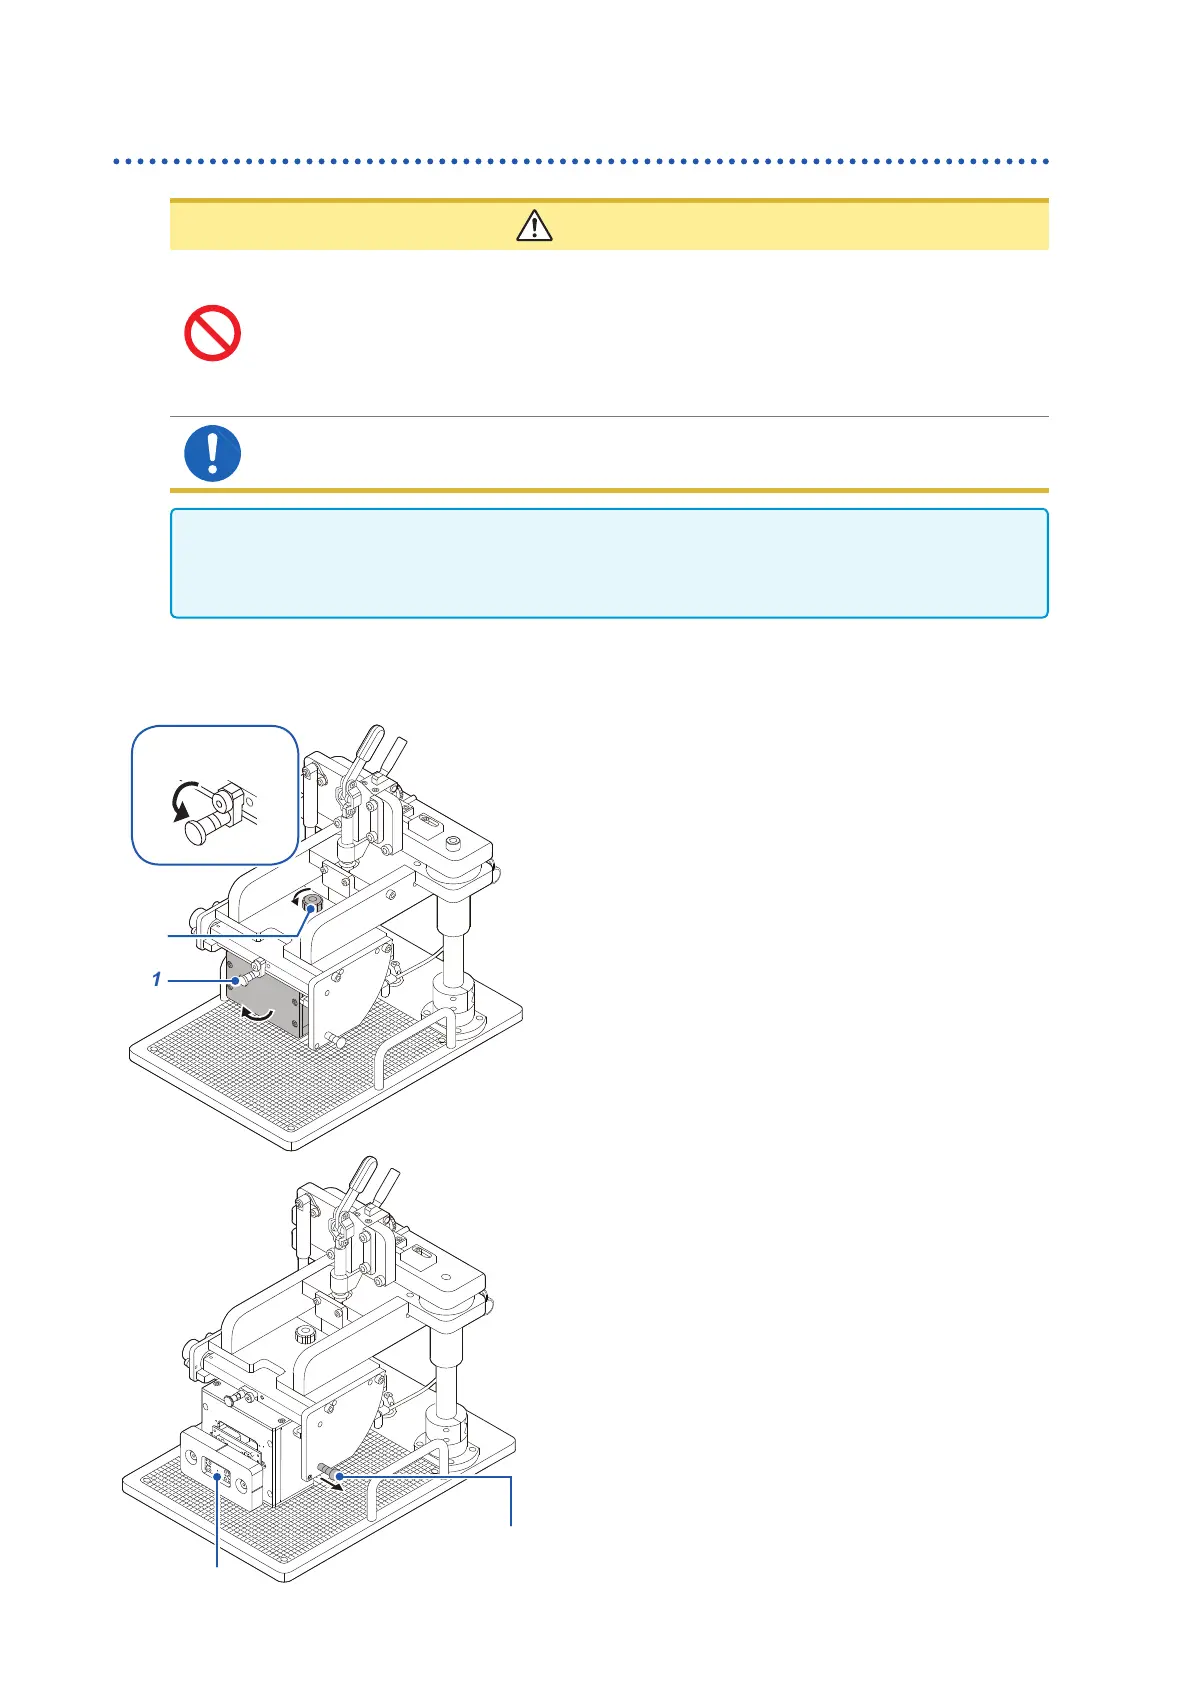
1
4
Test xture
lock lever
1
Verify that the test xture lock lever is in
the lowered position.
2
Disconnect the RM9005 Connection Cable
from the RM9004 Test Fixture.
3
Disconnect the grounding cable from the
RM9004 Test Fixture’s grounding terminal.
4
Rotate the test xture clamp knob
counterclockwise to disengage the lock.
While doing so, rotate the test xture clamp knob
toward the UNLOCK position until the screw is
fully removed while holding the RM9004 Test
Fixture still. The base (bottom) of the RM9004 Test
Fixture will gradually move so that it faces toward
the front of the unit.
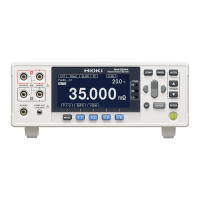
5
Probe
6
5
Once the base of the test xture is fully
facing toward the front, pull out the
maintenance plunger to lock the RM9004
Test Fixture in place.
6
Remove dust from the probes using the
compressed air gun or blower.
7
Repeat the above procedure in reverse
after cleaning to return the test xture to
its original state.