Brevera Breast Biopsy System User Guide
Chapter 8: The Images
Page 92 MAN-04303-002 Revision 006
8.2.3 Image Enhancement Tools
When you select the Tools button, the Image Enhancement Tools bar displays on the
active image. Select the tool icon to enable it. The active tool appears to be pressed into
the tools bar.
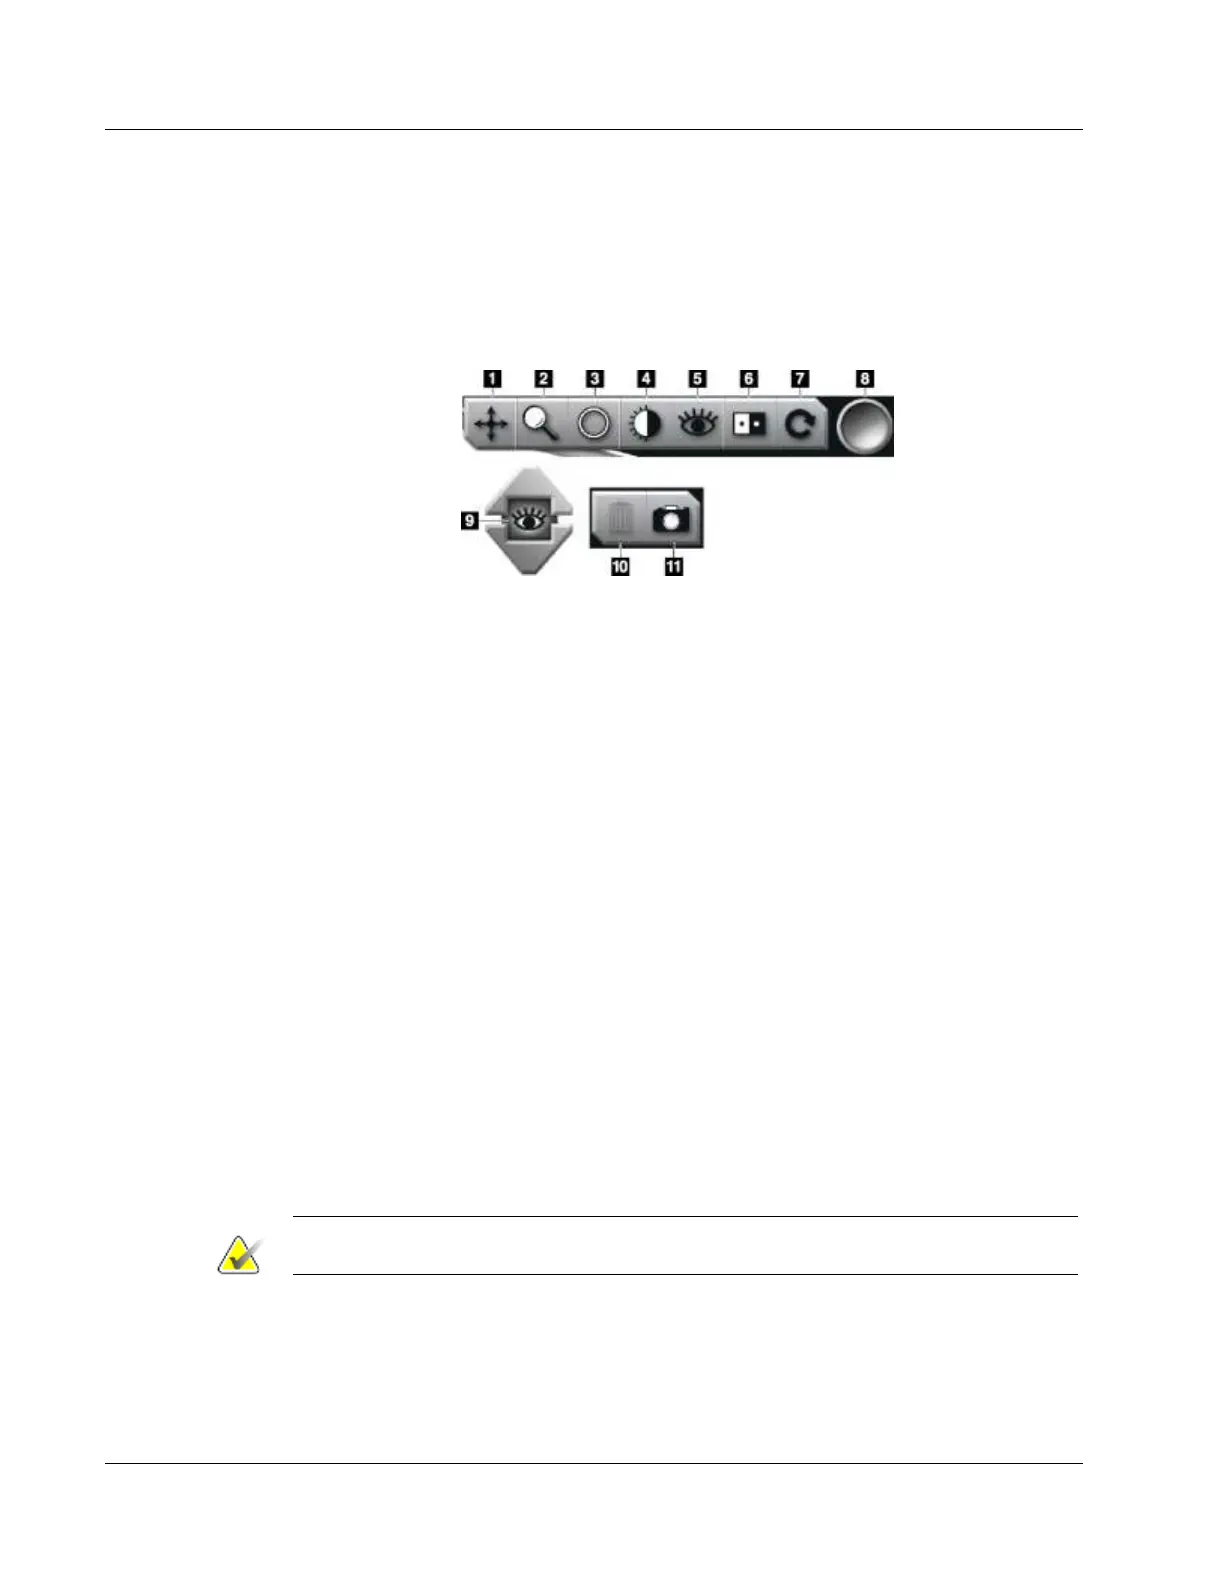
Figure Legend
1. The Pan tool is used to move the view to a different portion of the image by dragging.
2. The Zoom tool magnifies the whole image. Drag up to zoom in and make the image larger.
Drag down to zoom out and make the image look smaller.
3. The Circle tool is used to draw a circle on the image. Drag up or down to make the circle
larger or smaller. Once the circle is placed its size cannot be changed, but it can be moved by
dragging or deleted by double-tapping.
4. The Window/Level tool is used to change the brightness and contrast.
5. The Enhanced Visualization tool adjusts the image sharpness.
6. The Invert tool changes blacks to white and whites to black.
7. The Reset tool returns an image to the original state. Any annotations, panning, zooming, etc.
are removed.
8. The Tag tool selects a particular image or images. Tagged images show a green check mark
in the upper right of the thumbnail image. The check mark is burned into the tagged images
that are exported, archived, or printed off the system.
9. The Enhancement Level is displayed when the Enhanced Visualization tool is active. The
level of enhancement can be adjusted from greater (5) to lesser (1) in real time.
10. The Delete button deletes a snapshot.
11. The Camera button captures a snapshot of the image display area and adds the snapshot to
the current procedure.