Brevera Breast Biopsy System User Guide
Chapter 4: User Interface - Imaging Display
Page 56 MAN-04303-002 Revision 006
How to Print
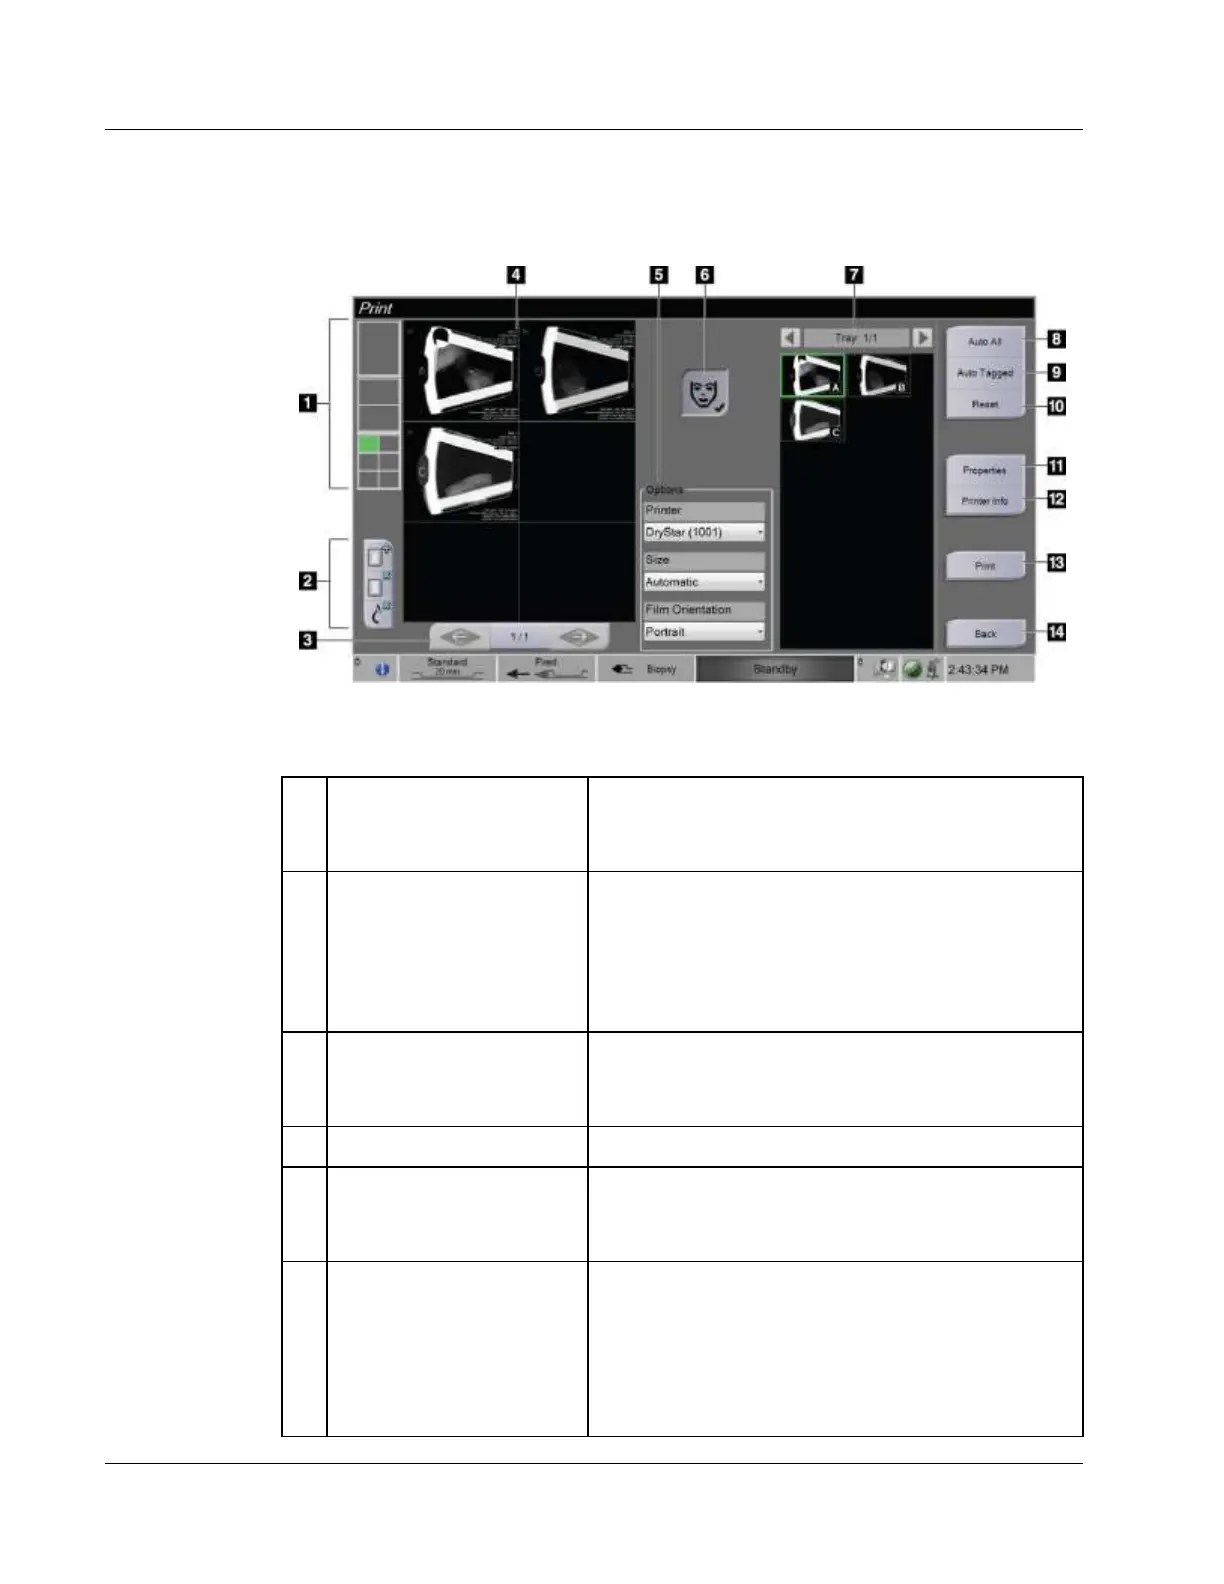
Figure 31: Example of the Print Screen
Select one, two, or six images per film (number of tiles
per film). A green rectangle indicates the position that
the active image will have on the film.
New film, Delete film, and
Delete image from film
Select the "+" button to create a new film.
Select the "x" button to delete the current film
selection.
Select the Delete image from film button to delete
only the active image from the film.
When more than one film is being printed, use these
arrows to step through the print preview of the film
output.
Shows a preview of the final film.
Select the printer options. The Automatic setting will
automatically determine a suitable size for the printed
images.
Activate or deactivate the patient information display.
The check mark indicates that the patient information
display is active and patient information will appear
on a film. Touching the Patient Information button
will deactivate the patient information only on the
current film for the same patient.