Set Up the Machine Torch
92 809240 Operator Manual Powermax45 XP
Assemble the machine torch
If you disassembled the torch to route it through the cutting table’s track or other mounting system,
use the following procedure to reassemble the torch.
While disconnecting and reconnecting the torch parts, do not twist the
torch or the lead. Maintain the same orientation between the torch head
and torch lead. Twisting the torch head in relation to the torch lead can
cause damage to the torch wires.
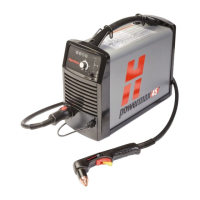
1. Place the right torch shell on a flat surface.
2. Make sure the cap-sensor switch and the torch-disable switch sit in the right torch shell as
shown. Mounting posts in the torch shell hold each switch in place.
3. Connect the wires from the torch body to the wires from the cap-sensor switch/torch-disable
switch assembly .
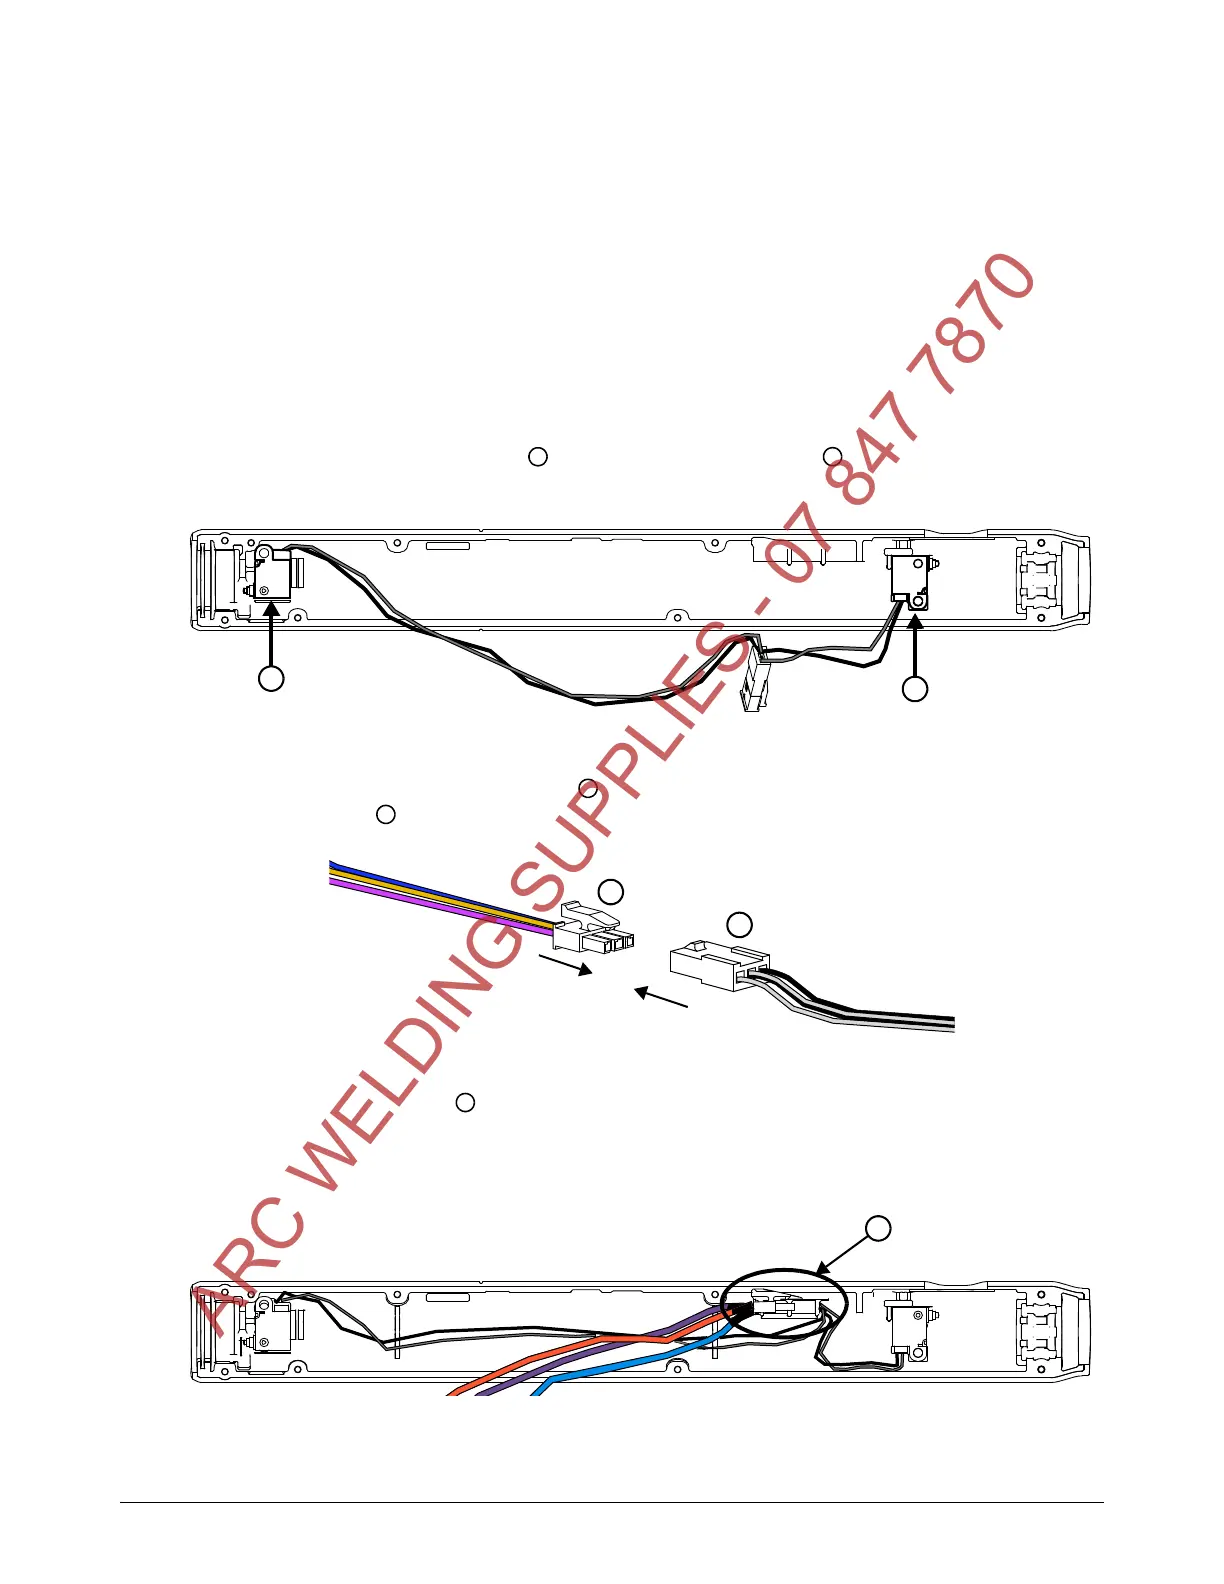
4. Place the wire connector on the mounting shelf in the right torch shell as shown.
Route the blue and black wires from the cap-sensor switch and the torch-disable switch outside
of and below the mounting shelf. This helps to prevent the wires from getting pinched and
damaged when the torch is fully assembled.
ARC WELDING SUPPLIES - 07 847 7870