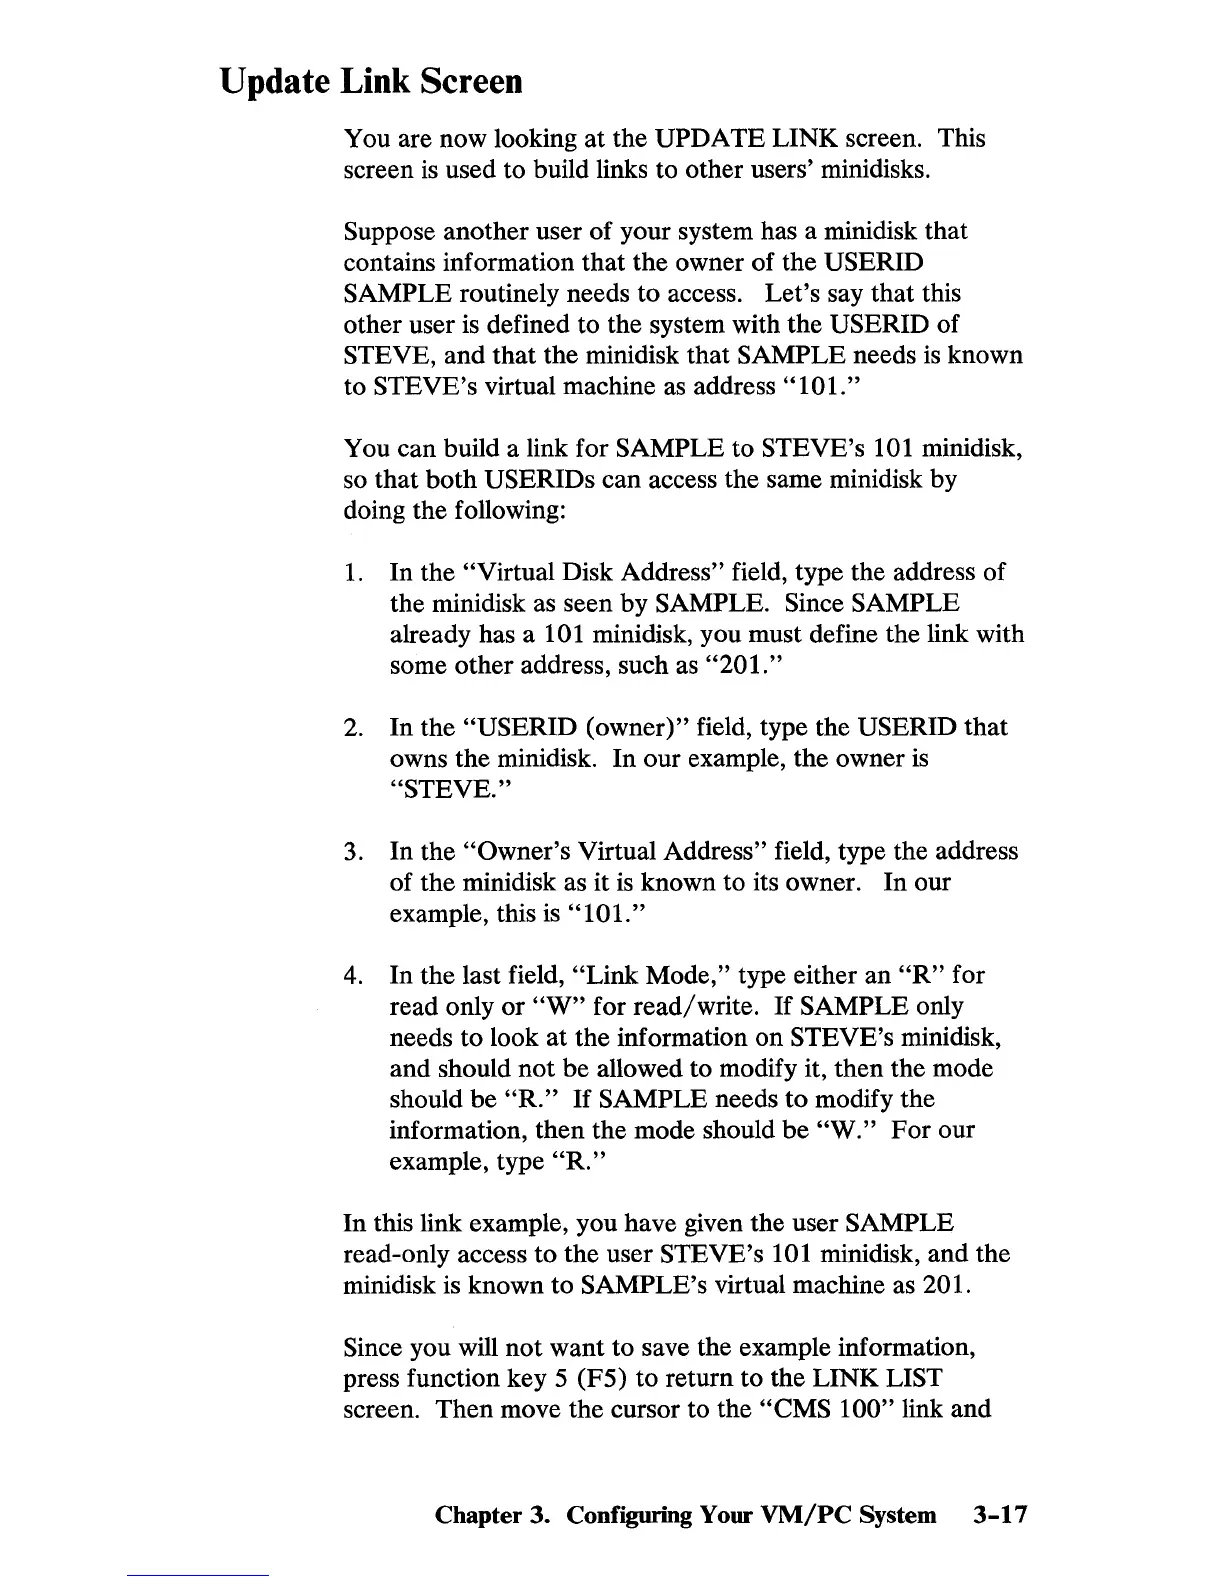
Update Link Screen
You are now looking
at
the UPDATE LINK screen. This
screen
is
used to build links to other users' minidisks.
Suppose another user of your system has a minidisk that
contains information that the owner of the
USERID
SAMPLE
routinely needs
to
access. Let's say that this
other user
is
defined to the system with the USERID of
STEVE, and that the minidisk that SAMPLE needs
is
known
to
STEVE's virtual machine
as
address
"101."
You can build a link for SAMPLE to STEVE's 101 minidisk,
so that
both
USERIDs can access the same minidisk by
doing the following:
1.
In the "Virtual Disk Address" field, type the address of
the minidisk as seen by
SAMPLE. Since SAMPLE
already has a 101 minidisk, you must define the link with
some other address, such
as
"201."
2.
In
the "USERID (owner)" field, type the USERID
that
owns the minidisk.
In
our example, the owner
is
"STEVE."
3.
In
the
"Owner's
Virtual Address" field, type the address
of the minidisk as it
is
known to its owner.
In
our
example, this
is
"101."
4.
In the last field,
"Link
Mode," type either an
"R"
for
read only
or
"W"
for read/write.
If
SAMPLE only
needs to look
at
the information
on
STEVE's minidisk,
and should
not
be allowed to modify it,
then
the mode
should be
"R."
If
SAMPLE needs
to
modify the
information,
then
the mode should
be
"W."
For
our
example, type
"R."
In
this link example, you have given the user SAMPLE
read-only access
to
the user STEVE's 101 minidisk, and the
minidisk is known
to
SAMPLE's virtual machine as 201.
Since
you will
not
want to save the example information,
press function key 5 (F5) to return to the LINK
LIST
screen.
Then
move the cursor to the
"eMS
100"
link and
Chapter 3. Configuring Your
VM/PC
System
3-17
 Loading...