7-30 Maintenance
D-H023.0906EN
innovators in agriculture
6. Rub the lower part of the teat cup liner and the teat cup sleeve in
with soapy water.
CAUTION
Do not turn the installation tool when you push the teat cup liner in the teat
cup sleeve.
7. Use the teat cup liner installation tool (1, fig. 44, page 7-31) to push
the lower part of the liner in the teat cup sleeve.
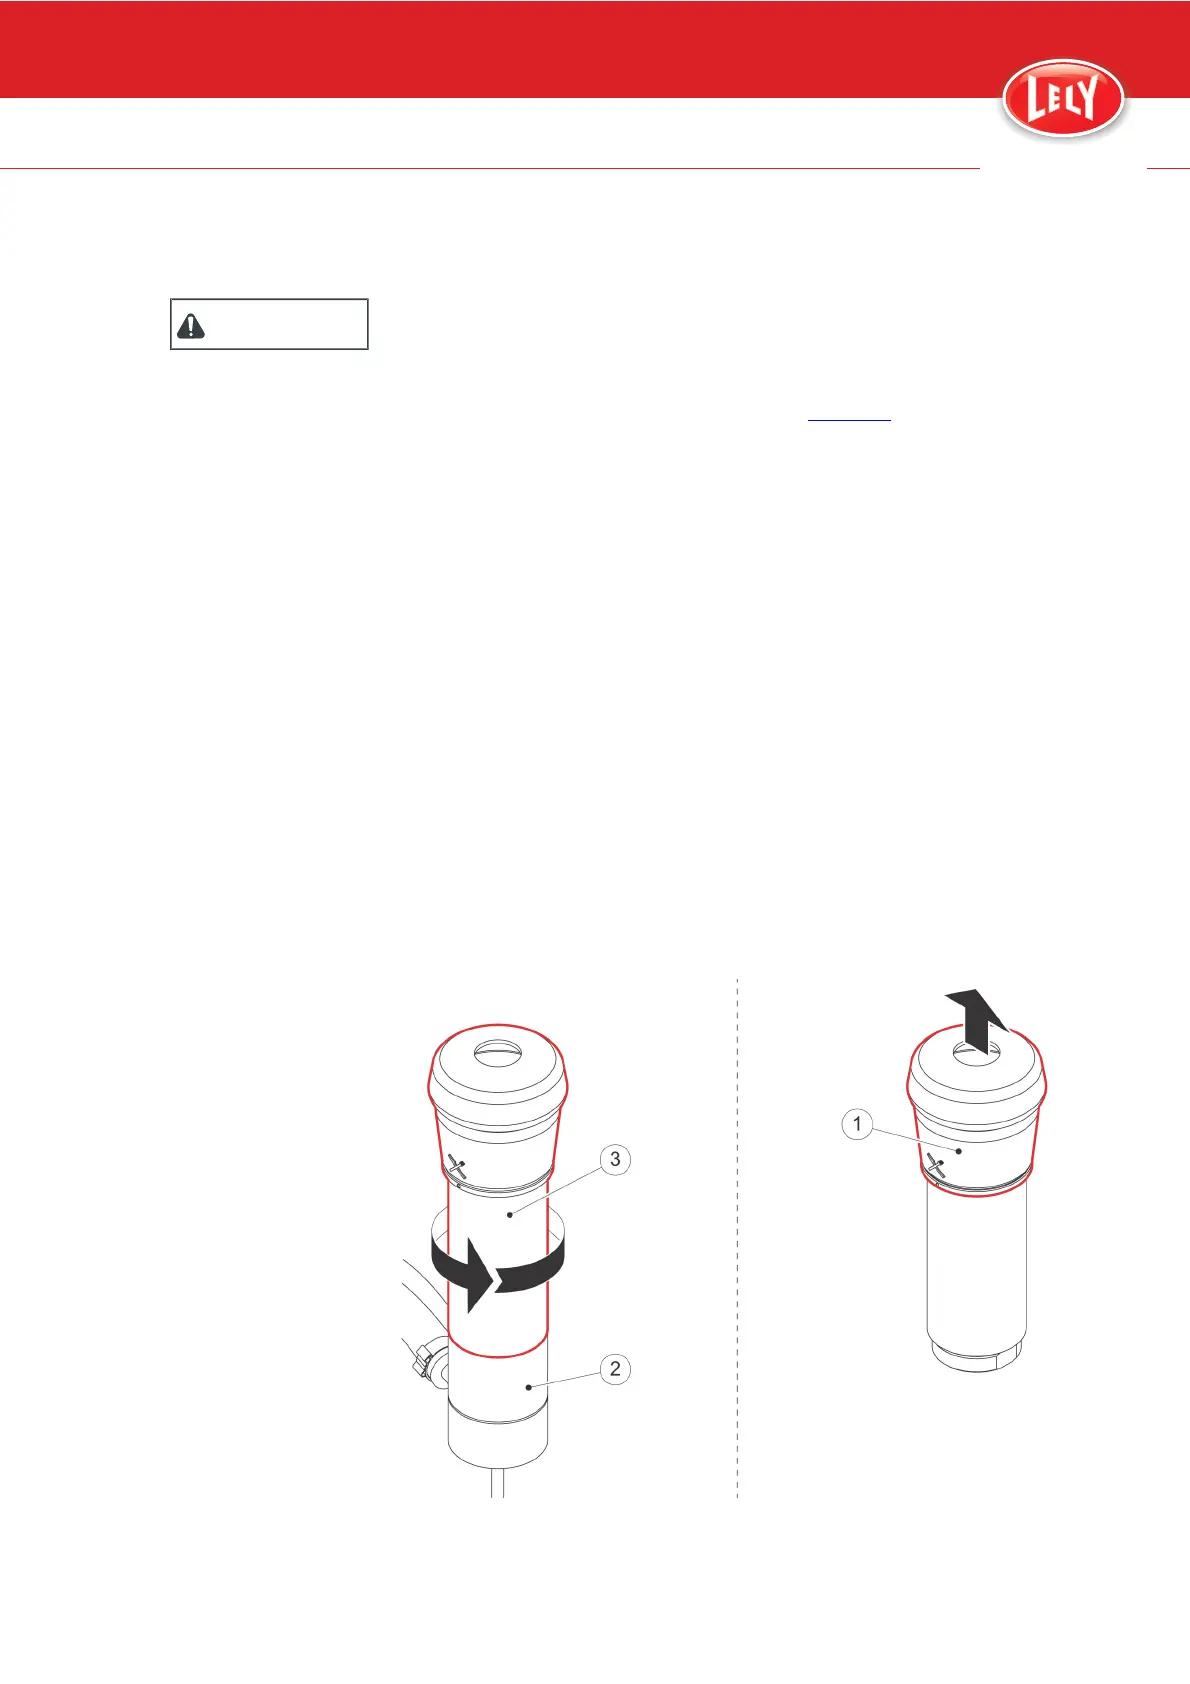
8. Make sure the bottom of the teat liner (2) engages correctly in the
bottom of the teat cup sleeve.
9. Examine the O-ring (3) of the teat cup sleeve for damage.
10. If necessary, replace the O-ring.
11. Lubricate the thread and O-ring of the teat cups with vaseline.
12. Install the teat cups in the milk collectors and turn them clockwise
while holding the milk collector into place.
13. In the field Cord cups, select:
• LF [Fixed]
• LR [Fixed]
• RF [Fixed]
• RR [Fixed].
Close-up
1. Move the robot arm to the home position.
2. Start the local rinse procedure with the X-Link (page 6-10).
3. Put the milking robot in operation with the X-link (page 6-1).
Figure 42. Turn the teat cup sleeve counter clockwise and remove