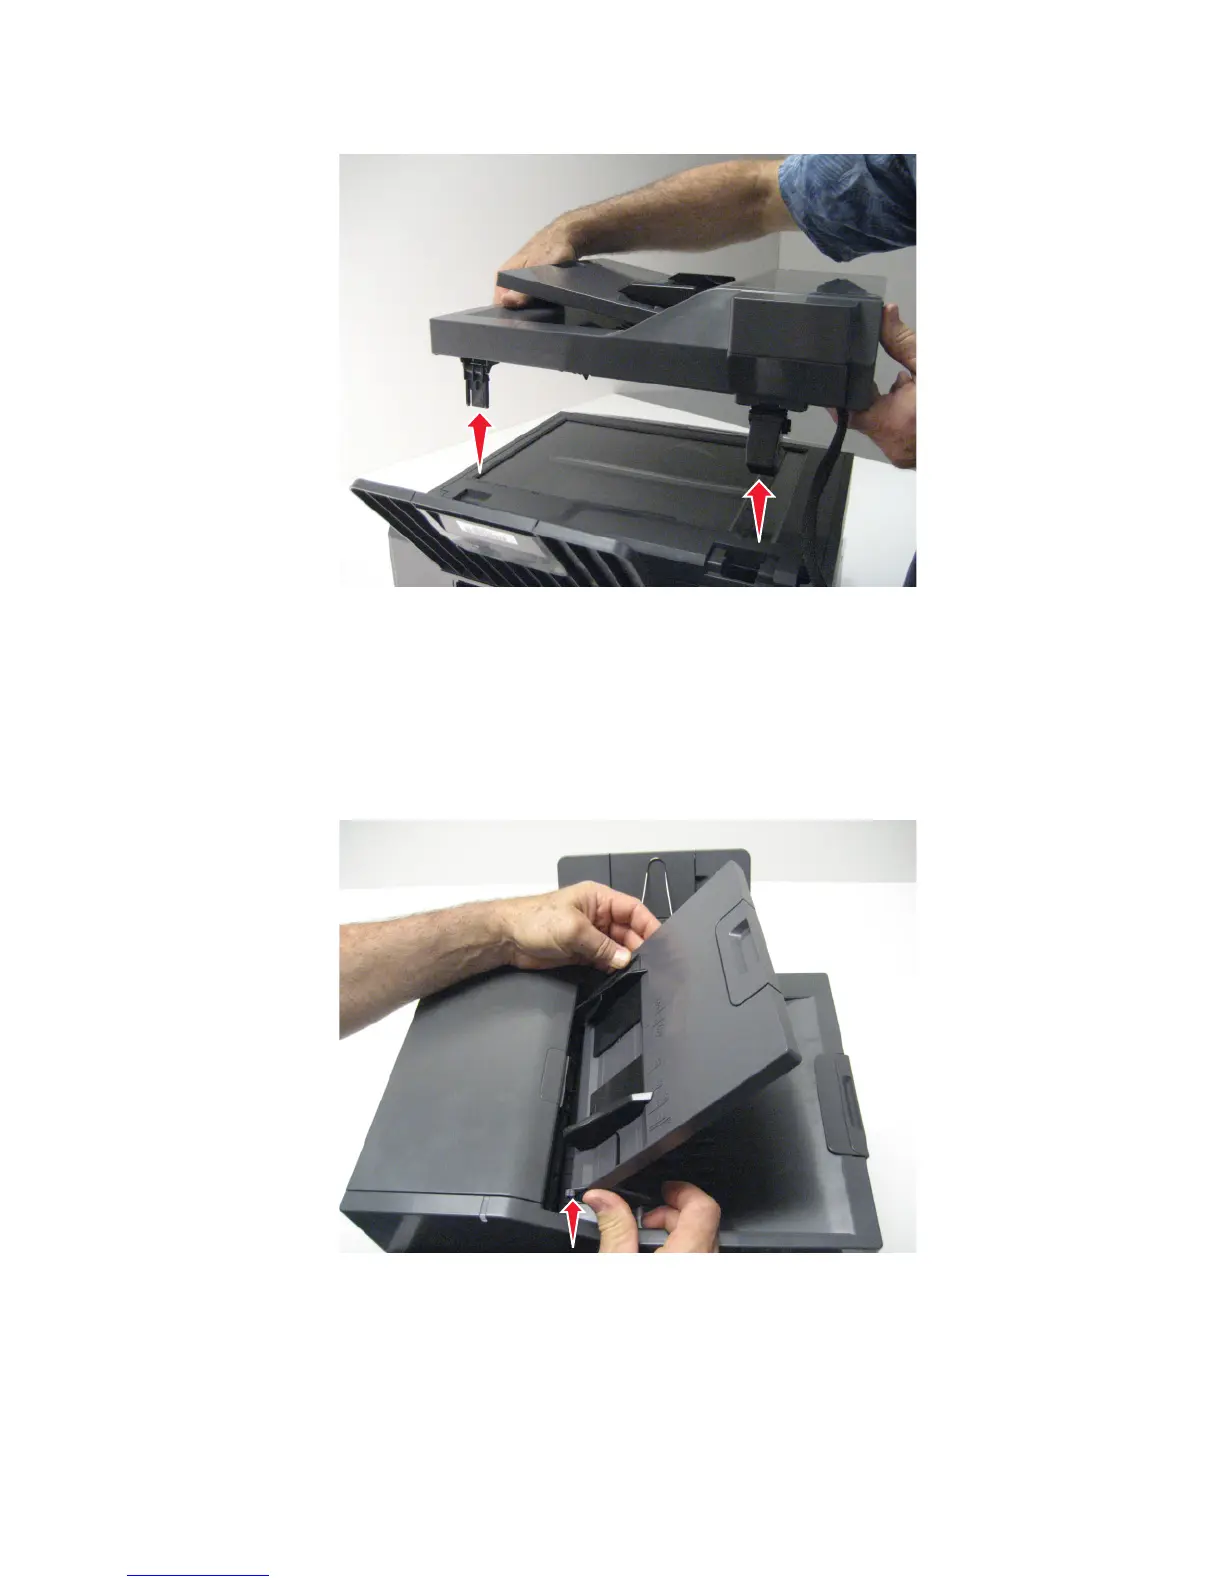
8 Lift the ADF assembly, and remove.
Note: After replacing this part, a scanner manual registration must be performed. See “Scanner manual
registration” on page 195. A scanner calibration reset must also be performed. See “Scanner calibration reset” on
page 188.
ADF input tray removal
1 Push in on the side of the ADF input tray to disconnect it from the top of the printer.
2 Remove the ADF input tray.
7527
Repair information
233