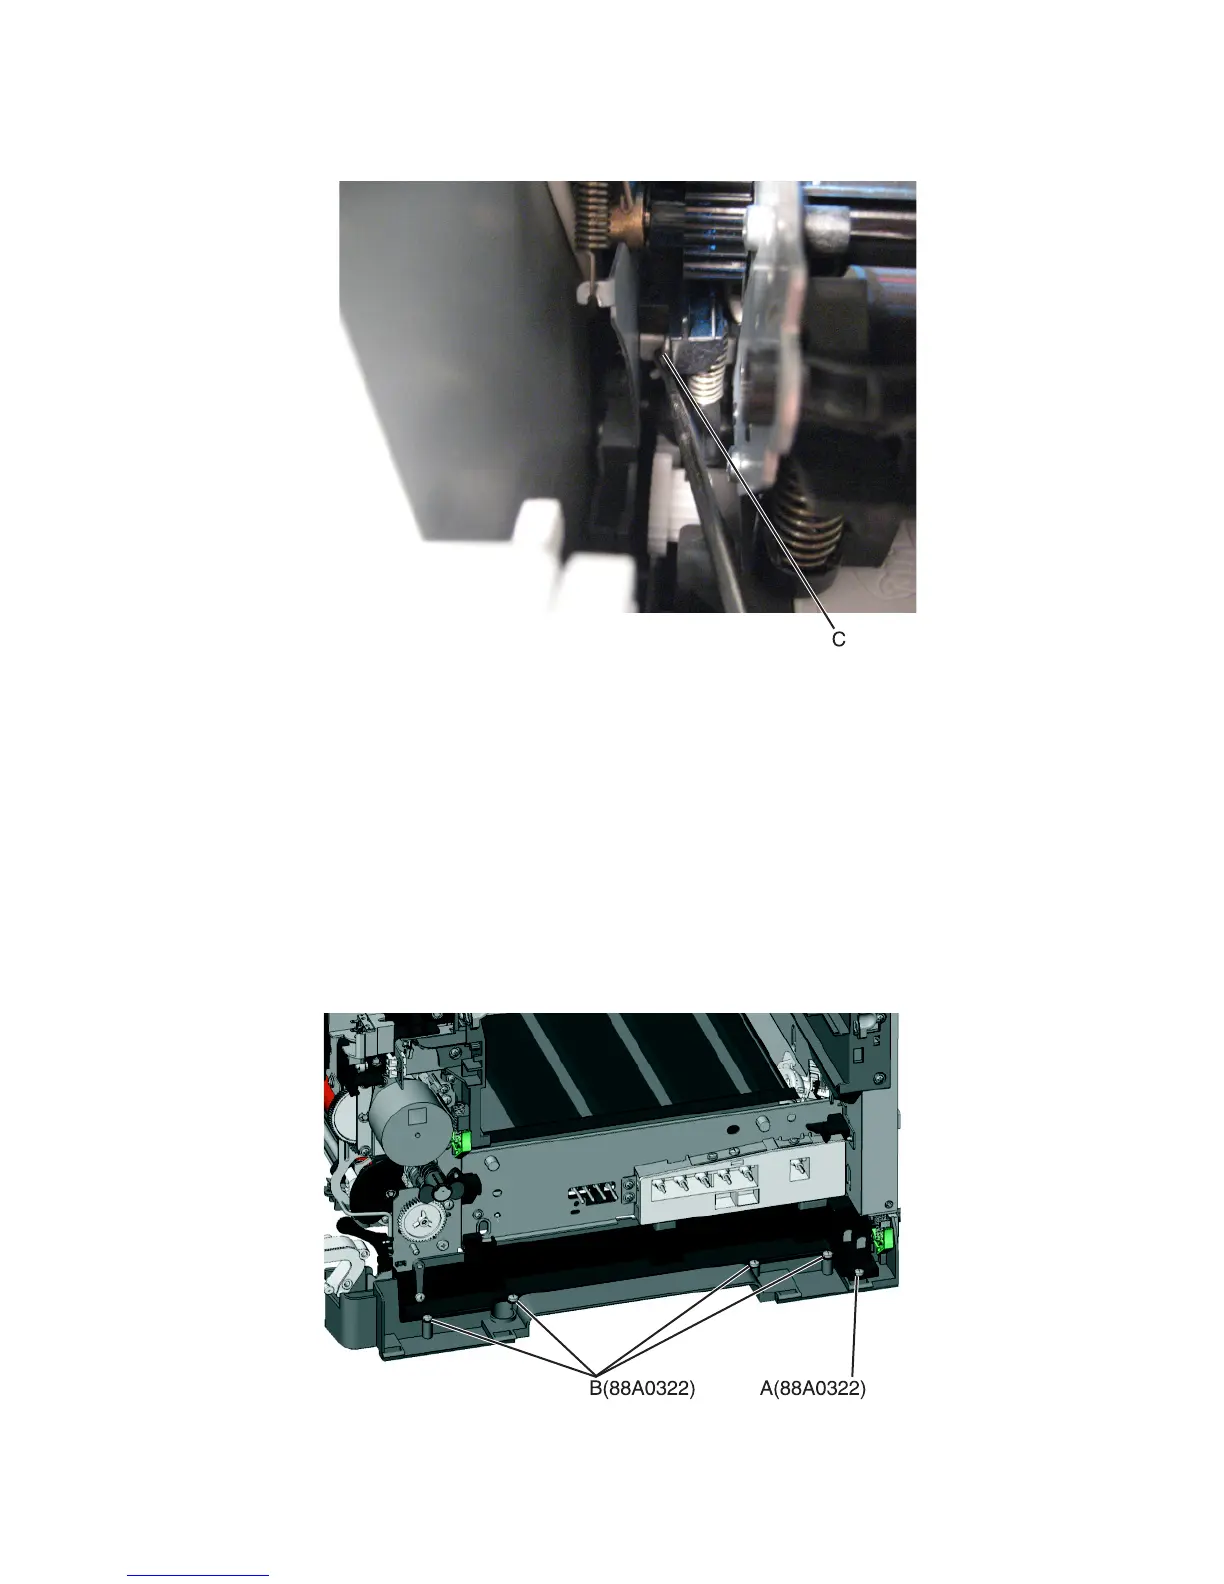
7 Rotate the release lever (C) in a counterclockwise direction with a springhook or needlenose pliers to decouple the
transfer module while pulling the transfer module toward the front.
8 Hold the release lever as you pull out the transfer module for the first four inches (100 mm), but a quick, firm pull
should overcome the latch at this point.
Tray present sensor removal
1 Remove the media tray.
2 Remove the imaging unit. See “Imaging unit (IU) removal” on page 266.
3 Remove the rear screw (A) in the waste toner bottle sensor contact to allow access to the cable cover.
Note: The waste toner bottle sensor contact does not need to be unplugged or removed.
4 Remove the four screws (B) from the cable cover, and remove the cable cover.
7527
Repair information
302
 Loading...