Speaker removal
Note: The speaker (only in CX410 and CX510) is in the operator panel module. See “Operator panel removal (for
CX310 and CX410 models only)” on page 283and “Operator panel removal (for CX510 models only)” on page 289.
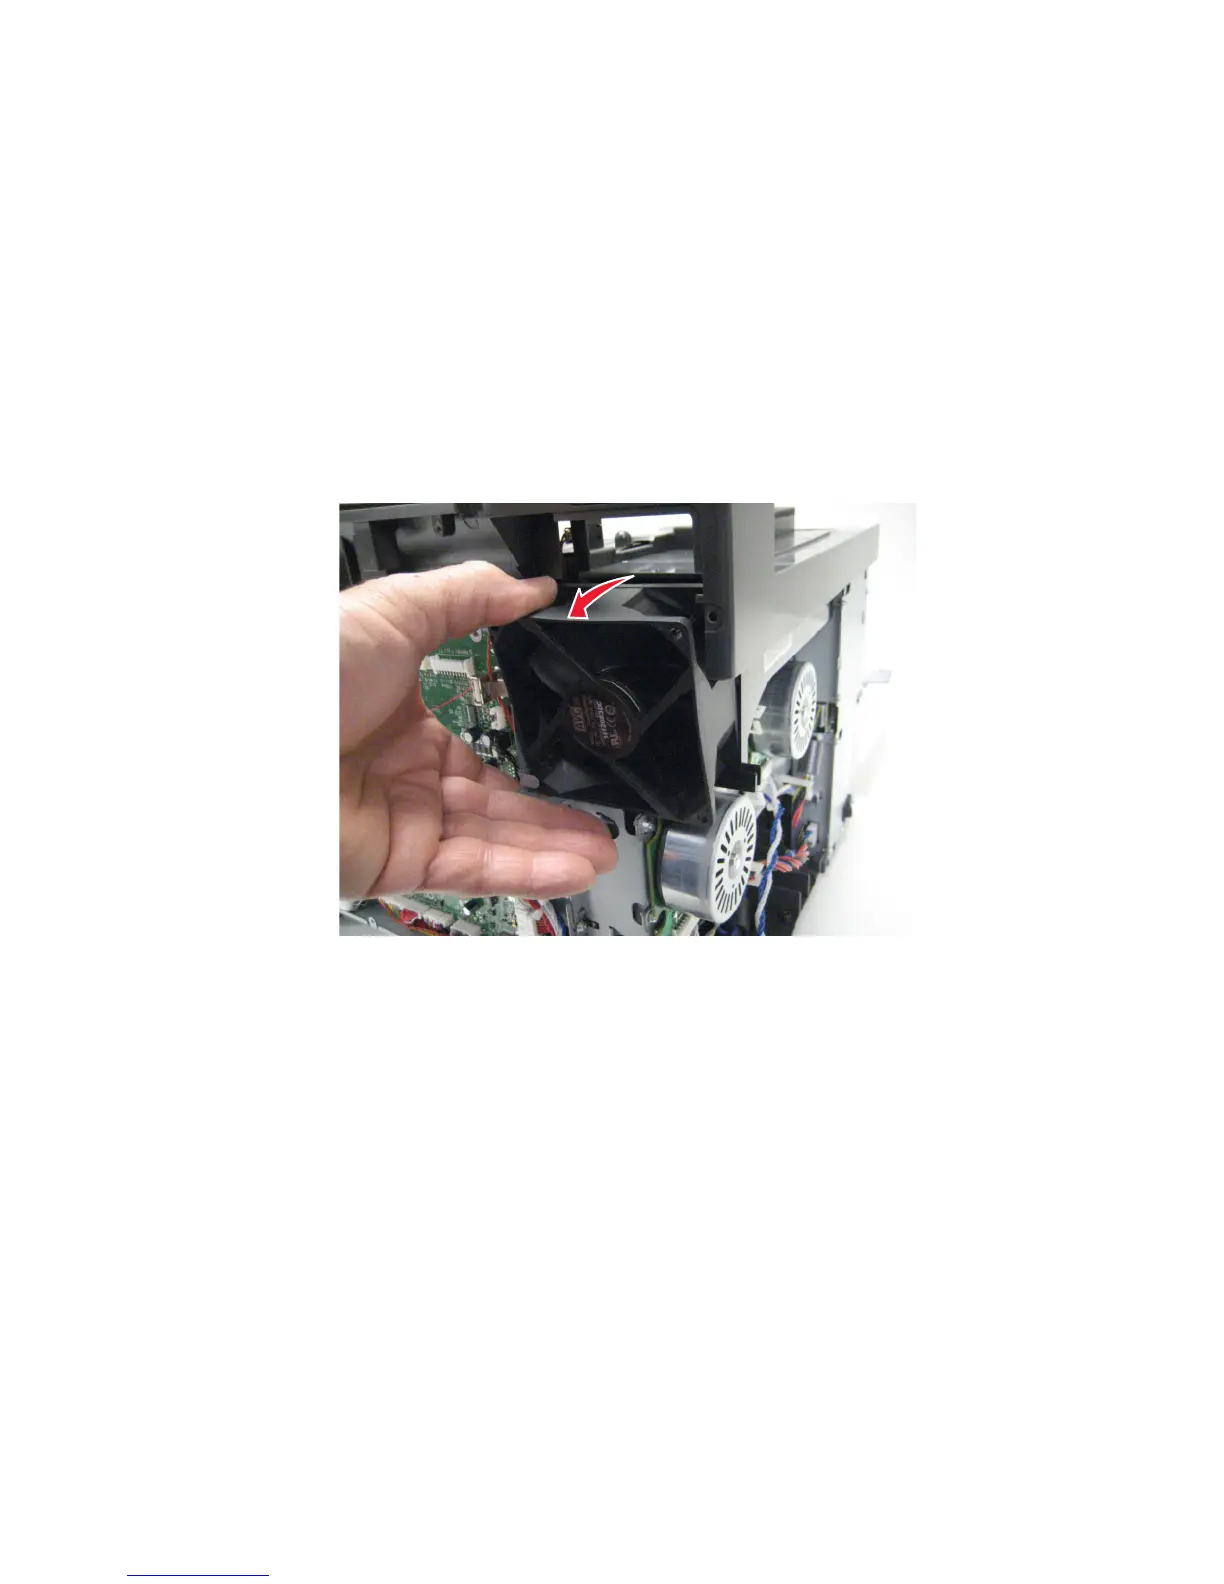
System fan removal
1 Remove the rear cover. See “Rear cover removal” on page 221.
2 Remove the left cover assembly. See “Left cover assembly removal” on page 219.
3 Remove the back AIO cable cover.
4 Unplug the top of the system fan from the controller board.
5 Unsnap the top of the system fan toward the rear.
6 Lift the system fan out, and remove.
Note: Be careful to not pinch the cables at the top rear corner of the fan when snapping it into place.
Toner cartridge contacts removal
1 Remove the right cover assembly. See “Right cover assembly removal” on page 223.
2 Remove the waste toner bottle. See “Waste toner bottle removal” on page 304.
3 Remove the imaging unit. See “Imaging unit (IU) removal” on page 266.
4 Remove the rear cover. See “Rear cover removal” on page 221.
5 Remove the rear screw (A) in the waste toner bottle sensor contact to allow access to the cable cover.
Note: The waste toner bottle sensor contact does not need to be unplugged or removed.
7527
Repair information
294