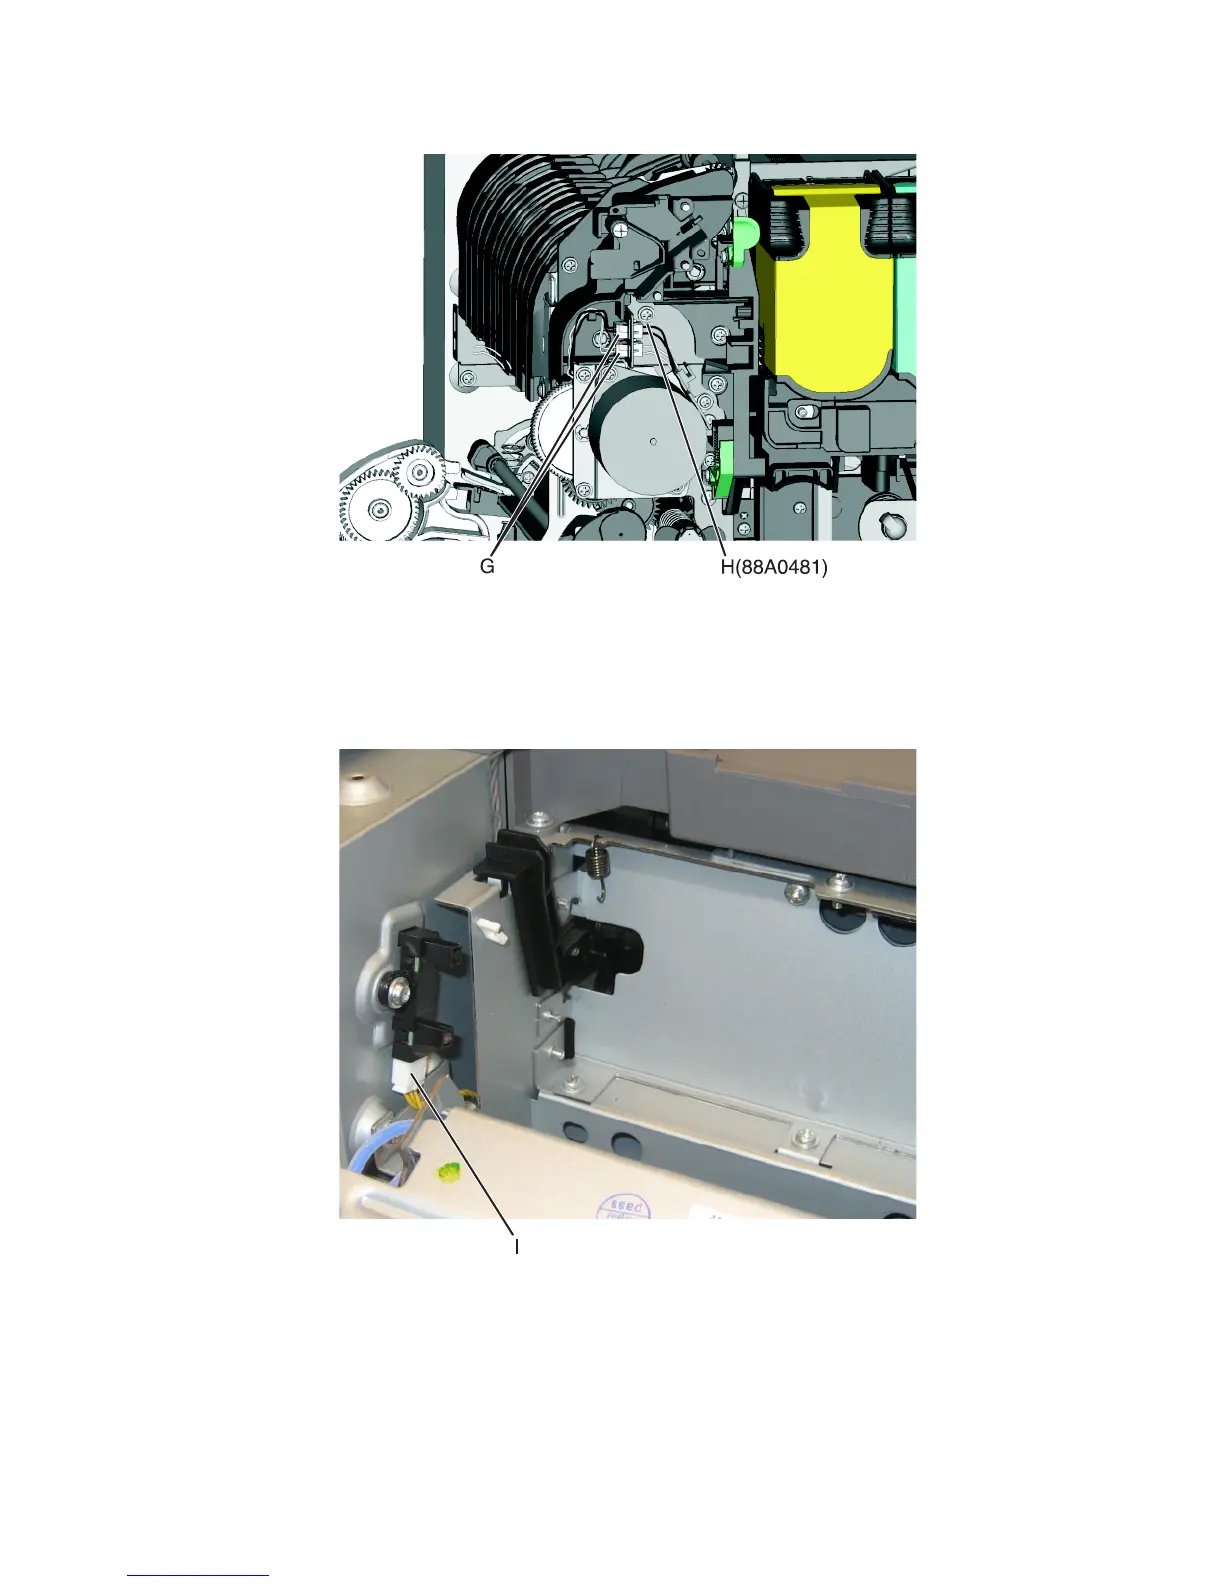
11 Remove the screw and grounding washer (H) on the right side of the frame.
Note: Be careful to not lose the grounding washer.
12 Rotate the top of the fuser toward the front, and then slide to the left to align the fuser side frames with the flat
area of the shaft.
13 Disconnect the fuser exit sensor cable (I).
14 Lift the front left corner of the top cover, and tilt the LVPS cage (J) to remove. There are two posts at the bottom
of the cage on the left side that need to be disengaged.
Note: Be careful with the fuser exit sensor which remains with the cage.
7527
Repair information
273