Do you have a question about the Link 2600 and is the answer not in the manual?
Lists system capabilities like storage, language options, security, auxiliary inputs, and diagnostics.
Details physical size, power requirements, and press speed capability of the System 2600.
Explains the two types of stops the system can generate: Immediate Stop and Top Stop.
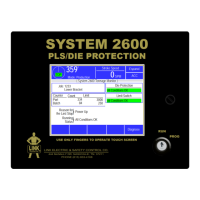
Describes the color LCD display, touch screen, and RUN/PROG switch for system interaction.
Shows the status of die protection and limit switches, and provides navigation to other functions.
Details the system's 6 built-in die protection channels for monitoring tool conditions.
Describes the system's support for up to 8 programmable limit switch outputs.
Details the system's support for 1 or 2 counter groups for production tracking.
Displays diagnostic information about inputs, relays, SD card, and battery voltage.
Provides access to various system configuration screens via softkeys.
Configures general system parameters like speed outputs, timeouts, and input modes.
Configures encoder parameters like trigger mode, offset, and reversal.
Sets up the RUN input for motion detection and clutch/brake monitoring.
Configures limited and system bypass options for die protection.
Allows custom naming for die protection channels for better identification.
Allows custom naming for limit switch channels for better identification.
Controls access to die protection channel settings, preventing unauthorized changes.
Controls access to limit switch channel settings, preventing unauthorized changes.
Configures the functions of optional output relays for signaling various system states.
Configures display settings, top area info, date/time, and access control.
Saves current system settings as a job setup for later recall.
Loads previously stored job settings into the current configuration.
Deletes stored job setups from the system's memory.
Explains where settings are stored (Micro-SD card) and board swapping procedures.
Guides on configuring settings for a new die installation.
Details the steps to create a backup of system settings to an SD card.
Explains how to restore system settings from an SD card backup.
Describes transferring the Micro-SD card between units for memory replacement.
Covers safety and site preparation before installing the system.
Provides guidance on physical mounting and enclosure access.
Details installing the encoder for crankshaft angle and speed information.
Explains how to install the optional communications board.
Covers general wiring practices and conduit requirements for system installation.