Doc #: L-2600-1023 Page 76 Rev. 02
6.3 Memory Swap-out Procedure
In cases where a unit is being
swapped out with another, but
there is no backup file available or
the only one available is badly out
of date, the Micro-SD card that
contains the information stored on
the unit may be moved to the new
unit. Note that it will be necessary
to remove the optional 805-3
communications board, if installed,
to get access to the Micro-SD card.
Before starting this procedure,
make sure all power is removed
from both units.
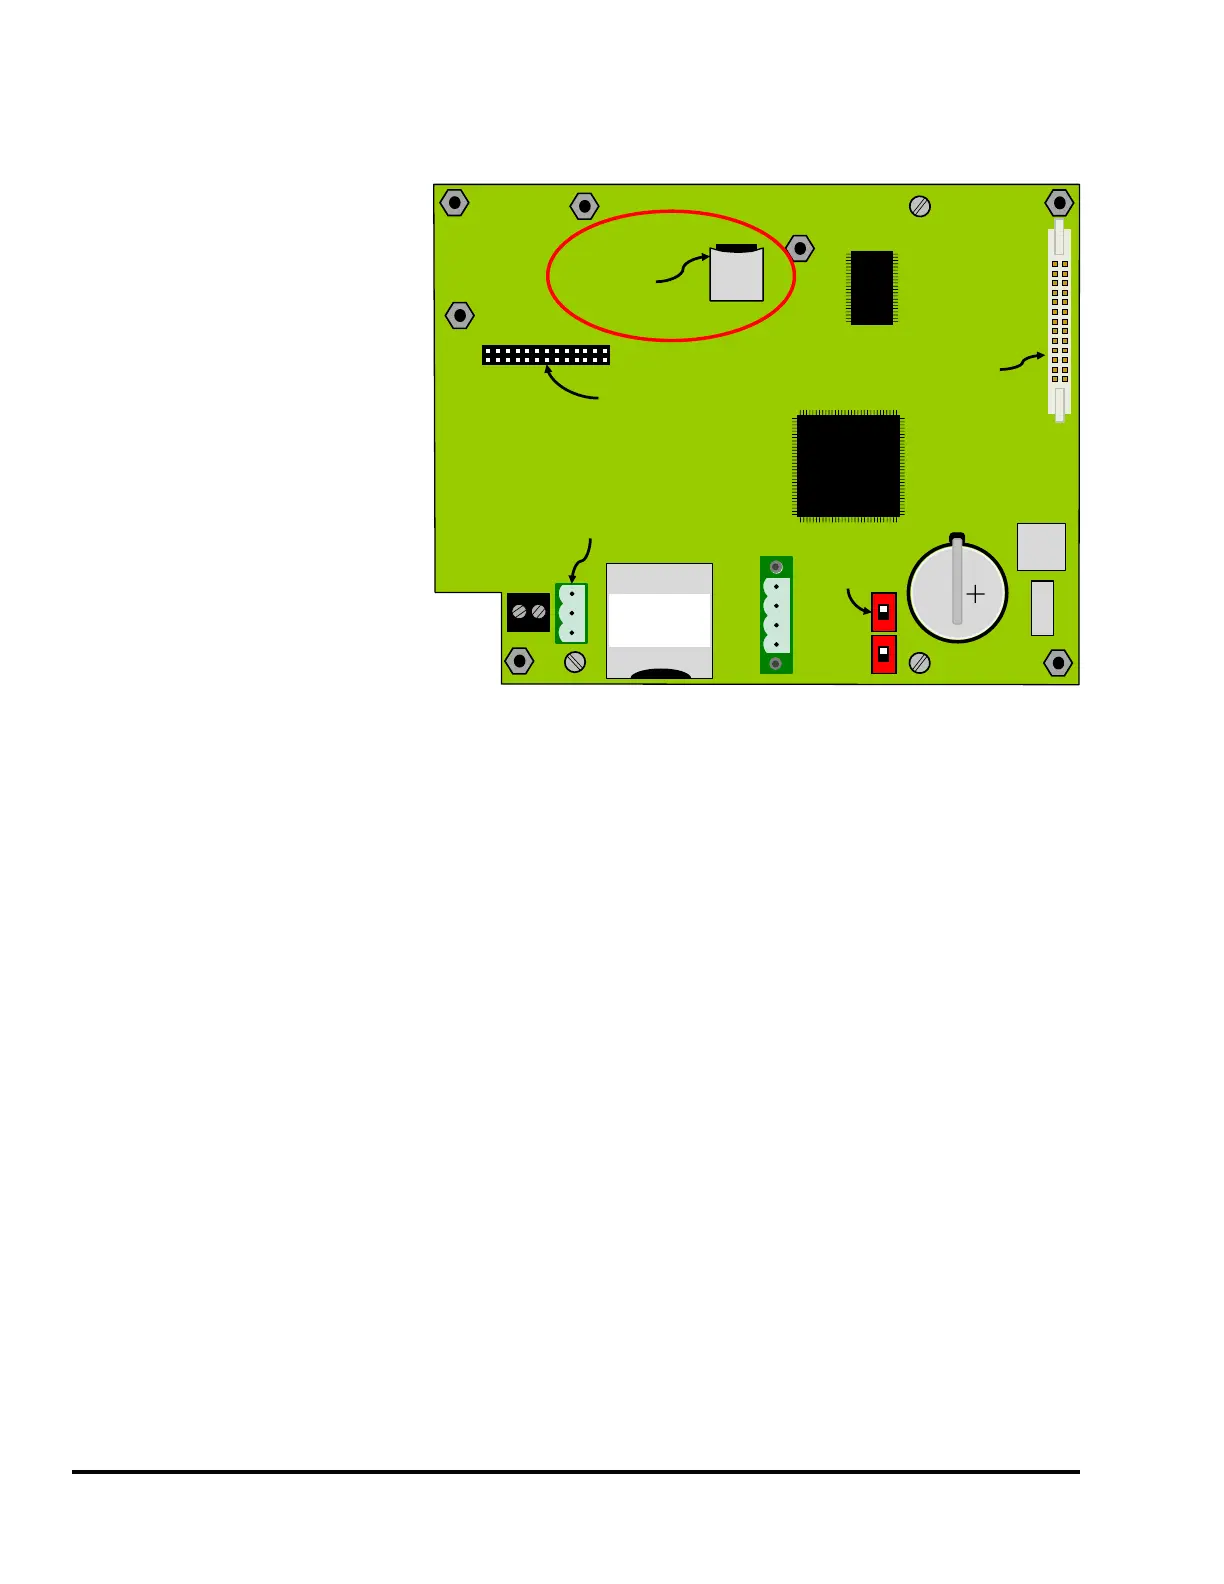
Carefully remove the Micro-SD
card from its connector on the
circuit board. The connector opens
by gently pushing it towards the
top of the board (there will usually be a tactile “click”) and then it will hinge up. The Micro-SD card
can then be removed.
In the same manner, open the Micro-SD carrier on the new unit, remove the Micro-SD card that was in
it, and place the chip from the original unit into the carrier of the new operator terminal. Close the
connector and gently push down toward the bottom of the board. There will usually be a tactile “click”
when the connector is seated properly.
After the Micro-SD card is installed, power up the new unit and verify that the settings are correct.
SD CARD
PUSH TO INSERT
PUSH TO EJECT
TX
RX
G
1200-1 Board
USB
USB
CR2477
Battery
SHLD
GND
CANH
CANL
PORT 1
Ribbon Cable
Connector
(to 1200-2 Board)
Touch
Screen
Cal Switch
Micro-SD
Card
Connector
805-3 Comm. Board
Option Connector
Figure 66: SD Card Location