Doc #: L-2600-1023 Page 4 Rev. 02
Table of Figures
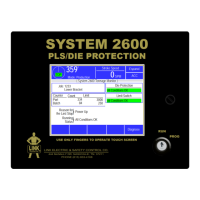
Figure 1: System 2600 ................................................................................................................................ 6
Figure 2: System 2600 .............................................................................................................................. 10
Figure 3: Top Info Area with 5100-11 Encoder........................................................................................ 11
Figure 4: Example Numeric Entry Screen ................................................................................................ 13
Figure 5: Example Text Entry................................................................................................................... 13
Figure 6: Example List Selection .............................................................................................................. 14
Figure 7: Example Password Entry Sequence .......................................................................................... 17
Figure 8: Operator Terminal Main Screen ................................................................................................ 21
Figure 9: Static Normally Off Example .................................................................................................... 24
Figure 10: Static Normally On Example .................................................................................................. 24
Figure 11: Cyclic Input Example .............................................................................................................. 25
Figure 12: Timing Window Examples for a Cyclic Input ........................................................................ 25
Figure 13: “In Position” Input Example ................................................................................................... 26
Figure 14: Timing Window Examples for an “In Position” Input ............................................................ 27
Figure 15: “1 Part Detector Edge” Input Example ................................................................................... 28
Figure 16: Timing Window Example for a “1 Part Detector Edge” Input ............................................... 28
Figure 17: “1 Part Detector Pass” Input Example .................................................................................... 29
Figure 18: Timing Window Example for a “1 Part Detector Pass” Input ................................................ 29
Figure 19: “2 Part Detector Edge” Input Example ................................................................................... 30
Figure 20: Timing Window Example for a “2 Part Detector Edge” Input ............................................... 30
Figure 21: “2 Part Detector Pass” Input Example .................................................................................... 31
Figure 22: Timing Window Example for a “2 Part Detector Pass” Input ................................................ 31
Figure 23: Timing Window Example for a “Transfer” Input ................................................................... 32
Figure 24: Die Protection Main Screen .................................................................................................... 33
Figure 25: Die Protection Main Screen with Error ................................................................................... 35
Figure 26: Die Protection Channel Settings Screen .................................................................................. 35
Figure 27: Wiring Sensors in Series and Parallel ..................................................................................... 38
Figure 28: Die Protection Channel Misc. Settings Screen ........................................................................ 38
Figure 29: Die Protection Channel Angle Setting Screen ........................................................................ 40
Figure 30: Die Protection Bypass Screen ................................................................................................. 40
Figure 31: Die Protection Diagnose Screen .............................................................................................. 42
Figure 32: Limit Switch Main Screen ....................................................................................................... 44
Figure 33: Limit Switch Settings Screen .................................................................................................. 44
Figure 34: Limit Switch Counted Output Screen ..................................................................................... 46
Figure 35: Limit Switch Angle and Time Setting Screen ......................................................................... 47
Figure 36: Limit Switch Speed Advance Screen ...................................................................................... 48
Figure 37: Counter Screen ........................................................................................................................ 49
Figure 38: Counter Group Screen ............................................................................................................. 49
Figure 39: Counter Configuration Screen ................................................................................................. 50
Figure 40: Main Diagnostic Screen .......................................................................................................... 53
Figure 41: Event Log Screen .................................................................................................................... 54
Figure 42: Event Log Detail Information Screen ..................................................................................... 54
Figure 43: Main Configuration Screen ..................................................................................................... 55
Figure 44: General Settings Configuration Screen ................................................................................... 55
Figure 45: Encoder Settings Screen .......................................................................................................... 57
Figure 46: RUN Input Settings Screen ..................................................................................................... 57