Starter Motor Removal
1.
Disconnect the battery cables from the battery.
2. Remove the air box and recoil starter.
• It is easiest to remove and install these two items together.
•
Refer to Section 3C ‑ Air Box Removal and Section 8A ‑ Recoil Starter.
3. Move the rubber boot out of the way, and remove the positive lead from the starter.
4. Remove the negative lead from the starter.
IMPORTANT: The port side screw that secures the starter motor isolation bracket is not easily accessible. Disconnect or
remove components as necessary to access this screw. Removing only the starboard side screw and bending the bracket
is NOT recommended, as this may weaken the bracket.
5. Remove the two screws that secure the starter motor isolation bracket to the engine.
6. Remove the two starter motor mounting screws.
7. Lift the starter motor and isolation bracket out and away from the engine.
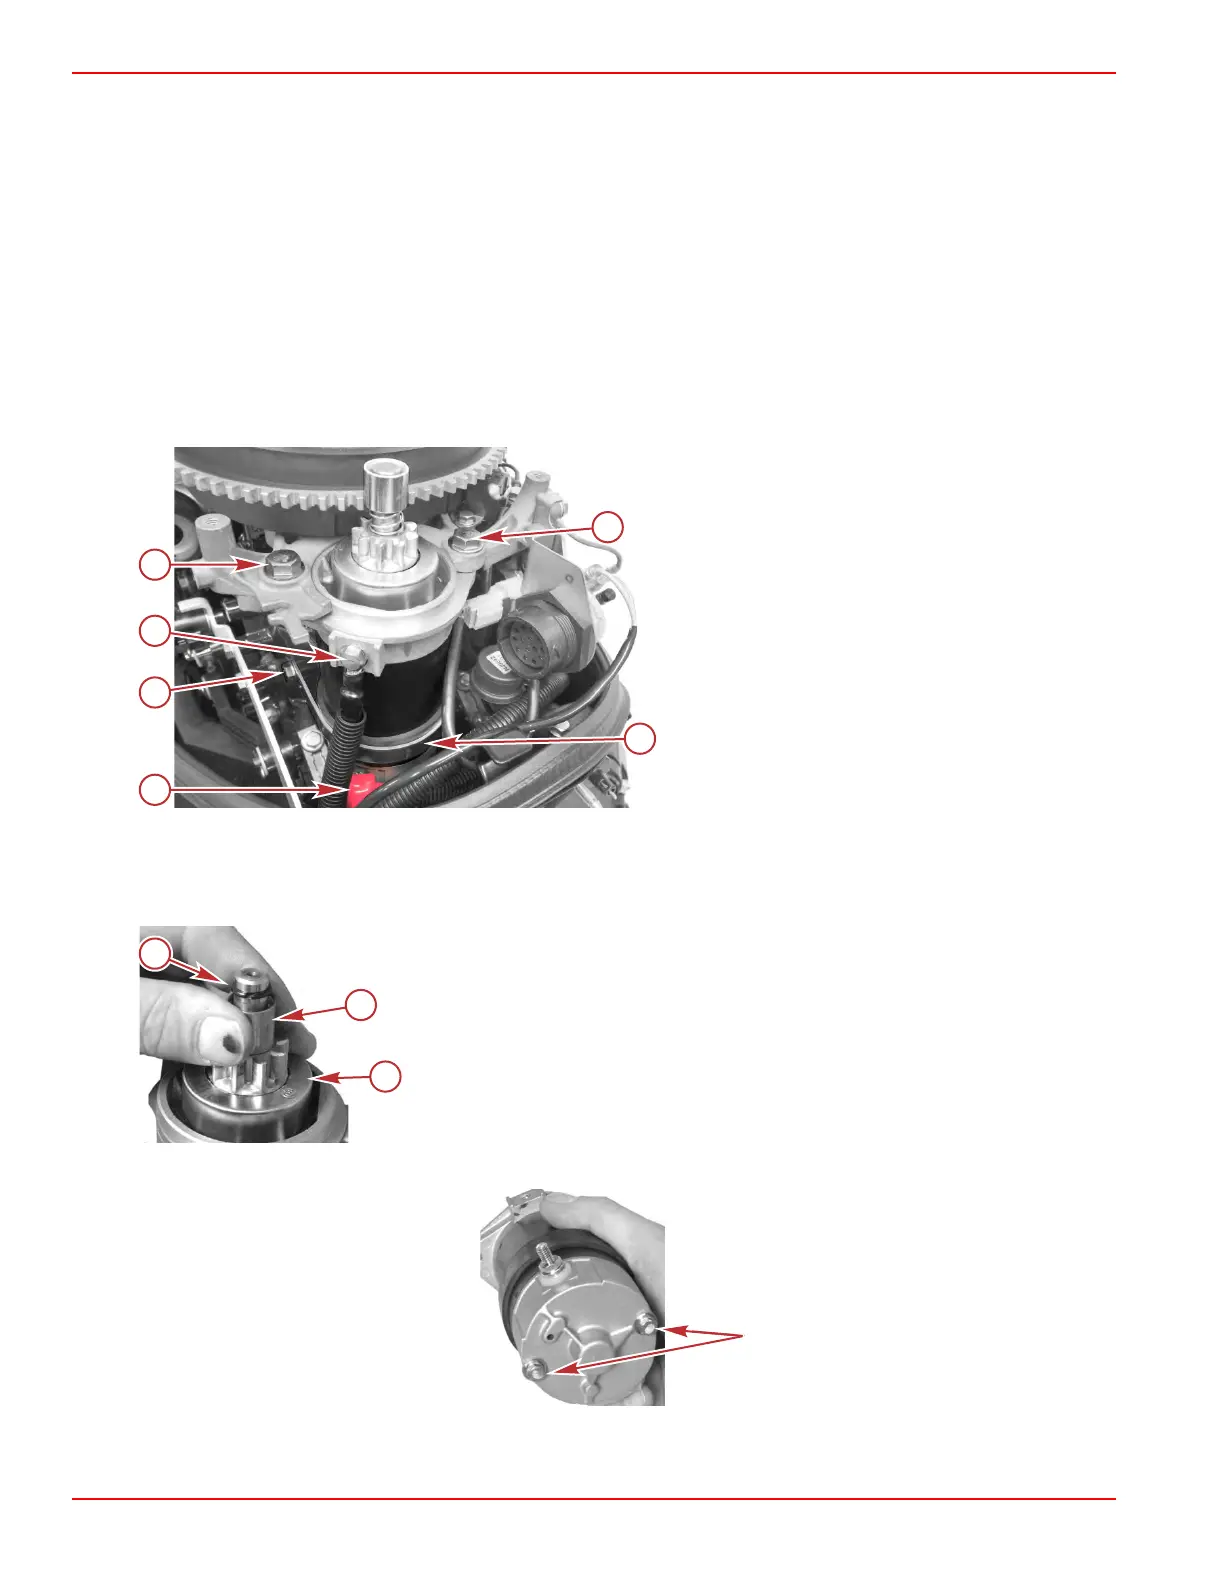
Some items shown removed for clarity
a - Positive lead and rubber boot
b - Isolation bracket screw (2)
NOTE: The port side screw is not shown in
this view.
c - Negative lead connection point
d - Starter motor mounting screws (2)
e - Starter motor isolation bracket
Starter Motor Disassembly
1.
Push the pinion stopper down and remove the circlip.
2. Remove the pinion stopper, bendix spring, and bendix.
a - Circlip
b - Pinion stopper
c - Bendix
3. Remove two bolts on the bottom of the starter holding it together.
4. Remove the top end cap. Do not lose any armature shims.
5. Remove the field frame.
Charging and Starting Systems
Page 2B-14 © 2018 Mercury Marine 90-8M0125265 eng NOVEMBER 2017
 Loading...


