10. Install the O‑ring.
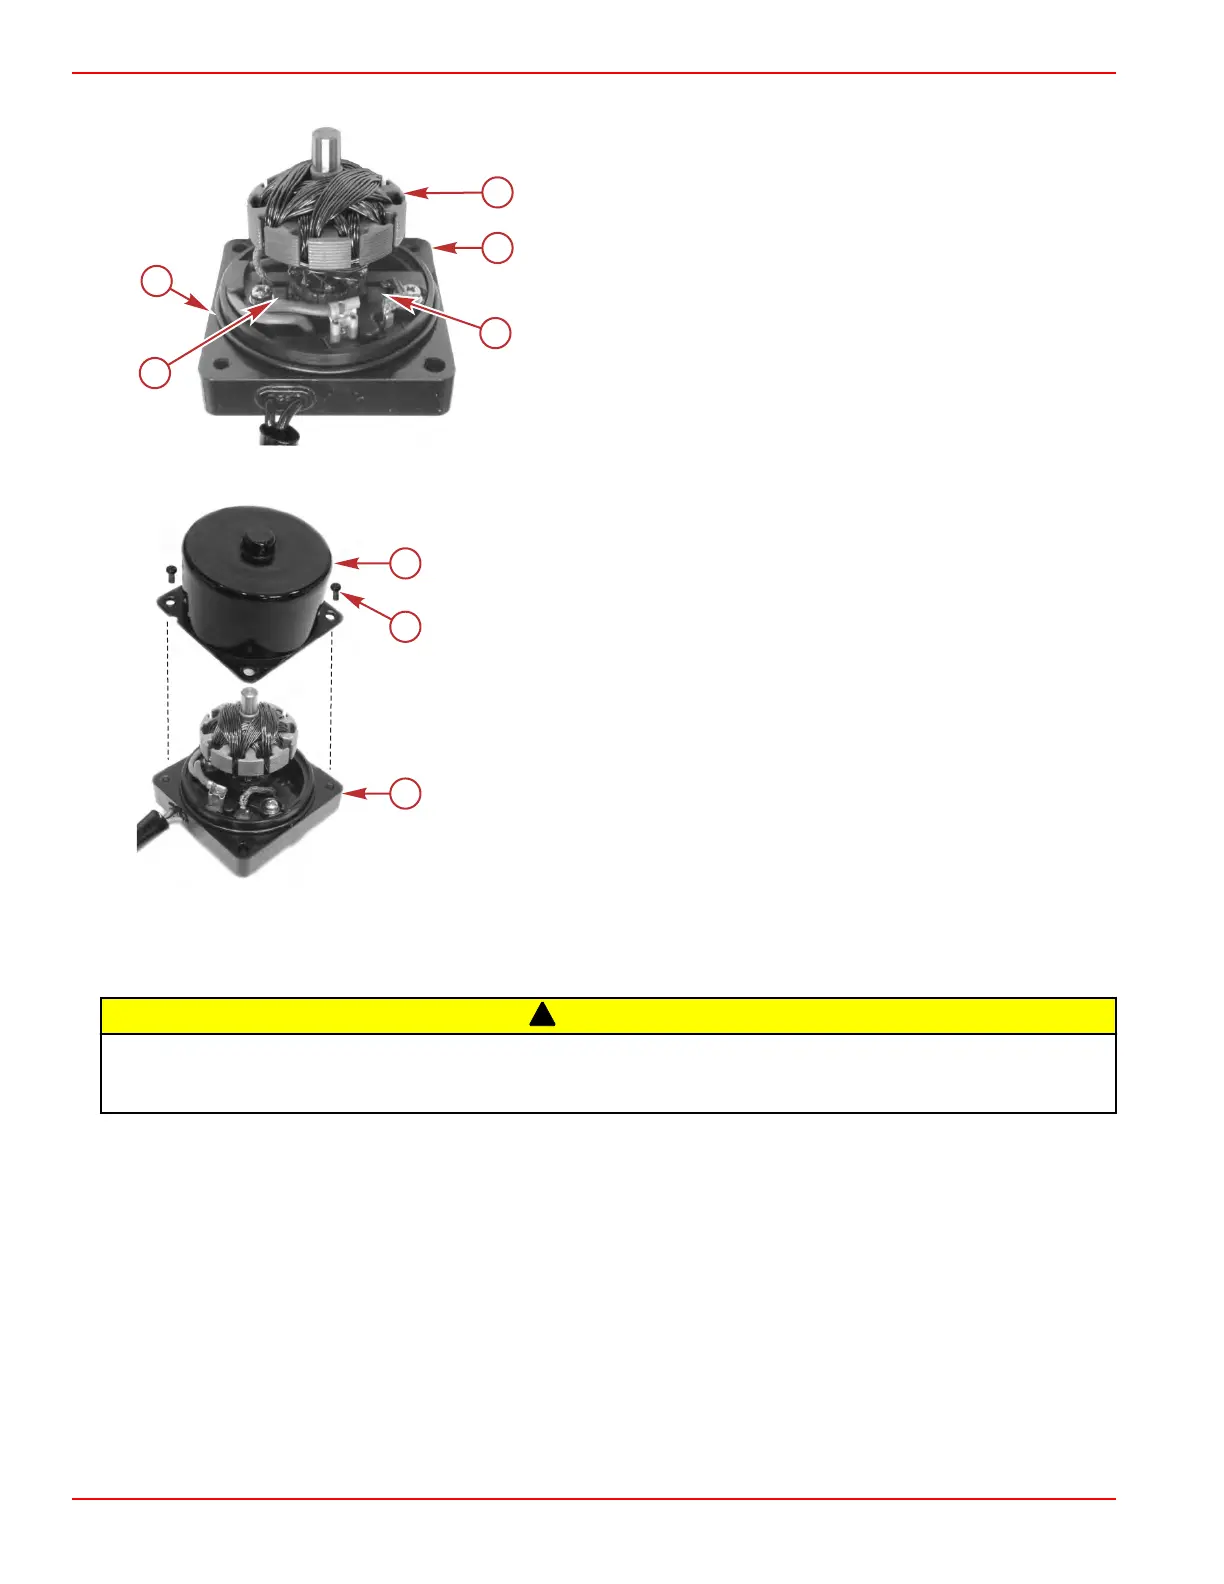
a - Armature
b - Motor bracket
c - Brush
d - Brush
e - O‑ring
11. Install the motor cover. Secure with two cross slotted screws.
a - Motor cover
b - Screws (2)
c - Motor bracket
Power Tilt Pump
Power Tilt Pump Disassembly
!
CAUTION
Contamination can damage the hydraulic system or cause the system to malfunction. Failure of power trim or steering
components
can result in injury or product damage. Ensure that the work area, shop tools and all components are clean and
lint free during reassembly.
IMPORTANT: The power tilt system is pressurized. The tilt cylinder rod must be fully extended in the up position prior to
removing the reservoir plug or manual release valve.
1.
Remove the power tilt assembly from the outboard. Refer to Power T
ilt Removal, preceding.
2. Extend the tilt cylinder rod to the full up position.
3. Slowly remove the power tilt reservoir fill plug.
4. Drain the power tilt fluid.
5. Remove the wire harness retaining screw.
6. Remove the power tilt motor by removing the two 4 mm internal hex screws.
Power Tilt
Page 5B-24 © 2018 Mercury Marine 90-8M0125265 eng NOVEMBER 2017
 Loading...


