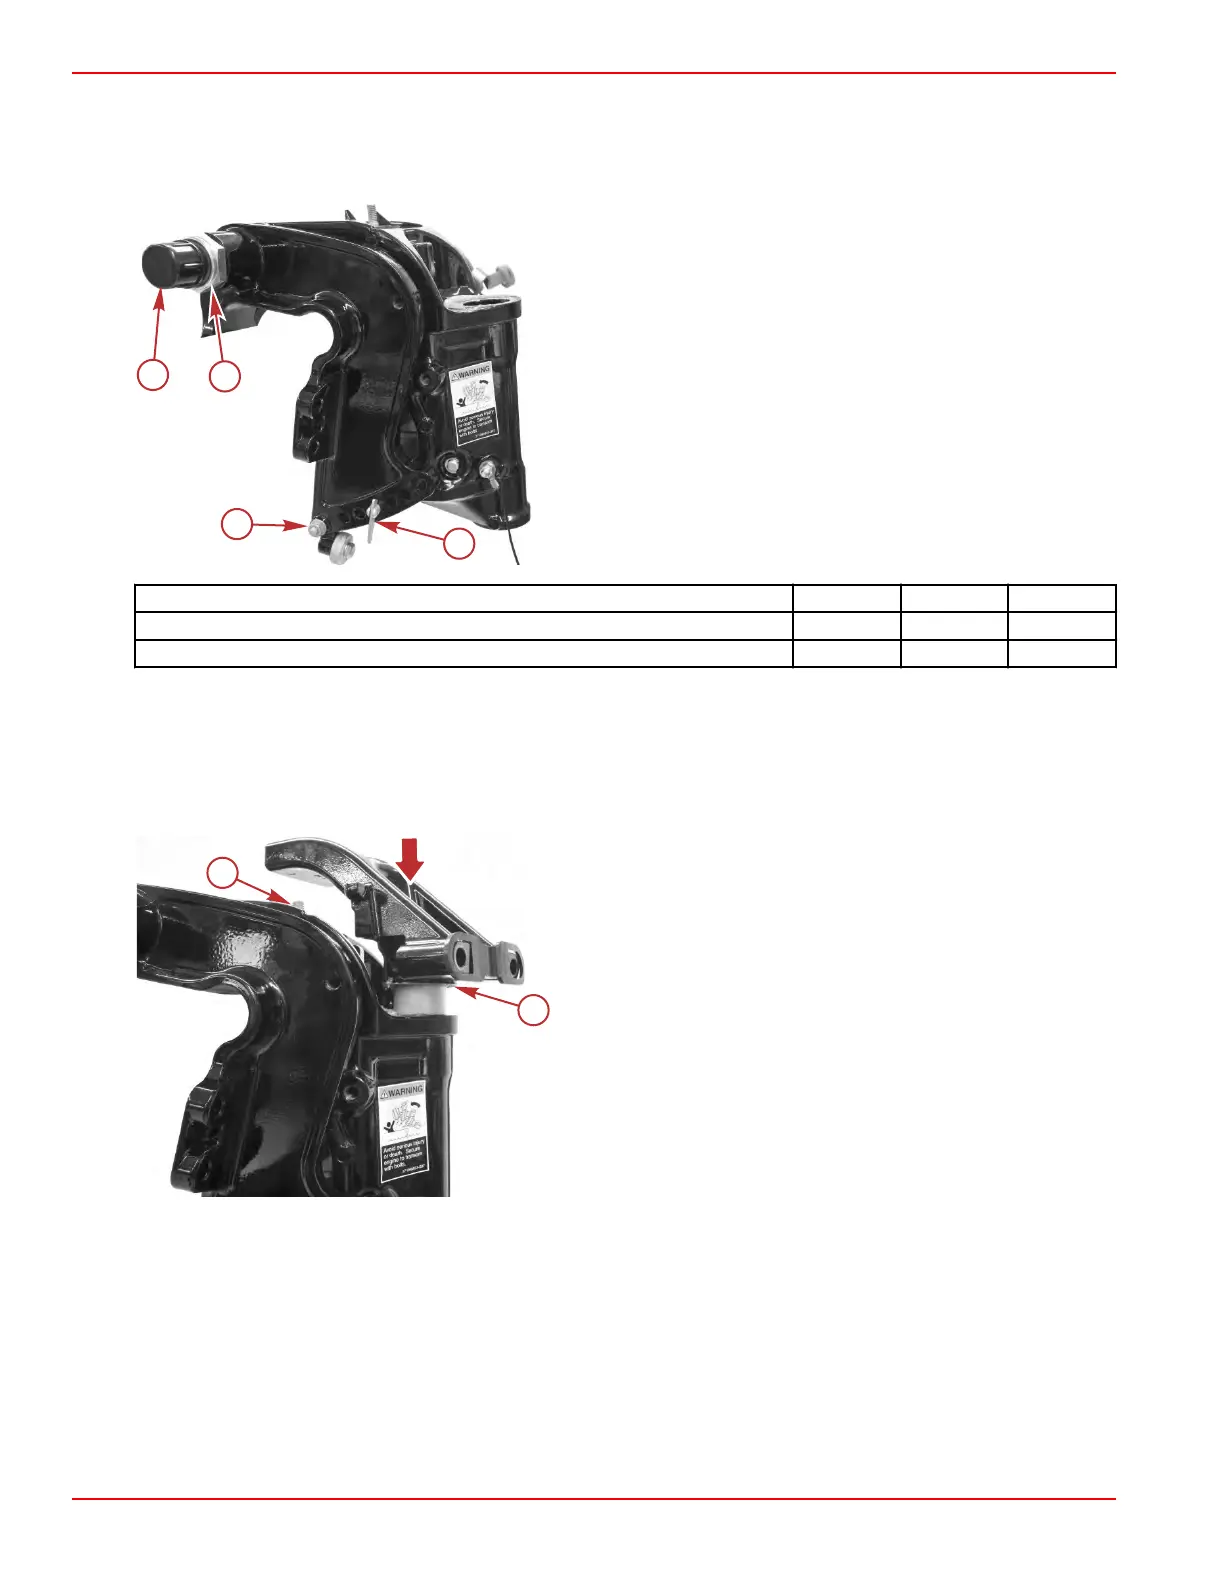
7. Install the locknut onto the tilt tube. Tighten the locknut to the specified torque.
8.
Install the washer and nut onto the clamp bracket spacer. Tighten the nut to the specified torque.
9. Install the tilt pin.
10. Install the tilt tube caps.
a - Tilt tube cap (one each end)
b - Locknut
c - Clamp bracket spacer nut and washer
d - Tilt pin
Description Nm lb‑in. lb‑ft
Tilt tube locknut 24.0 – 17.7
Clamp bracket nut 6.0 53.1 –
Steering Arm Installation
1.
Install a washer onto the steering arm shaft.
2. Insert the steering arm into the swivel bracket. Ensure that the lower bushing remains in the swivel bracket.
3. Install the copilot hardware:
a. Install the copilot threaded rod into the swivel bracket.
a - Washer
b - Copilot threaded rod
b. Install one disc and washer (item c, shown following) onto the threaded rod.
c.
Attach the plate to the steering arm with two screws and washers.
Clamp/Swivel Bracket and Driveshaft Housing
Page 5A-44 © 2018 Mercury Marine 90-8M0125265 eng NOVEMBER 2017
 Loading...


