This manual assumes that you have successfully installed CDS G3 on your computer and have updated it to the most current
version. For installation instructions, refer to the user manual loaded onto the computer diagnostic system laptop (in the
Windows® Start
menu > All Programs > Mercury Marine > User Manual).
Connecting CDS G3
CDS G3 Diagnostic Tool Kit 8M0114141
1. Insert the CDS G3 SmartCraft diagnostic interface USB connector into a USB port on your computer.
2.
Connect the SmartCraft cable to the serial adapter cable from the CDS G3 cable kit.
CDS G3 Cable Kit 8M0137534
3. Connect the serial adapter cable to the diagnostic adapter harness.
4.
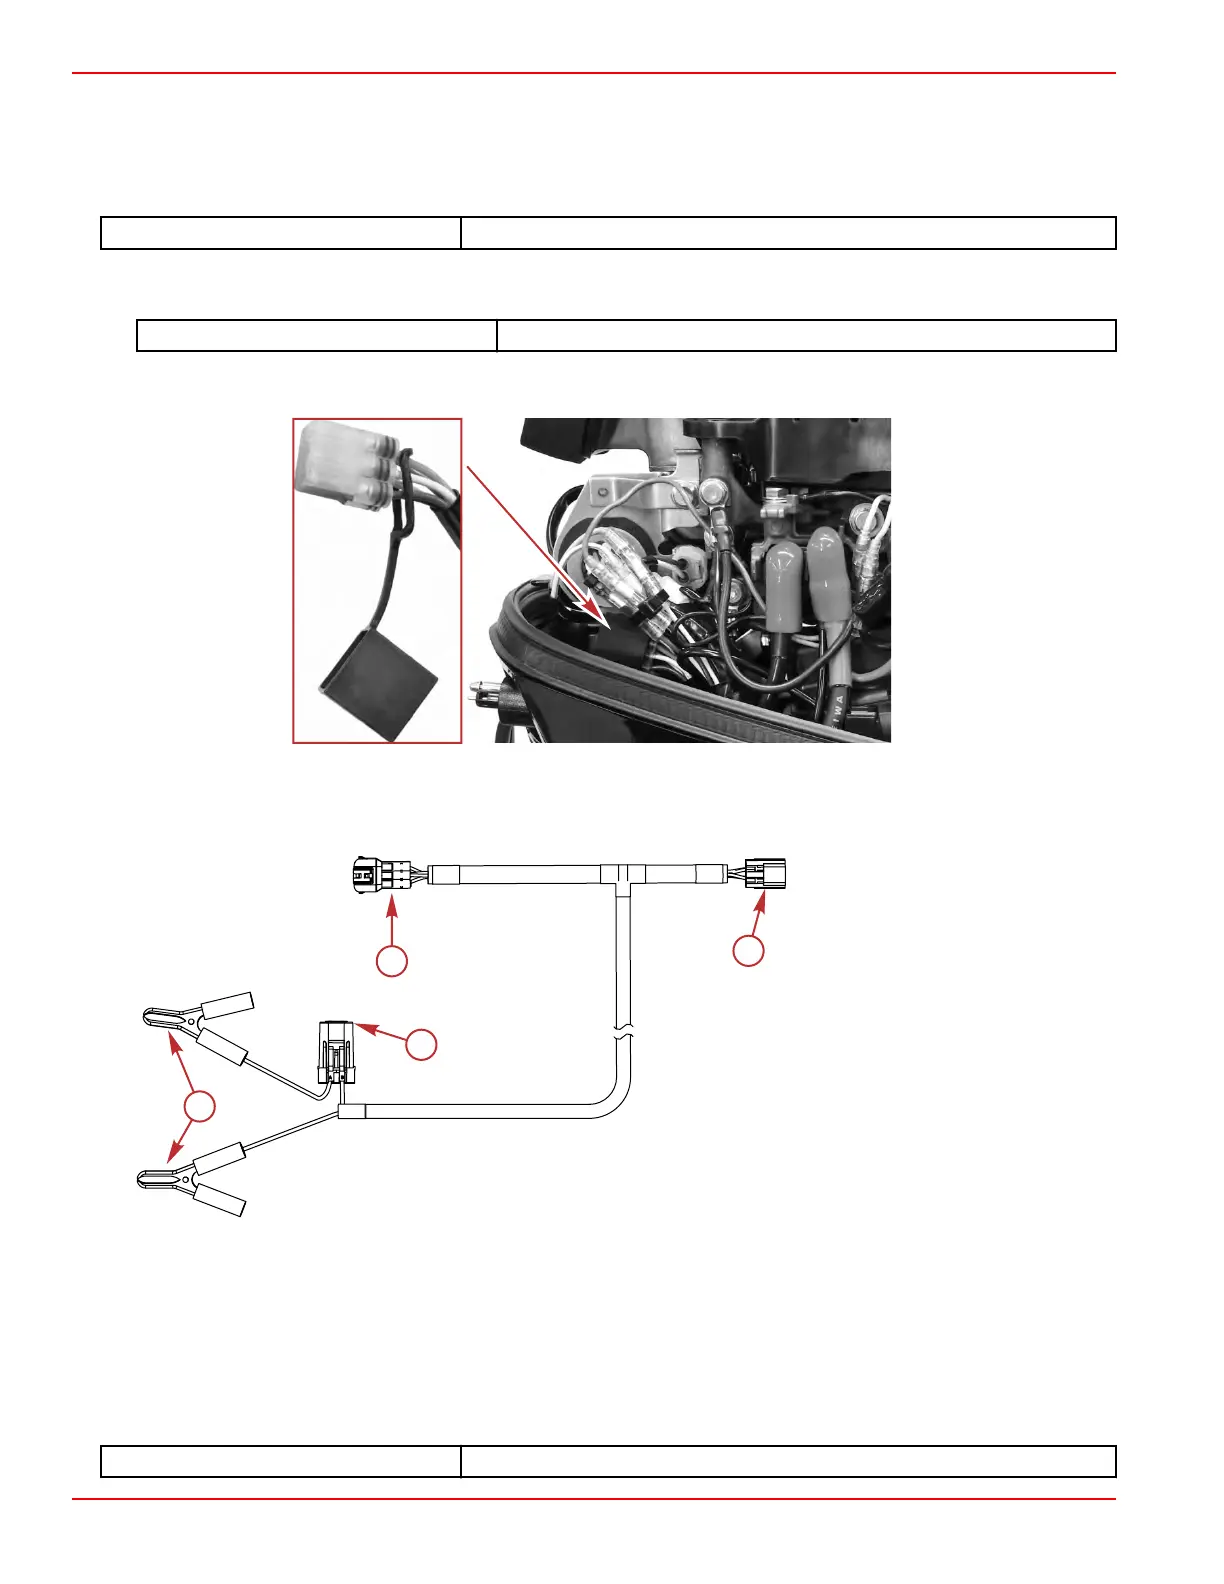
Connect the diagnostic adapter harness to the ECM diagnostic connector on the engine.
ECM diagnostic connector (location approximate)
5. Connect the red and black clips on the diagnostic adapter harness to the positive and negative battery terminals,
respectively.
Diagnostic adapter harness
a - To serial adapter cable
b - To ECM diagnostic connector
c - 5‑amp fuse (in positive cable)
d - To 12 V battery
NOTE: For manual start models,
use a shop battery or other
suitable 12 volt battery.
Using CDS G3
CDS G3 will monitor sensors and ECM data, including status switches. The ECM program can help diagnose intermittent
engine problems. It can record the state of the engine sensors and switches for a period of up to 10 minutes, which can then be
played back and analyzed.
When using CDS G3 for troubleshooting, follow the driven troubleshooting menu for the complete diagnostic troubleshooting
procedures.
Accessing ECM Information with CDS G3
CDS G3 Diagnostic Tool Kit 8M0114141
General Troubleshooting
Page 1E-8 © 2018 Mercury Marine 90-8M0125265 eng NOVEMBER 2017
 Loading...


