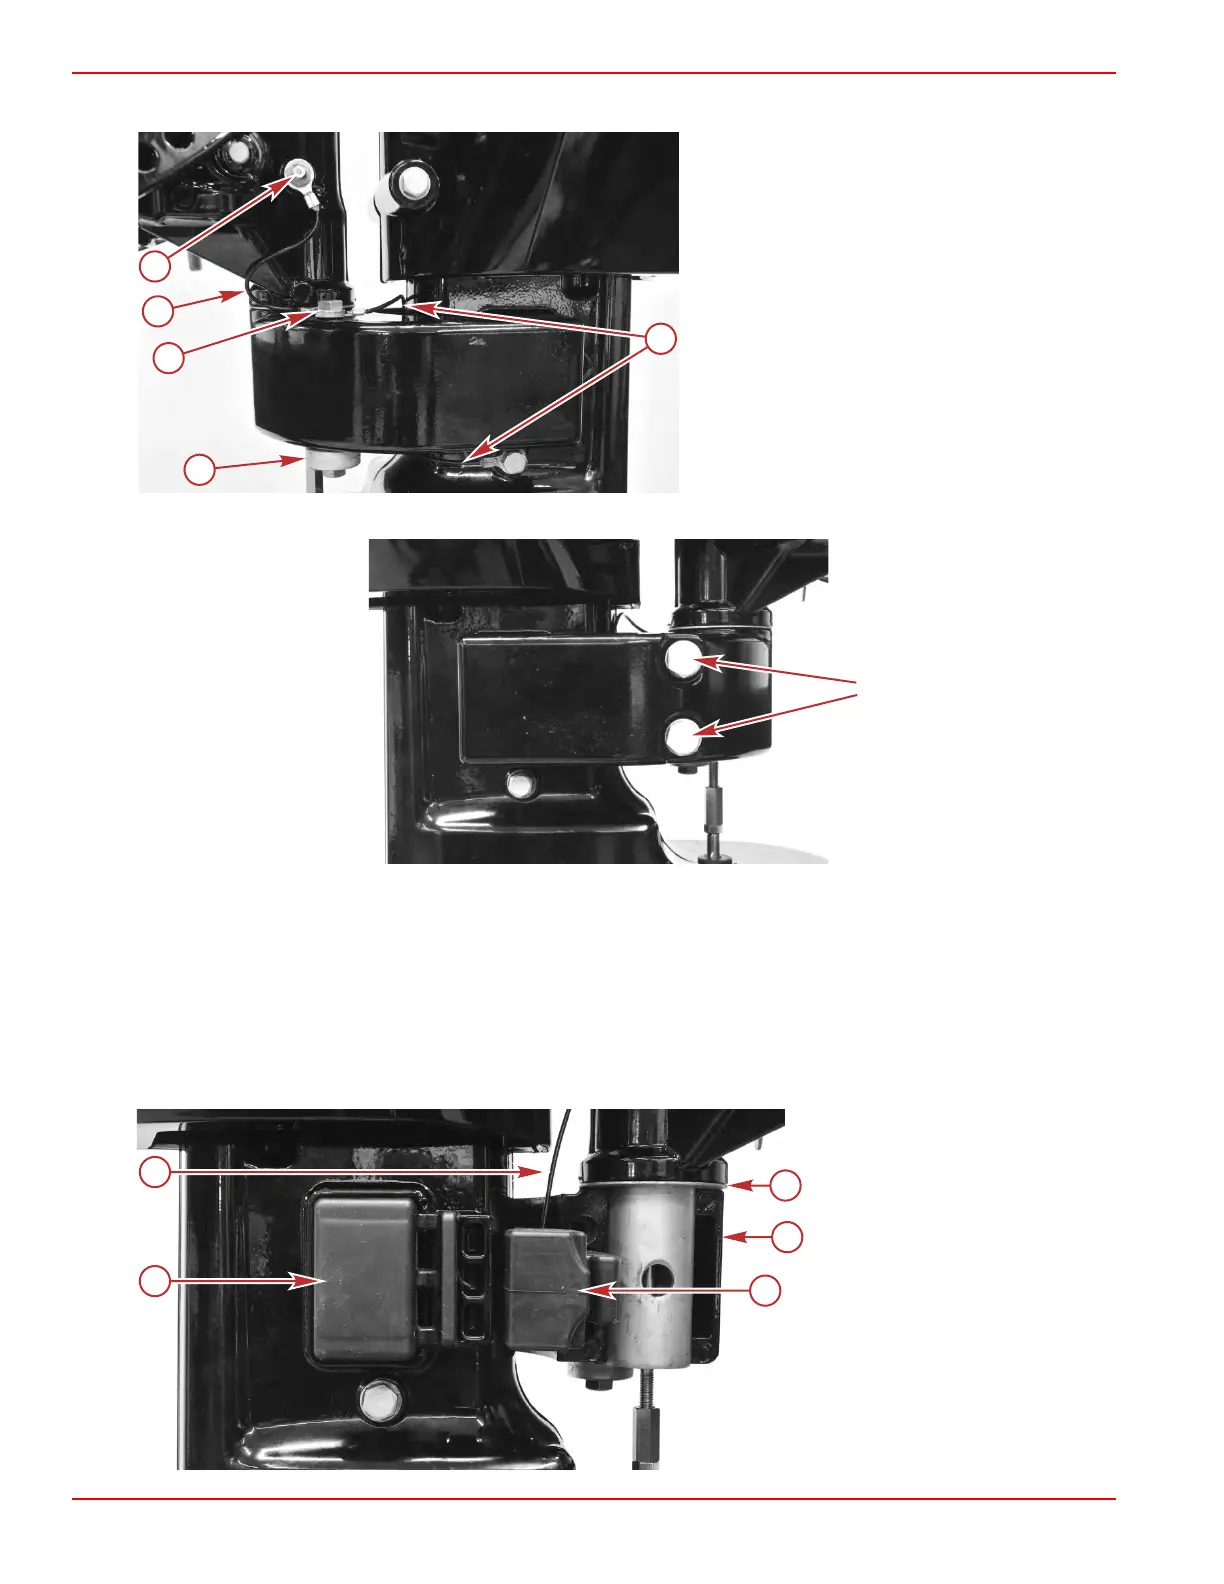
NOTE: Inspect the anode. Replace if necessary; otherwise, it need not be removed.
a - Anode
b - Screw
c - Continuity wire (from swivel bracket to lower
mount)
d - Lubrication fitting
e - Continuity wire (from lower mount to driveshaft
housing)
2. Remove the two screws that attach the two halves of the lower mount bracket.
3. Remove the lower mount bracket halves and three rubber mounts.
4.
Inspect the rubber mounts for wear. Replace, if necessary.
Installation
1. Position the two smaller rubber mounts in the pockets on the driveshaft housing. The third, large rubber mount spans the
two halves of the lower mount bracket. Ensure that the lower continuity wire passes between the large rubber mount and
the driveshaft housing.
2. Ensure that the thrust plate is in place at the end of the tilt tube, and slide the port half of the lower mount bracket into
position.
a - Smaller rubber mount (one on
each side)
b - Lower continuity wire (from
driveshaft housing to lower
mount)
c - Thrust plate
d - Port half of the lower mount
bracket
e - Large rubber mount
Clamp/Swivel Bracket and Driveshaft Housing
Page 5A-24 © 2018 Mercury Marine 90-8M0125265 eng NOVEMBER 2017
 Loading...


