Operating Front Panel Controls
99
OM-296747A | 4/15/24
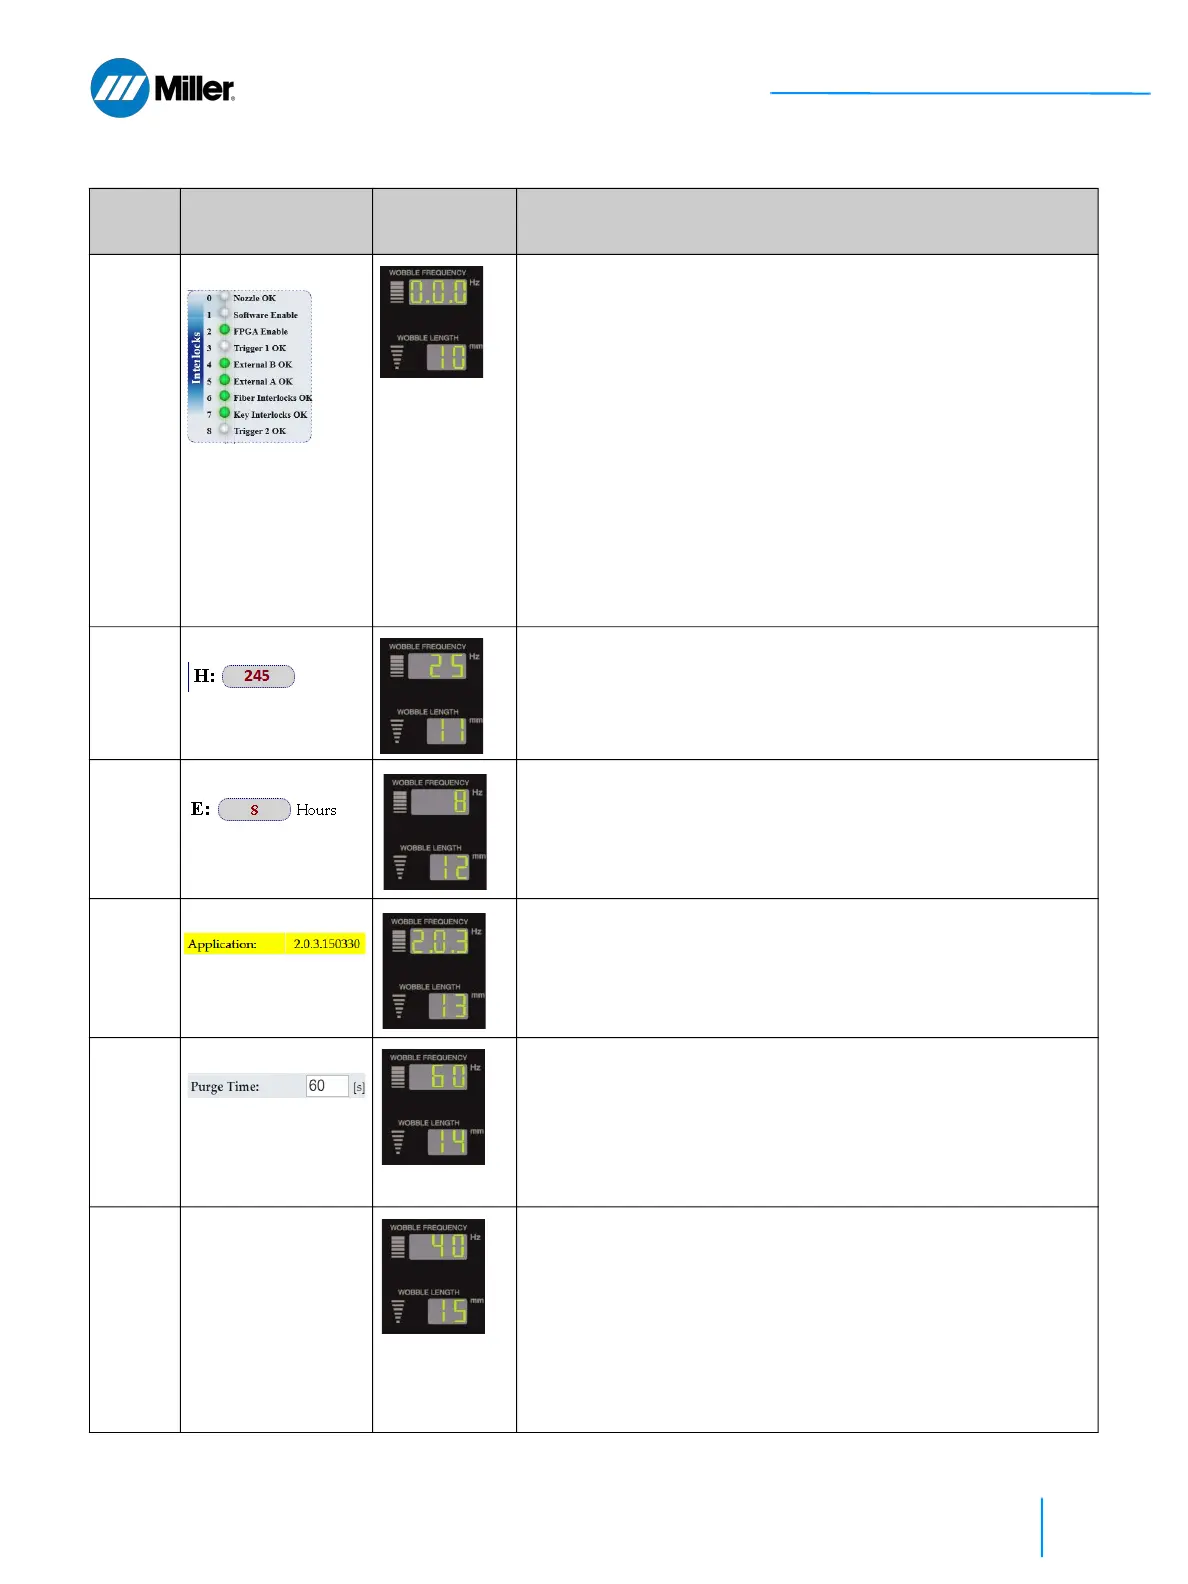
10 Interlock Group 2
See Table 31
[▶133].
1
See NOTE
Displays second group of 3 Interlock states.
1. Turn Wobble Length knob to Code 10.
2. Wobble Frequency display shows interlock state. In this example,
1.1.1 means that all 3 interlocks are OK.
0= NOT OK and 1= OK (interlock satisfied)
Result format, left to right, is specified below.
3rd Digit . 2nd Digit . 1st Digit
(Fiber Interlocks OK).(External A OK).(External B OK)
Interlock Examples:
1 - Fiber cable is properly connected to torch.
1 - Door to laser controlled area is closed. External A/B
interlocks are for door interlocks to laser controlled area, as
an example.
11 Hours On
See Table 31
[▶133].
Displays the device total ON hours (1 count for every 10 hours).
1. Turn Wobble Length knob to Code 11.
2. Wobble Frequency display shows the total number of hours device
was ON. In this example it’s 25 counts or 250 hours.
12 Emission ON Hours
See Table 31
[▶133].
Displays the device total Emission ON hours.
1. Turn Wobble Length knob to Code 12.
2. Wobble Frequency display shows number of hours laser emission
was ON. In this example it’s 8 Emission ON hours.
13 Firmware Revision
Refer to section 9.6
[▶139].
Displays the firmware revision number.
1. Turn Wobble Length knob to Code 13.
2. Wobble Frequency display shows device revision number. In this
example the revision is 2.0.3.
14 Purge Time
Refer to section
9.10 [▶145].
Sets the Purge Time (seconds).
1. Turn Wobble Length knob to Code 14.
2. Turn Wobble Frequency knob to set time 0 to 998 s (default is 60
s). Setting the purge time to 999 will keep purge gas on infinitely
(replicating legacy operation).
3. Press and hold both the Mode Up and Down buttons simultane-
ously for 3 seconds to save setting.
15 Maintenance Time
Refer to section
9.10 [▶145].
Set the maintenance time interval (in emission on hours).
This feature tracks the number of hours the emission has been
on since it was last cleared, and generates a warning when the
number of hours exceeds the threshold set here.
1. Turn Wobble Length knob to Code 15.
2. Turn Wobble Frequency knob clockwise to set the maintenance
time interval emission on hours.
3. Press and hold both the Mode Up and Down buttons simultane-
ously for 3 seconds to save setting.
▼Table 25. Y0 Setup State Program Mode (Continued)
Code # Parameter Front Panel
Displays
Explanation
User Must First Set Program Mode to Y0
 Loading...