Revision:1.0(2023-01-12)
249
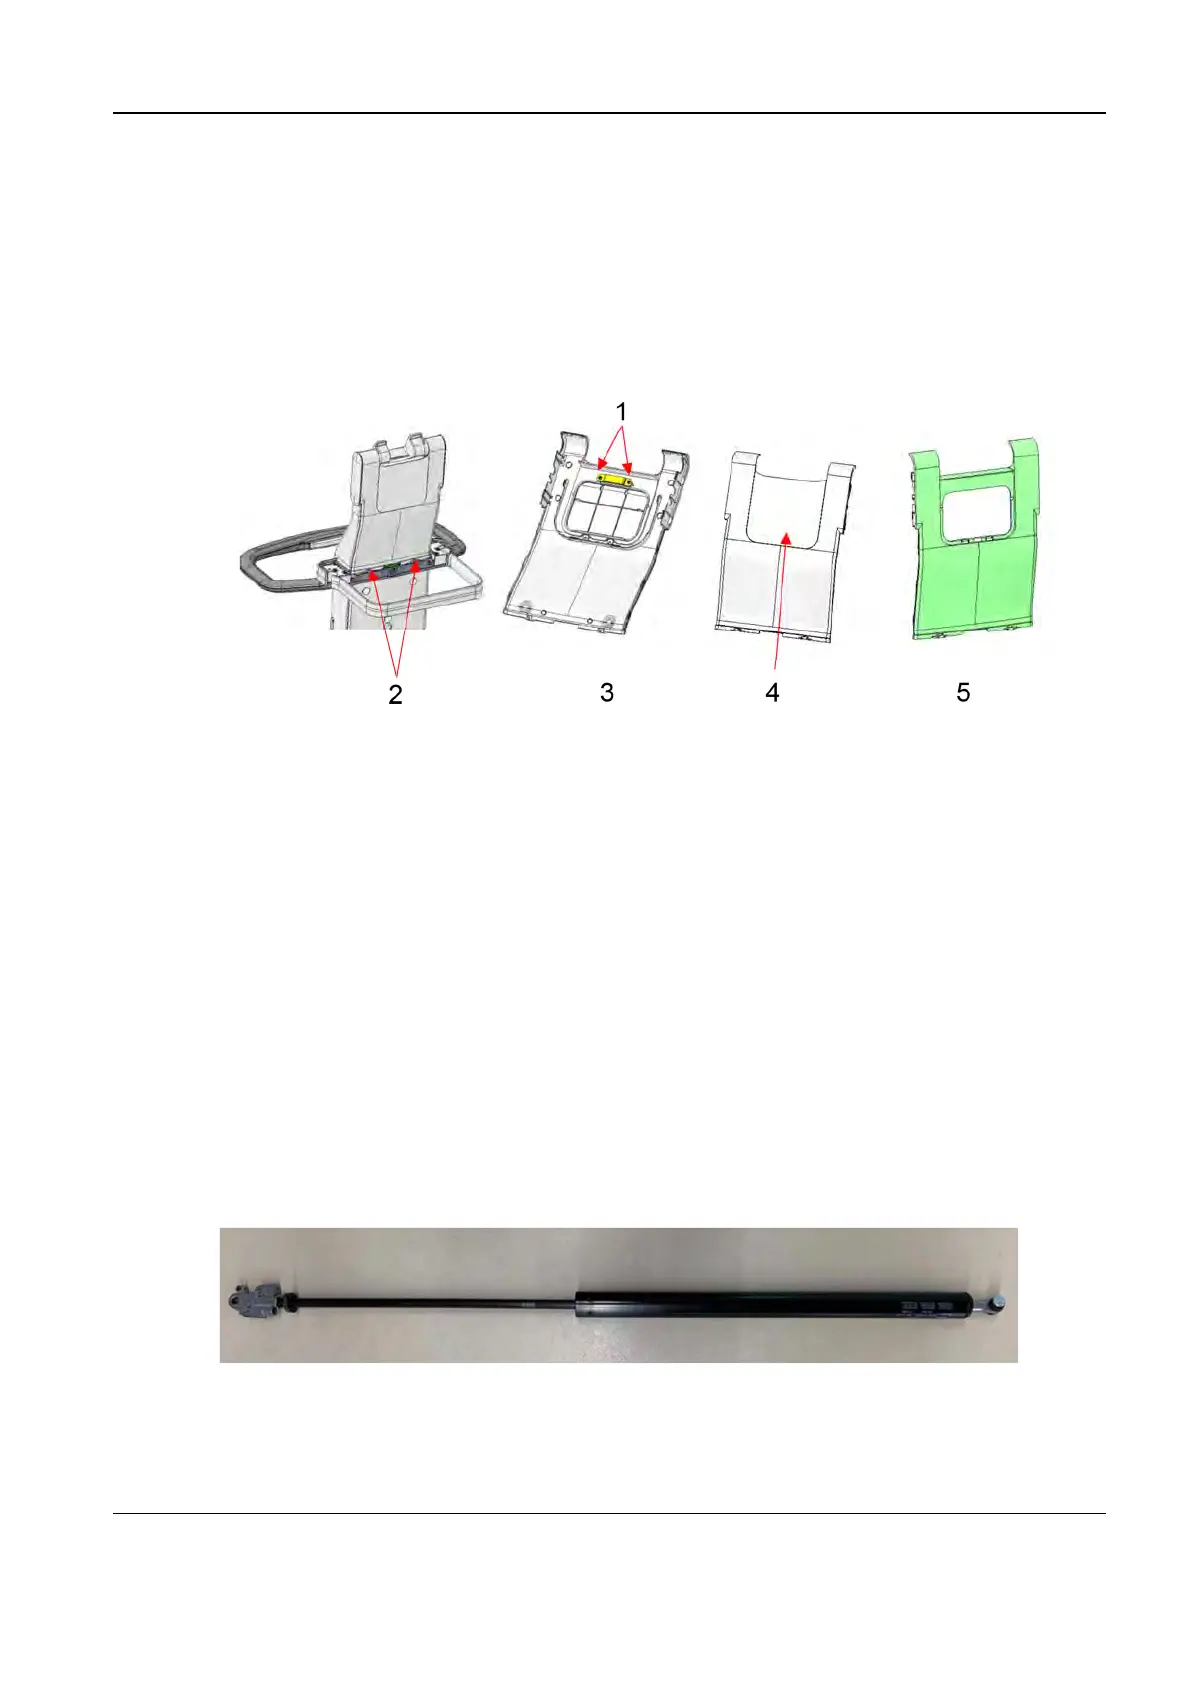
3. Use a flathead screwdriver to pry open from the bottom of the Back Cover for Yoke (the arrow
position in the figure below), and take off the Back Cover for Yoke assembly.
4. Use a crosshead screwdriver to remove the two M3×8 self-tapping screws that connect the
magnet clamping bar, and take off the magnet clamping bar and the magnet.
5. Separate the Back Cover for Yoke from the cable cover to obtain the Back Cover for Yoke.
1 Two M3×8 self-tapping screws
2 Prying position of the flathead screwdriver
3 Magnet clamping bar and magnet
4 Cable cover
5
Back Cover for Yoke
7.30.3 Commissioning and Verification
None
7.31 Gas spring assembly (FRU)
7.31.1 General Information
Diagnostic Ultrasound System
Service Manual
7 FRU Replacement