MOOR INSTRUMENTS moorLDI2 RESEARCH USER MANUAL
85
14.3 DEFINING ROI’s - GENERAL
Click on either a rectangular, circular, polygon or line followed by the Add ROI button
or the
Insert key
, and the choosen ROI will appear on the Flux and Photo images, if in single image
mode, or on all the Flux images if repeat scans are being displayed.
Note that the ROI can be defined with reference to photo images of a repeat scan set if the camera
icon is clicked.
ROI’s can be dragged around the image by clicking on the centre of the box.
The size of ROI is adjusted by dragging the box corners.
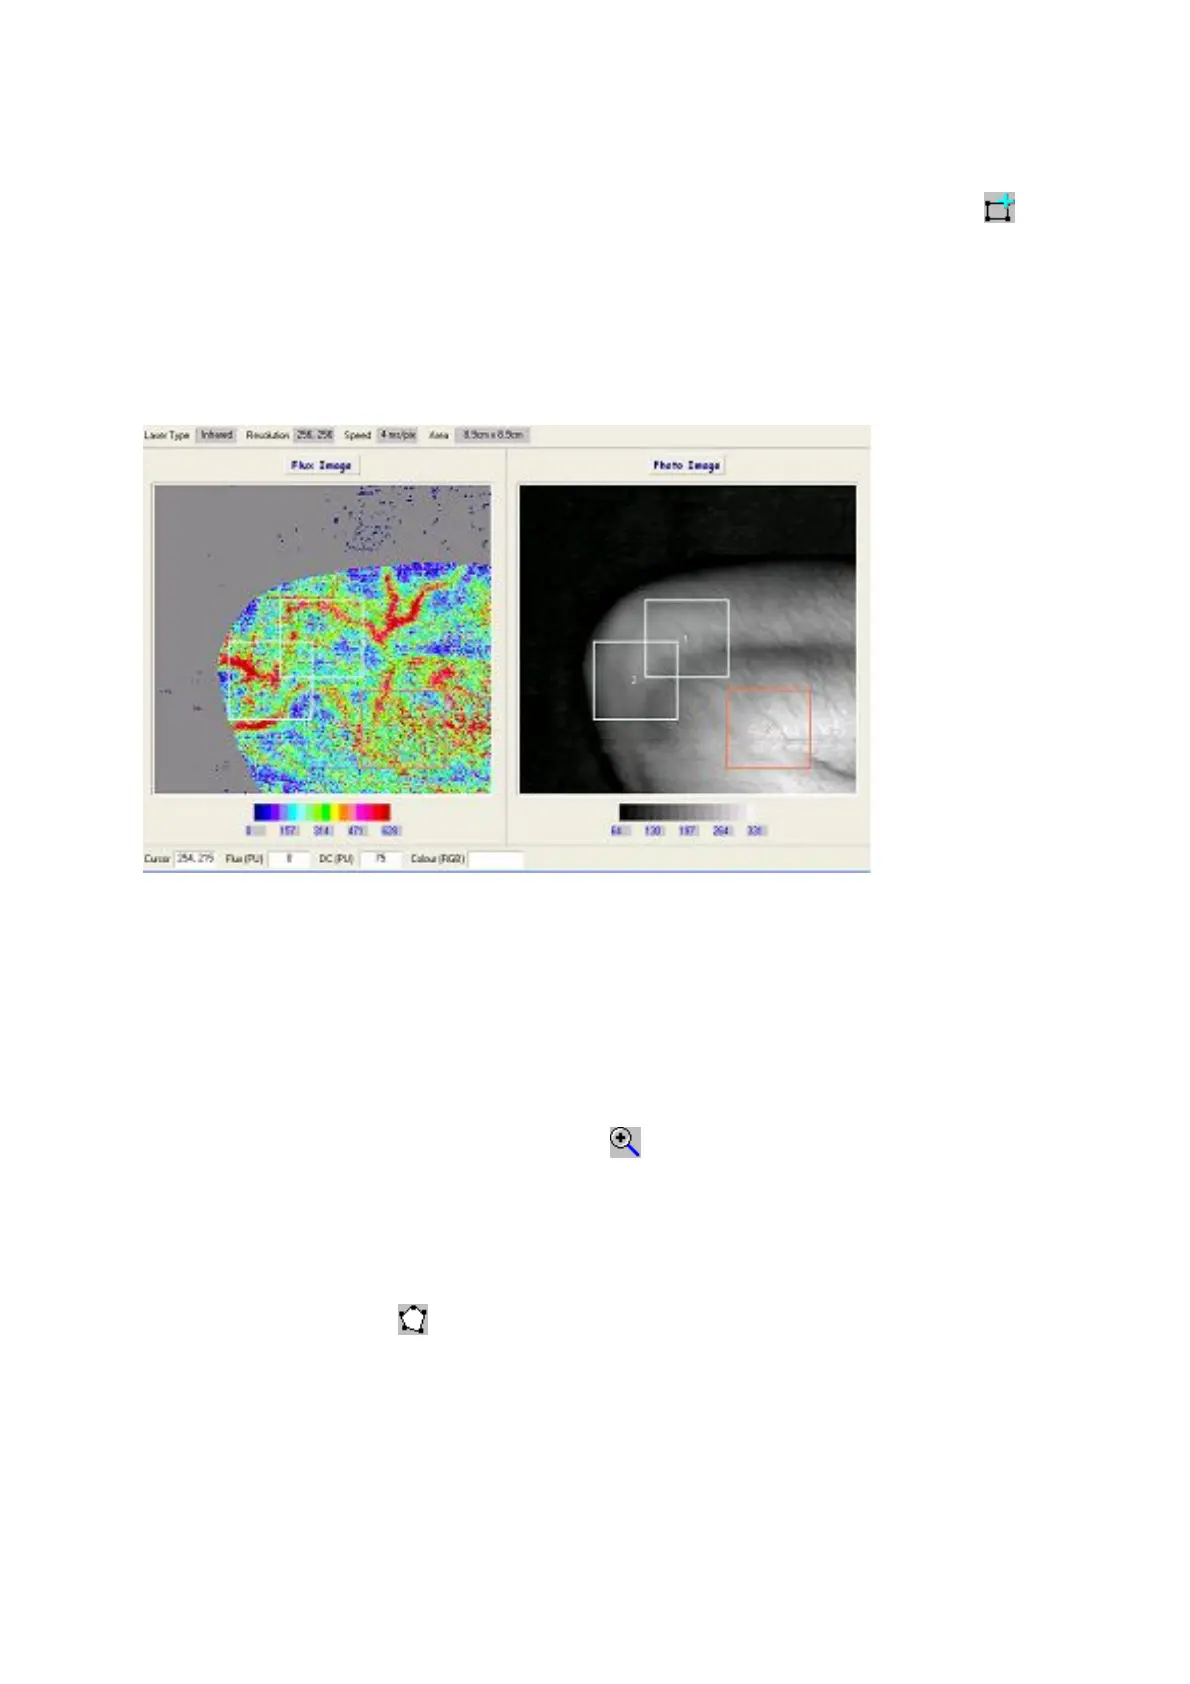
The image above shows 3 ROIs (Regions Of Interest). Each region requires the Add ROI button to be
clicked or the Insert key to be pressed. Note too that when ROI 2 is inserted it is superimposed
(overlaps) the ROI 1. ROI 2 will be the active ROI and it can be dragged and resized. To make ROI 1
the active ROI left click with the screen pointer within the ROI.
14.4 ZOOM IN
This applies only to rectangular ROIs. To look at the ROI region in detail first define a rectangular
ROI and zoom with the + magnifying glass icon . The zoomed ROI will now fill the new image
window. This can be treated as a ‘new’ image allowing all the image processing operations to be
done. It is now possible to mark a ROI in the zoomed image and perform the statistics on this ROI.
14.5 POLYGON ROI
Click on the polygon icon . The polygon now has to be defined by the 'elastic band' technique:
move the cursor to the first position on the edge of the ROI then click. As the cursor is moved a line
radiates from the first point to the cursor position. When the cursor is placed at the next position on
the ROI boundary click again. Follow this procedure until the ROI is outlined, positioning the cursor
on or near the first point to complete the polygon or right click to complete the polygon. The
maximum number of points on the polygon is 40.
The polygon can be dragged around the image by clicking on the centre of the polygon.