Open the cable cover on the side where you
wish to install the additional control.
When the control is installed on the right
side, the cover of the headset socket must
also be removed. To this end, use a
screwdriver to pry away the clip on the right
side and swivel the cover out to the front.
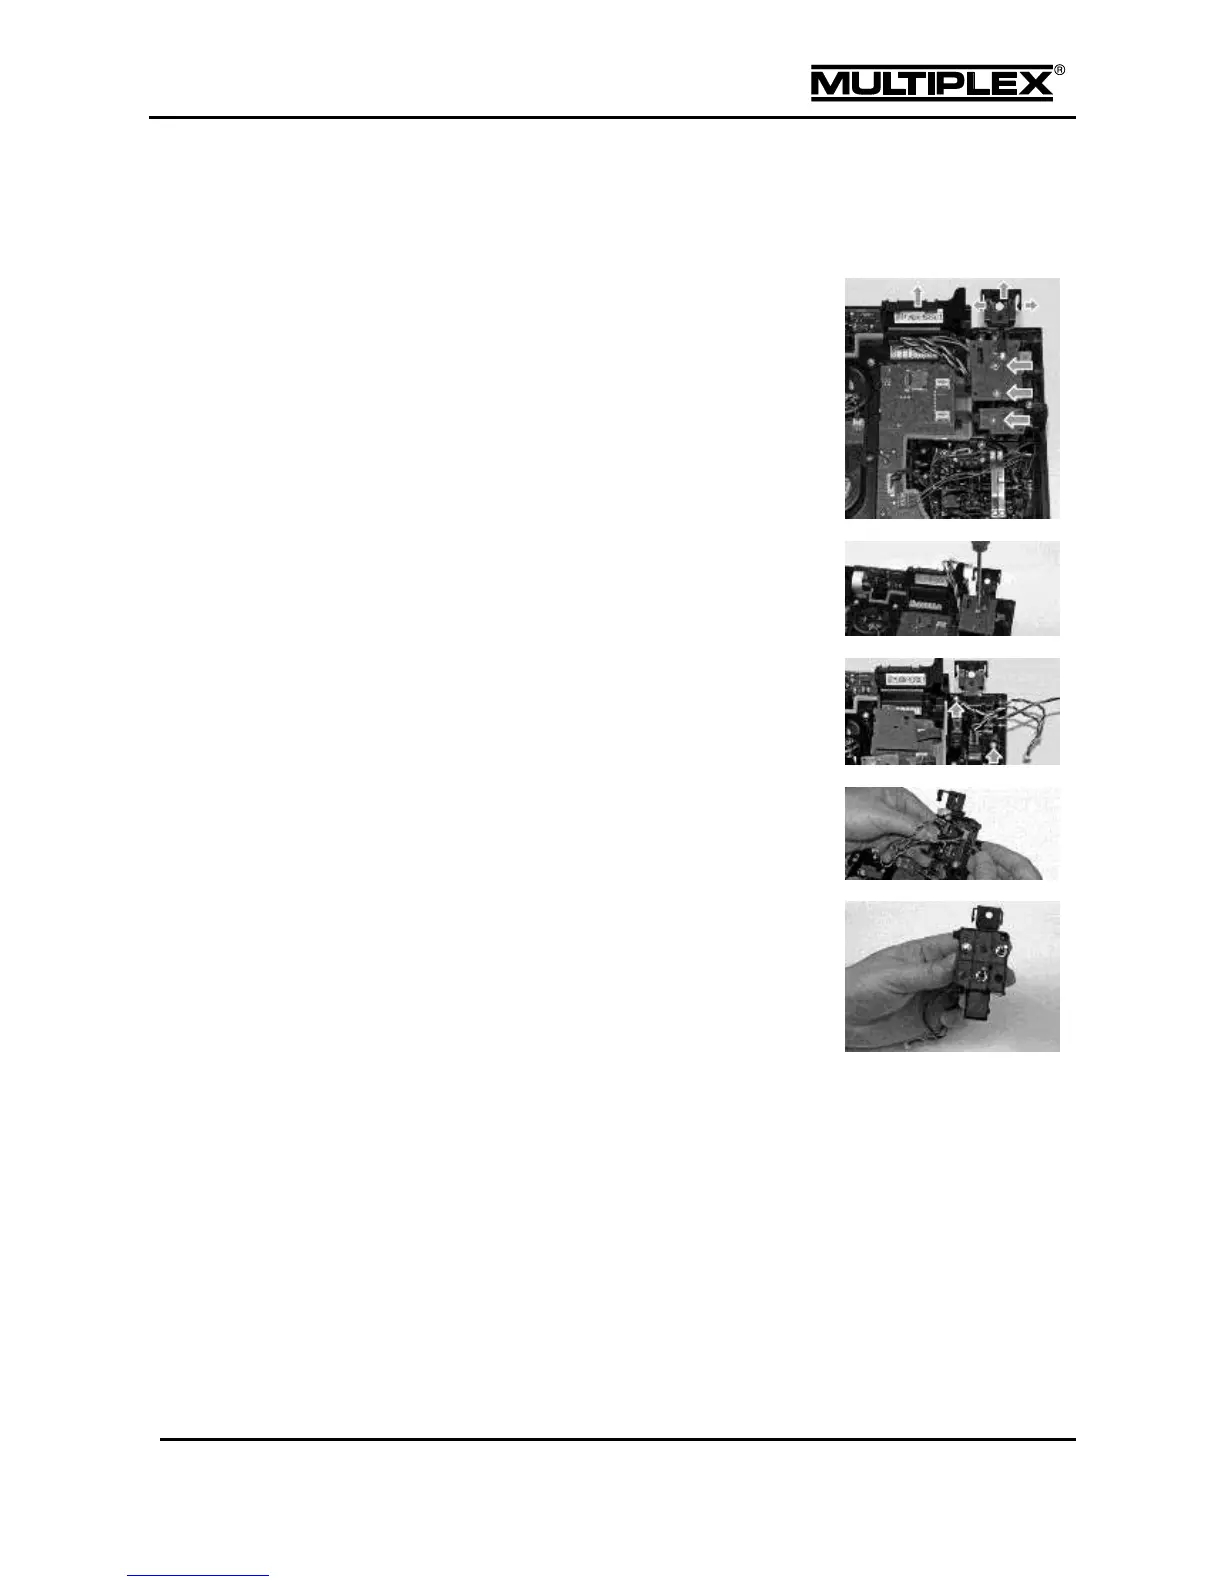
Loosen the 2 screws on the circuit boards
on top of the switch tray using the TORX
screwdriver.
Lift off the circuit boards and place them
nearby. Remove the two screws on the
switch tray.
Lift out the switch tray and remove the blind
plugs from the required installation slots.
Install the controls. Observe the installation
direction for dip-switches: The red cable
must face the transmitter front.
Replace the switch tray and secure it using the screws.
Replace the circuit boards and secure them using the screws. Replace
the cover over the headset socket and make sure that the clips snap into
place.
Refit the connectors of the controls.
Close the cap on the slots.
Insert the battery and close the transmitter.