- 159 -
Using a Web Browser to Configure the Network Setup
4
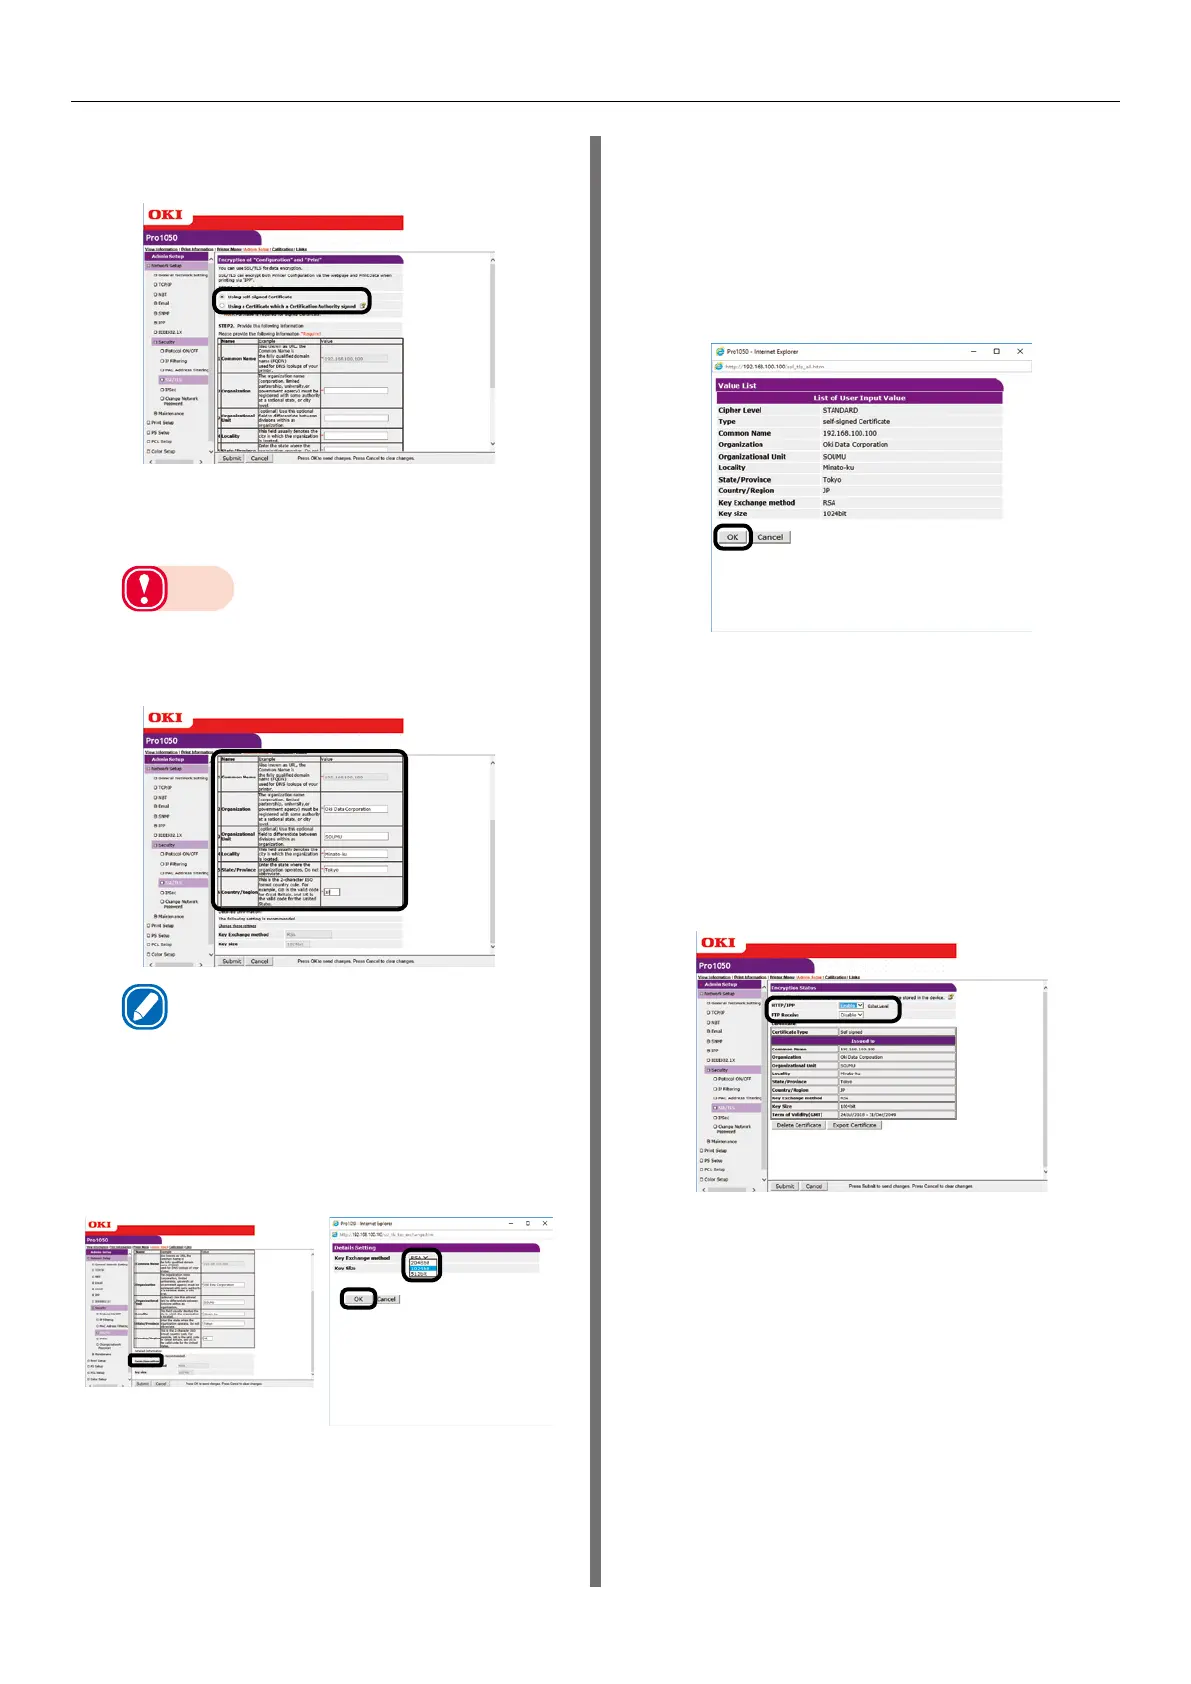
Select the type of the certificate to
create in [Step 1].
5
Enter information for the Common
Name, Organization, and other items.
Note
z
If you selected "Use a certificate issued by a
certificate authority", perform detailed content
input and other certificate issuing procedures in
accordance with issuing authority procedures.
Memo
z
If you selected a self-signed certificate, the printer's
IP address will be set for [Common Name].
If you want to change the key exchange
method and key size, click [Key Exchange
method]. (The initial default setting is RSA,
1024 bits. Normally, you should use this
setting without modifying it.)
6
Click [Submit].
Self-signed Certificate
To create a CA certificate, advance to "CA
Certificate" (P.160).
7
This displays the input.
Check the contents, and then click [OK].
This creates the certificate.
This completes self-signed certificate
creation.
Settings are saved on the printer and the
network function is restarted.
8
Perform steps 1 through 3 of this
procedure to display the encryption
(SSL/TLS) setup screen, and then
configure protocol settings to enable
encryption.
9
Click [Submit].
In this case, advance to "Usage Method"
(P.160).