7-10 Service Manual
XZAC4219-05
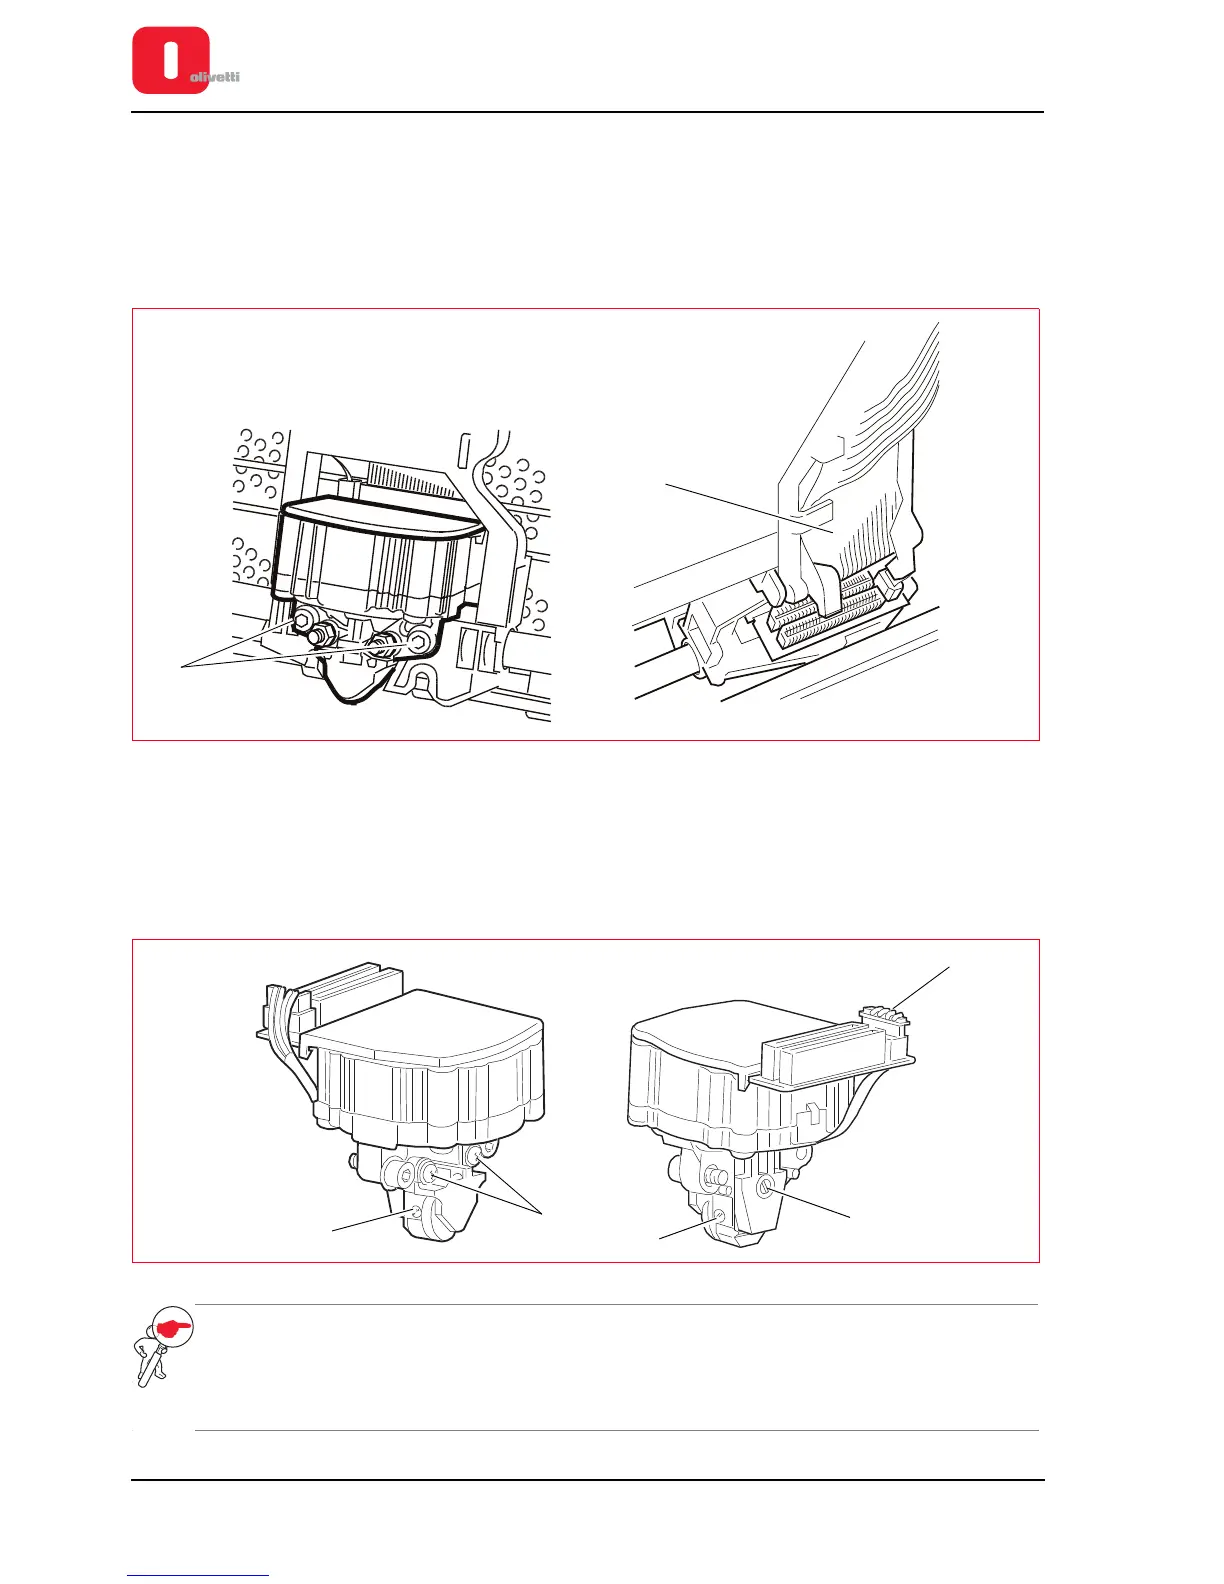
Printhead disassembly/reassembly
1. Open the top cover and lift the upper mechanical assy.
2. Removing the ribbon cartridge from the printer. See the section “REPLACING THE RIBBON CARTRIDGE” on
page 3 - 8.
3. Back off the two lock-screws (1) of the printhead.
4. Partially slide out the printhead from the carriage and disconnect the two flat cables (2) from the connectors on
the printhead.
Figure 7 - 11 Removing the printhead of the carriage
To disassemble the components of the printhead:
1. Unscrew the two front screws (2) and unmount the probe roller
2. Unscrew the two side screws (3) and unmount the ribbon protection flap.
3. Unscrew the rear screw (4), disconnect the connector (5) and remove the paper photosensor.
Figure 7 - 12 Disassembling the printhead
NOTE: to insert the flat cables into the printhead connectors, free them from the cable guiding block, then
block them again after insertion. During the phase for reassembling the components of the
printhead carry out the adjustments: “Adjusting Paper Photosensor” on page 6 - 8 , “Adjusting the
print bar (where torsion bar present)” on page 6 - 4 and “Adjusting the print bar (where torsion bar
absent)” on page 6 - 5.