7-26 Service Manual
XZAC4219-05
Fan power supply unit disassembly/reassembly
1. Disassembling the casing. See the section “Casing disassembly/reassembly” on page 7 - 4.
2. Remove the upper mechanical assy. See the section “Mechanical assy disassembly/reassembly” on page 7 - 6.
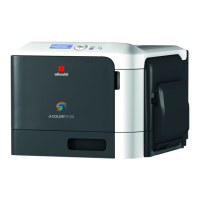
3. Back off the two lock-screws (1) of the fan.
4. Disconnect the power cord (2) and extract the power supply unit fan.
Figure 7 - 34 Disassembling the fan power supply unit
Power supply unit disassembly/reassembly
NOTE: If the fuse inside the power supply unit has blown, replace the entire unit as some of the
components on the power supply unit board could be faulty.
1. Disassembling the casing. See the section “Casing disassembly/reassembly” on page 7 - 4.
2. Disassembling the mechanical assy. See the section “Mechanical assy disassembly/reassembly” on page 7 - 6.
3. Detach all the connections to the motherboard and disassemble the mechanical assy. See the Figure 7 - 25 for
the printers with scanner or see the Figure 7 - 29 for the printers with serial number 8.xxx.xxx and 1.xxx.xxx.
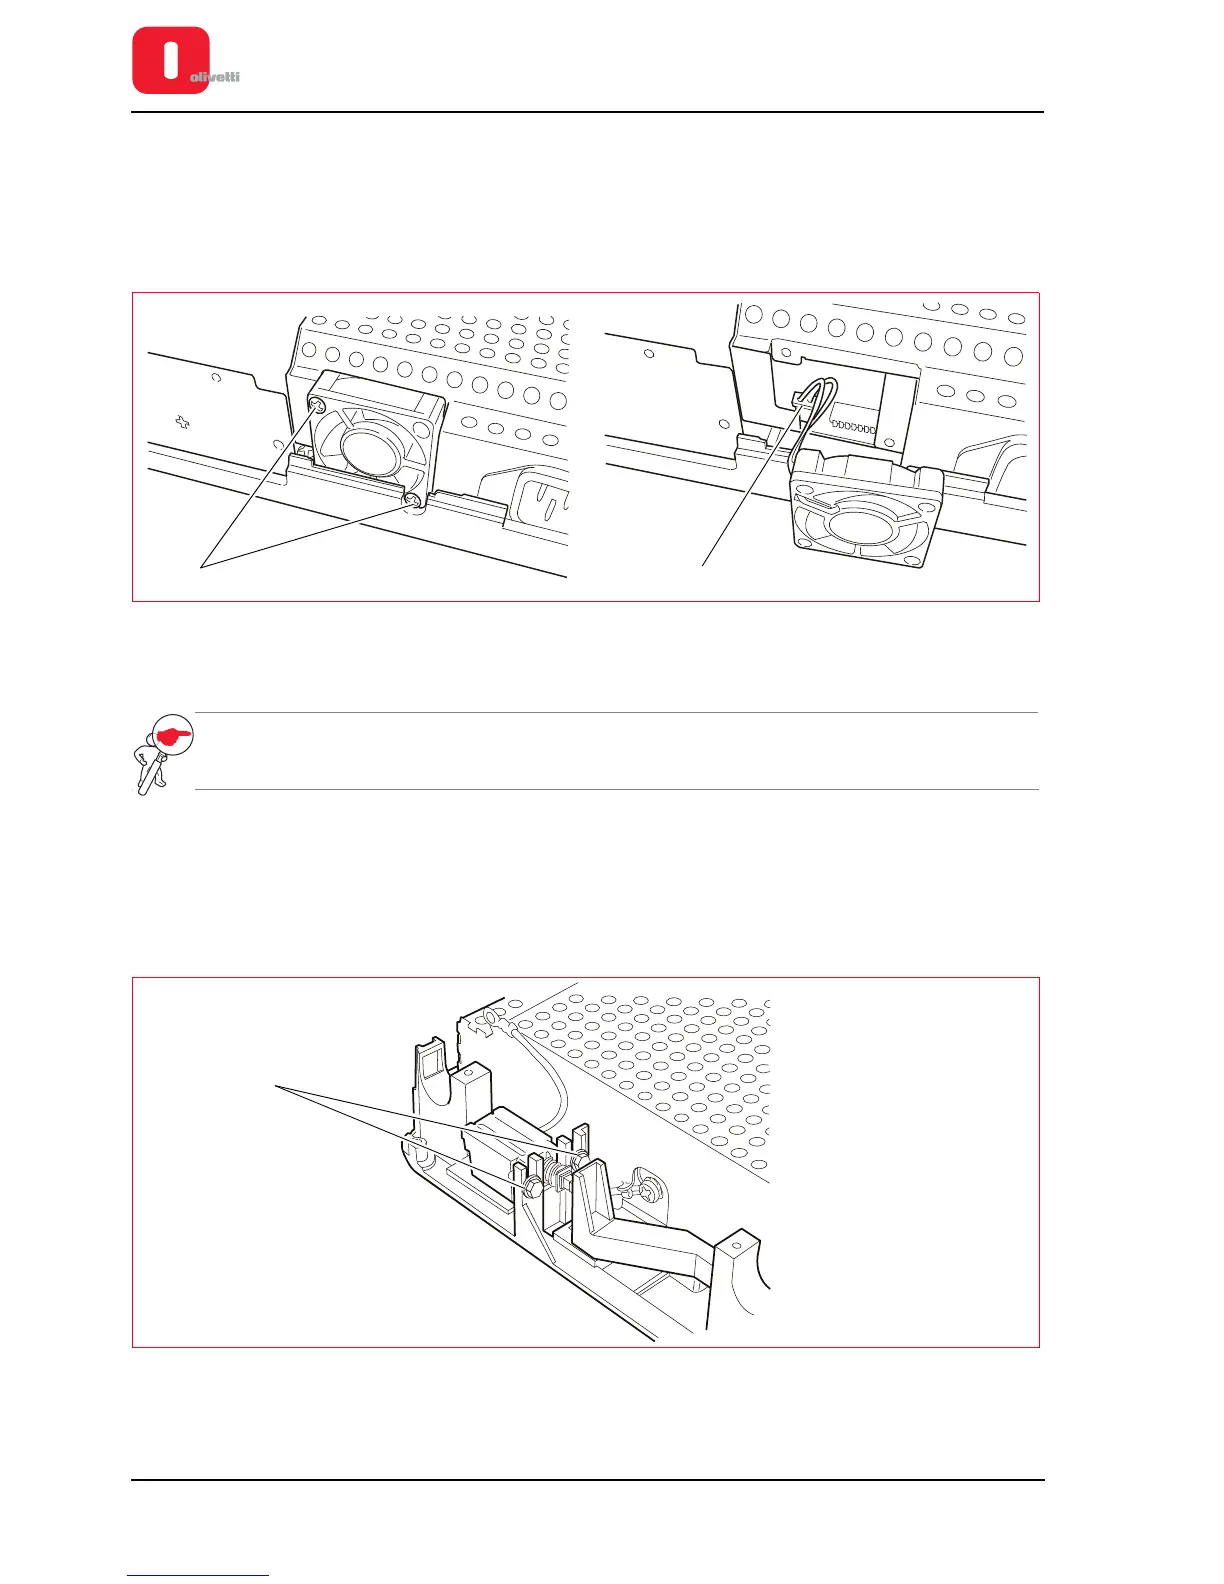
4. Loosen the 2 lock-screws (1) of the switch.
Figure 7 - 35 Fastening screws for switch