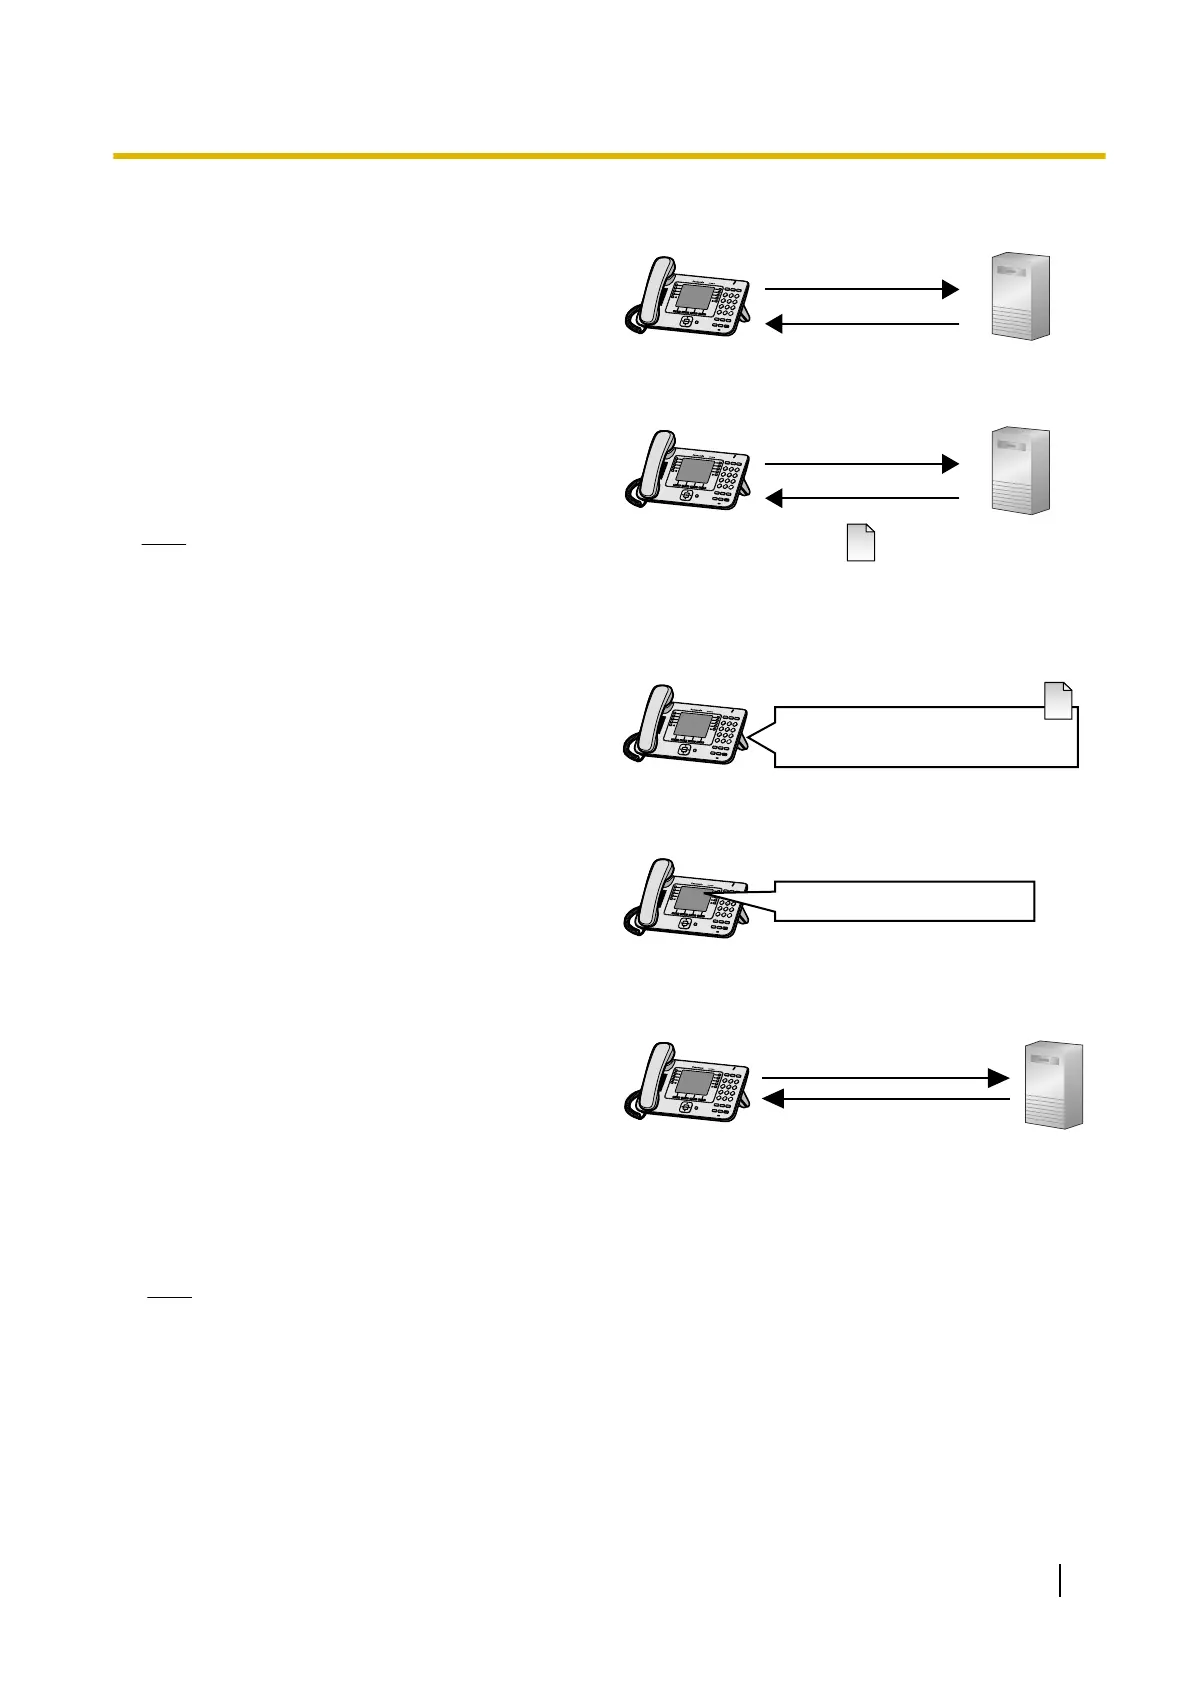
The pre-provisioning process
Step 1
Connect the
unit to the network, and turn the power
on. The unit is assigned an IP address by the DHCP
server, and also receives the TFTP server address
from the DHCP server using DHCP server option
66.
DHCP Server
Option 66
SIP Phone
Power on
TFTP Address
192.168.0.130
Step 2
The unit downloads the configuration file for
pre-provisioning from the TFTP server:
tftp://192.168.0.130/KX-UT248.cfg
Note
• The file name may be different depending
on the phone being used. For example, the
file name for KX-UT113 users will be:
tftp://192.168.0.130/KX-UT113.cfg
TFTP ServerSIP Phone
KX-UT248.cfg
tftp://192.168.0.130/
Step 3
The URL of the server where the configuration file
for provisioning
is stored (provisioning server) is set
to the unit:
http://provisioning.example.com/Panasonic/
Config{MAC}.cfg
SIP Phone KX-UT248.cfg
http://provisioning.example.com/
Panasonic/Config0080F0123456.cfg
Step 4
The unit will display a message indicating
pre-provisioning is complete.
SIP Phone
"Complete Pre-Provisioning"
Step 5
When the message is displayed, turn off the unit’s
power, then turn it back on.
The
unit may restart automatically depending on the
configuration file programming (® see
"OPTION66_REBOOT" in 5.3.5 Provisioning
Settings).
When the unit is distributed to end users and started
up in real circumstances, provisioning will be
performed correctly.
SIP Phone
Provisioning
Server
Config0080F0123456.cfg
http://provisioning.example.com/
Panasonic/Config0080F0123456.cfg
Note
• This example describes the case when only one unit is connected. However, multiple units can be
configured through the same procedure without changing any settings, because the MAC address is
specified by the {MAC} macro.
Document Version 2013-03 Administrator Guide 37
2.1.4 Pre-provisioning Setting Example
 Loading...