3
9929399 R01 - 2018-2019 RANGER XP/ CREW 900/1000 Service Manual
© Copyright Polaris Industries Inc.
3.85
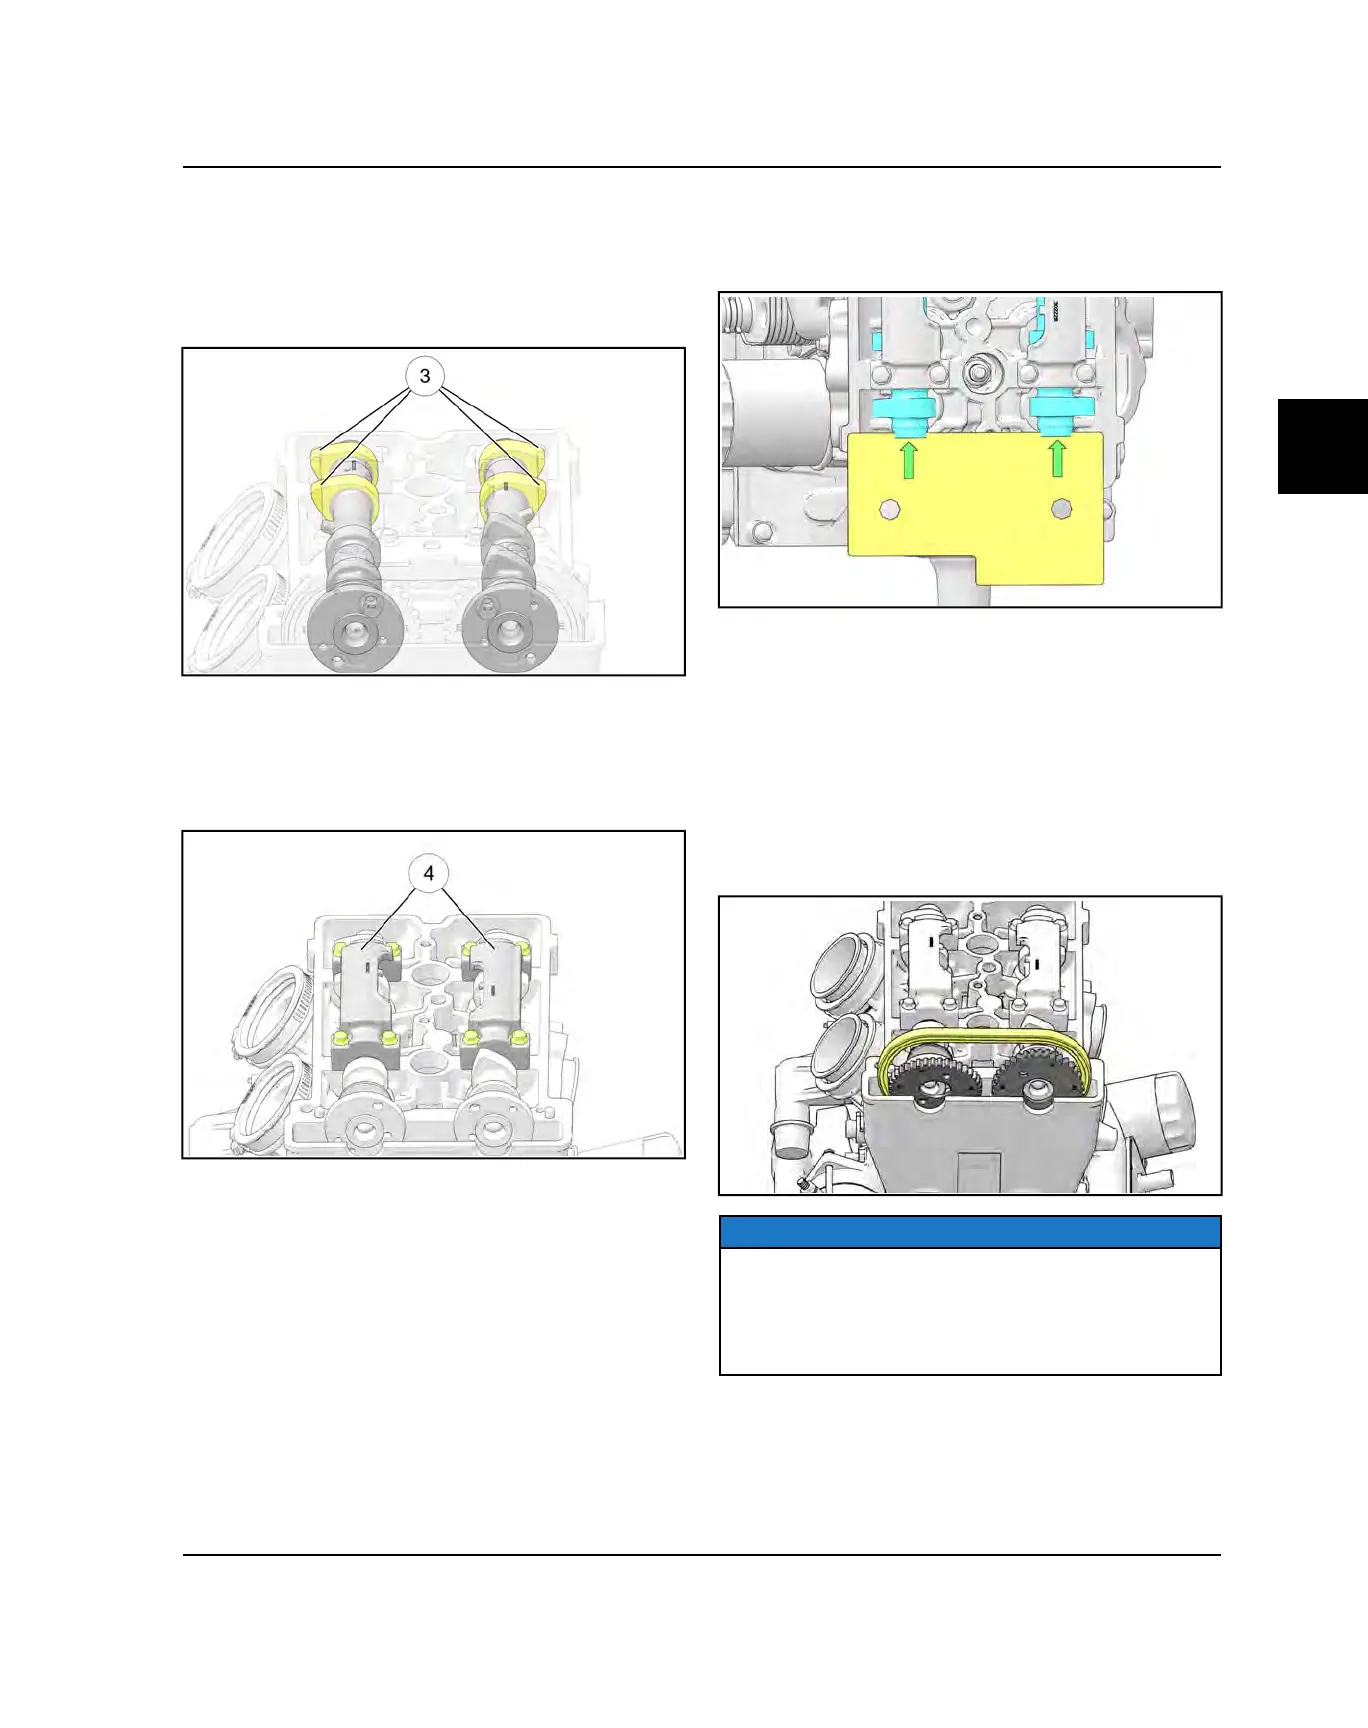
3. Lubricate all camshaft lobes and bearing journal
surfaces with Polaris PS-4 engine oil prior to
installation.
4. Carefully install the camshafts into the cylinder head.
The PTO camshaft lobes
e
should face out as
shown.
5. Carefully install the rear camshaft carriers onto the
camshafts. Carrier openings should face each other
when installed properly.
6. Install the four bolts that retain each rear camshaft
carrier
r
and tighten the bolts evenly until snug.
7. Install the Cylinder Holding & Camshaft Timing Plate
(PU-50563) into the end of camshafts as shown. Use
a 13/16” open-end wrench to rotate camshafts slightly
if needed.
8. Verify TDC mark on the flywheel is still properly
aligned (see Step 1).
9. Pull cam chain upward, making sure it is engaged
with the drive sprocket on the crankshaft.
10.While lifting the cam chain up, engage the cam
sprockets into the chain with the “I” and “E” marks
facing out.
11. Install the sprockets onto the camshafts and align the
sprocket marks with the valve cover gasket surface
(see sprocket timing illustration).
NOTICE
Intake cam sprocket should have “I” marks aligned with
gasket surface and the exhaust cam sprocket should
have “E” marks aligned with gasket surface.
Install the exhaust cam sprocket first (opposite the cam
chain tensioner) to ensure proper cam timing.
ENGINE / COOLING / HVAC SYSTEM
 Loading...