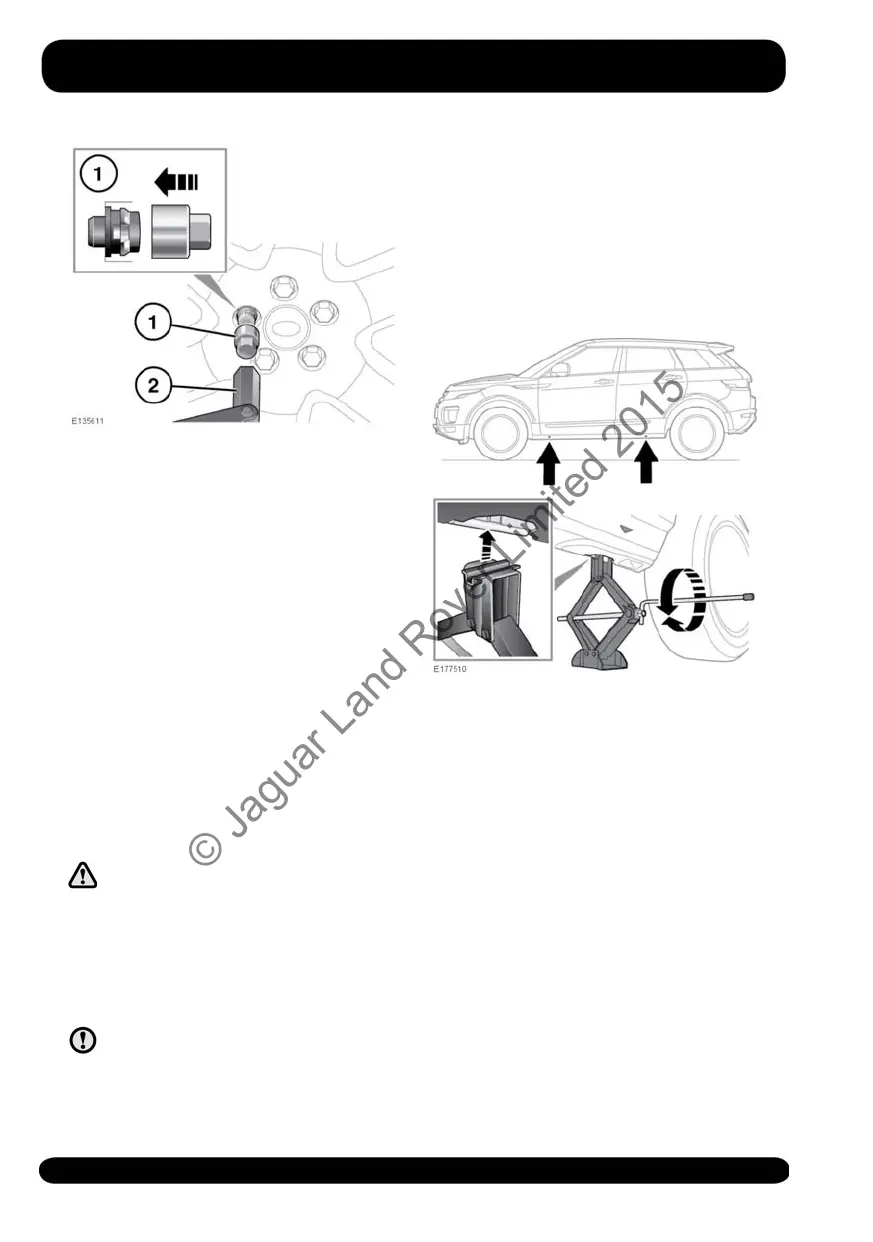
To release:
1. Insert the wheel nut adaptor into the
locking wheel nut, making sure that it
is fully engaged.
2. Locate the wheel brace over the
adaptor and unscrew the wheel nut
half a turn counter-clockwise.
3. After raising the vehicle on the jack,
remove the locking wheel nut.
Note: When the vehicle is first supplied,
the wheel nut adaptor may be stored in
the glovebox. If this is the case, the wheel
nut adaptor must be moved to its correct
storage position in the loadspace, as soon
as possible. See 252, TOOL KIT.
WHEEL CHANGING
Before raising the vehicle, refer
to all warnings at the beginning
of this section of the Owner’s
Handbook.
Before changing a wheel, read and
observe the warnings, see 251, WHEEL
CHANGING SAFETY.
Jack up the vehicle using only the
jacking points described, or
damage to the vehicle could occur.
Note: Your vehicle may be fitted with a
tilt sensor which activates the alarm if the
vehicle is tilted in any direction after it has
been locked. To lock the doors while
changing the wheel, and avoid the alarm
activating, the tilt sensor can be
temporarily disabled. See 18, TILT
SENSOR.
1. Before raising the vehicle, use the
wheel nut brace to slacken the wheel
nuts of the wheel to be replaced, by
half a turn counter-clockwise.
2. Locate the jack under the relevant
jacking point.
Note: Do not allow the jack to contact
the sill at any other point as damage
may result.
Note: The Sports pack sills include
arrows to identify jacking points.
3. Unfold the cranking handle from its
stowed position on the jack. Fit the
wheel nut brace to the end of the
cranking lever.
254
Wheel changing
© Jaguar Land Rover Limited 2015