Rockwell Automation Publication 450L-UM001D-EN-P - December 2019 33
Safety Function Chapter 4
Table 6 on pag e 36 shows the reaction of the OSSD outputs with Fixed Blanking
de-activated and activated for different use cases.
Teach-in Blanking Procedure
The procedure to teach a new fixed blanked object is similar to the procedure to
conduct a confirmation of a changed configuration (Confirmation of a New
System Configuration on page 64) with the help of the optical push button.
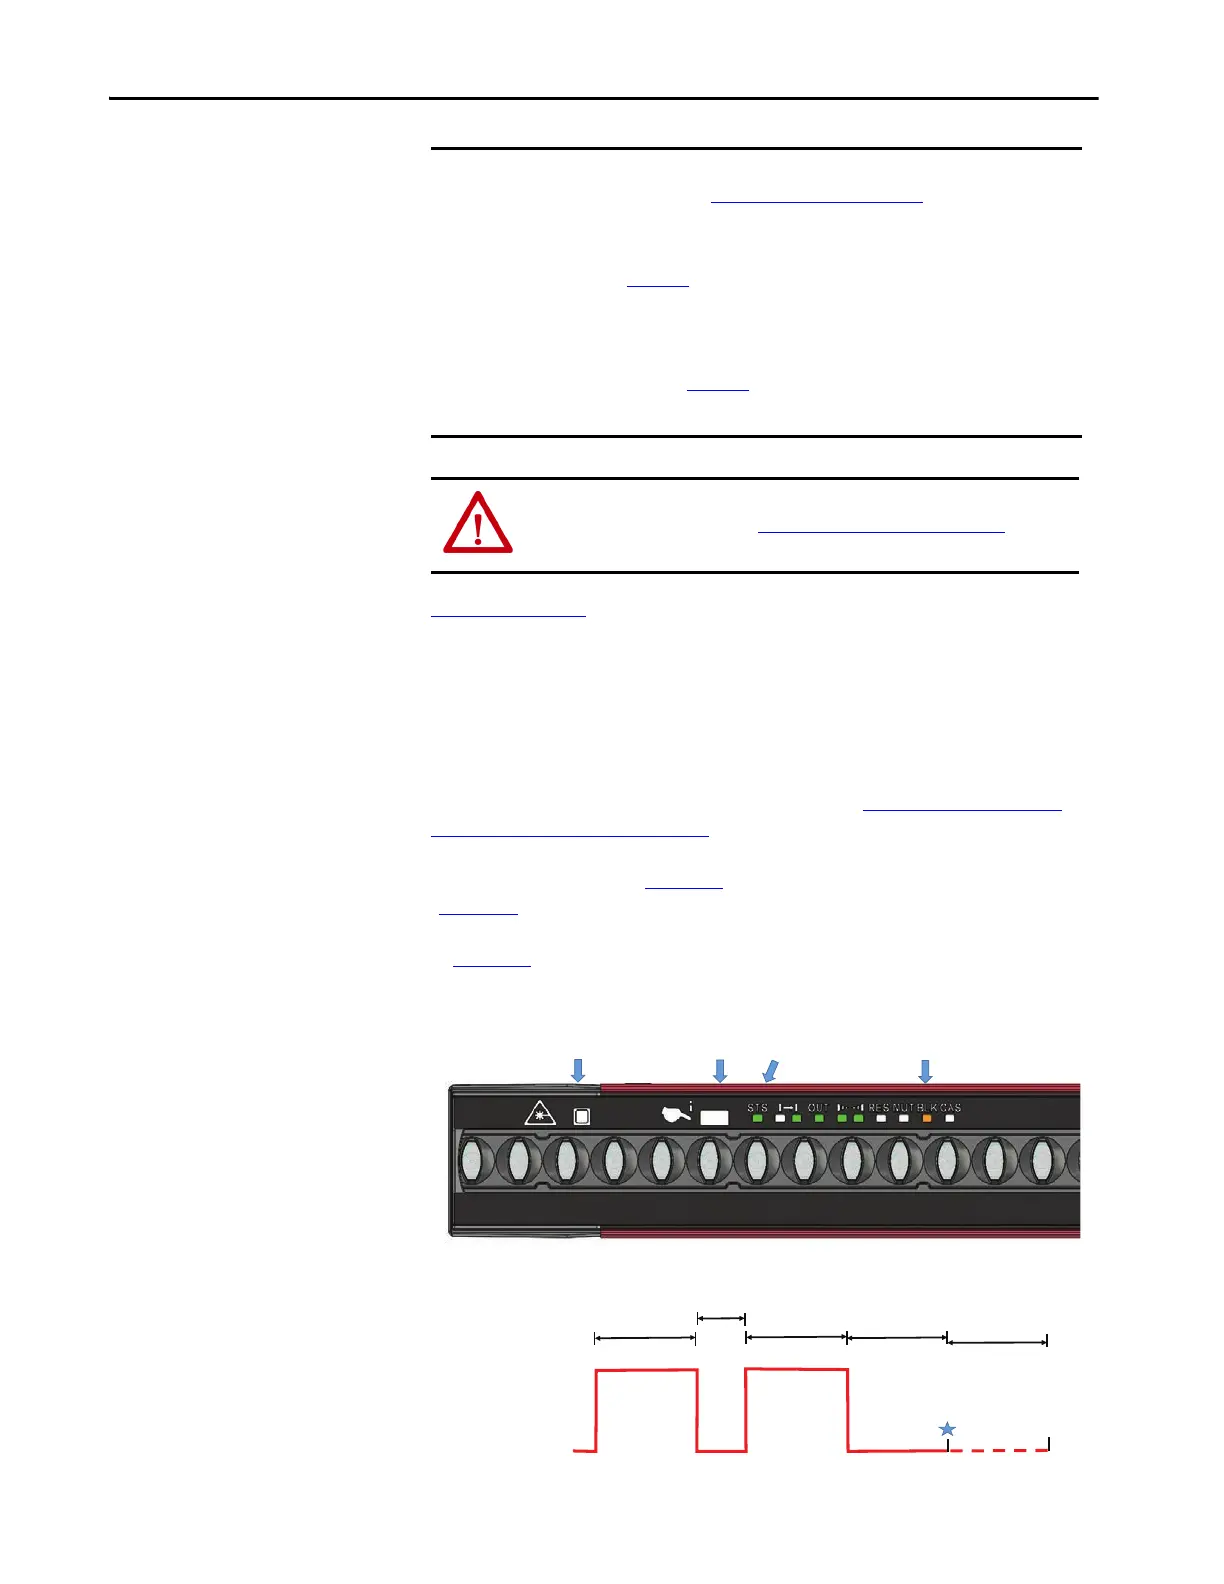
The optical push button (Figure 12
) has to be activated two times for 5 seconds
(Figure 13
). Between the two activations, a break of a maximum of 2 seconds is
allowed. The following two descriptions describe the same process that is shown
in Figure 13
.
Figure 12 - Position of Optical Push Button, ILAS, and Status Indicators
Figure 13 - Teach-In Blanking Configuration Process
IMPORTANT Fully test the protective field with the provided test rods according to the
instructions given in Regular Inspection on page 123
.
The configuration and activation of fixed blanking creates a hole to the left
and/or right of the object in the protective field. (Objects are indicated in
black in Figure 11
.) If the fixed object that is in the protective field does not
completely fill the area between the GuardShield transmitter and receiver, it
is necessary to obstruct access to the hazard by additional means. Hard
guarding the open area can accomplish this obstruction. Open areas are
indicated blue in Figure 11
.
Hard guards refer to mechanical barriers.
ATTENTION: A fixed blanking zone changes the resolution of the 450L-E
safety light curtain system (see Resolution with Blanking on page 37
). This
change must be considered when calculating the safety distance.
ILAS
Optical Push
Button
<STS> Status
Indication
<BLK> Blanking
Indication
Optical Push
Button Activated
> 5s
Optical Push
Button Deactivated
> 5s 5s
3s
< 2s
1
3
452
67 8
 Loading...