Section 3: Operation and Configuration
Page 3-36 HR2 Series Operator Manual
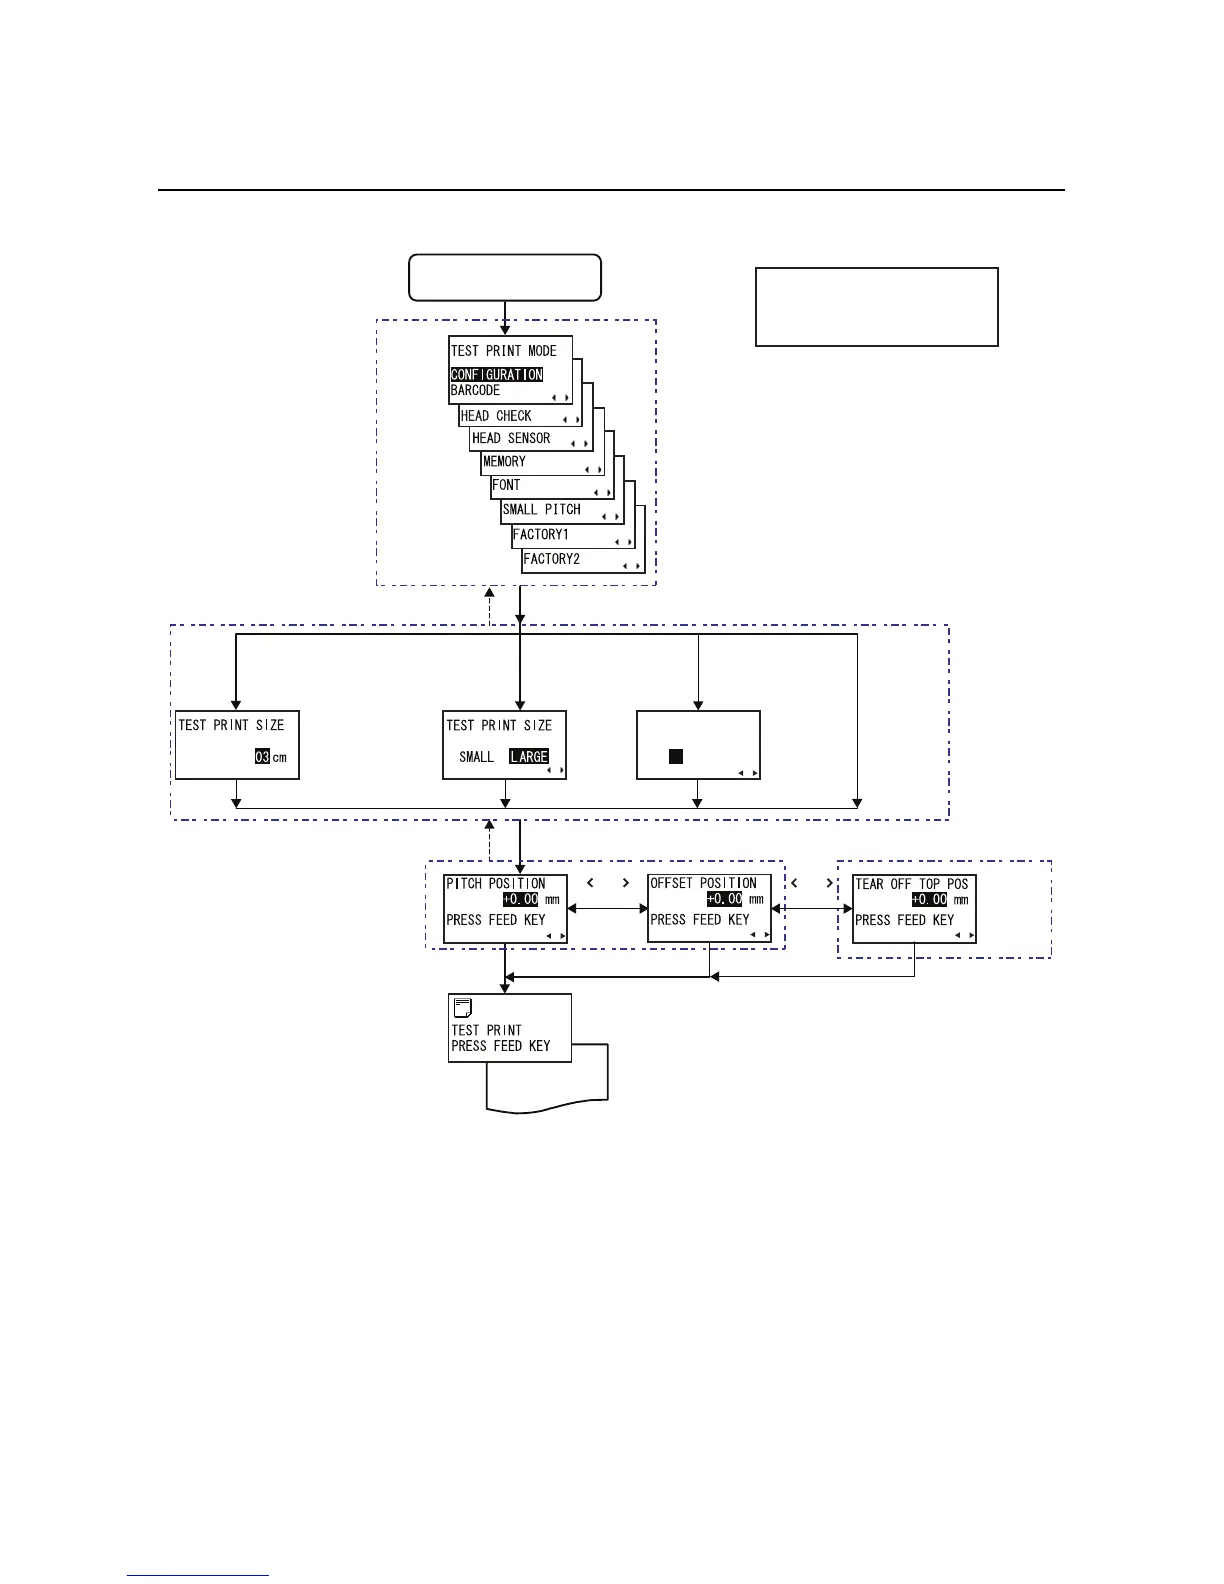
3.13 TEST PRINT MODE
The Test Print Mode offers nine different printer status labels for troubleshooting.
1. Make sure the Power of the printer is turned off (O).
2. While pressing the FEED button, switch the Power to On (I).
3. TEST PRINT MODE is displayed on the screen. Press the FEED button repeatedly will switch to the next
setting options as shown above. To return to the previous setting option, press LINE button.
4. When the desired setting option is displayed, press +, - or < > arrow buttons to select the item or to set the
value and then press FEED button to save the setting.
Test print
FEED button
FEED
button
LINE button
FEED button
or
button
FEED button FEED button
FEED button
LINE button
FEED button
When the
above
TEST
PRINT was
set as
FONT or
MEMORY
Press FEED button
+
Switch Power to On “ I ”
When the above
TEST PRINT was
set as FACTORY1/2
When the above TEST PRINT
was set as CONFIGURATION,
BARCODE, HEAD CHECK or
HEAD SENSOR
* Press <, >, + or - button to select
item or set the value accordingly.
The active icons are displayed on
the screen.
3
/$%(/6,=(
[:
+
-
When the above
TEST PRINT was set
as SMALL PITCH
FEED button
+
-
+
-
+
-
+
-
Displayed
only when
SMALL
PITCH and
TEAR OFF
are selected
or
button
FEED button
 Loading...