Table of Contents
Page iv HR2 Series Operator Manual
TABLE OF CONTENTS
Introduction 1 - 1
1.1 Features of the Printer................................................................................................. 1 - 2
1.2 Unpacking ................................................................................................................... 1 - 2
1.2.1 Included Accessories......................................................................................... 1 - 2
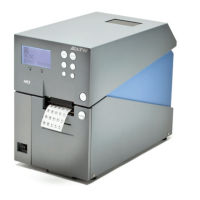
1.3 Parts Identification....................................................................................................... 1 - 3
Installation 2 - 1
2.1 Site Location................................................................................................................ 2 - 2
2.2 Media Selection........................................................................................................... 2 - 2
2.3 Loading Media............................................................................................................. 2 - 3
2.3.1 To load the label when using the dispenser ...................................................... 2 - 3
2.3.2 When operating in continuous mode for the first time........................................ 2 - 7
2.3.3 To load the media when operating in continuous mode .................................... 2 - 7
2.3.4 Overview of the media/ ribbon loading path ...................................................... 2 - 8
2.4 Loading the Carbon Ribbon ........................................................................................ 2 - 9
2.5 Removing the Carbon Ribbon ................................................................................... 2 - 15
2.6 Basic Connections..................................................................................................... 2 - 17
2.6.1 Connecting the Interface board ....................................................................... 2 - 17
2.6.2 To Configure the Connected Interface............................................................. 2 - 18
2.6.3 Interface Combination...................................................................................... 2 - 18
2.6.4 Connecting the Power Cable ........................................................................... 2 - 19
2.6.5 Turning On the Power...................................................................................... 2 - 20
2.6.6 Turning Off the Power ..................................................................................... 2 - 20
2.7 Connections of optional accessories......................................................................... 2 - 21
2.8 LCD Power Saving Mode .......................................................................................... 2 - 24
2.8.1 Turning off the LCD Backlight.......................................................................... 2 - 24
2.8.2 Turning on the LCD Backlight.......................................................................... 2 - 24
Operation and Configuration 3 - 1
3.1 Operator Panel ............................................................................................................ 3 - 2
3.2 Operating Modes......................................................................................................... 3 - 5
3.3 ONLINE And OFFLINE Modes.................................................................................... 3 - 8
3.3.1 Online Mode ...................................................................................................... 3 - 8
3.3.2 Offline Mode ..................................................................................................... 3 - 8
3.3.3 To Adjust the Screen Contrast........................................................................... 3 - 8
3.4 Adjustment Screen...................................................................................................... 3 - 9
3.5 Cancel Print Job Mode ............................................................................................. 3 - 11
3.6 User Mode................................................................................................................. 3 - 12
3.7 Interface Mode .......................................................................................................... 3 - 15
3.7.1 Overview of Interface Mode Configurations .................................................... 3 - 15
3.7.2 Enabling Interface Card Configuration............................................................. 3 - 18
3.8 CARTRIDGE Mode ................................................................................................... 3 - 25
3.9 SEMBL Mode ............................................................................................................ 3 - 27
3.10 Advanced Mode ...................................................................................................... 3 - 28
3.11 HEX Dump Mode .................................................................................................... 3 - 34
3.12 Received Data Saving Mode................................................................................... 3 - 35
3.13 Test Print Mode ....................................................................................................... 3 - 36
3.13.1 Types of Test Print......................................................................................... 3 - 39
3.13.2 Explanation of the contents of each piece of Factory Test Print 1................. 3 - 39
 Loading...