3.12
SEL-787 Relay Instruction Manual Date Code 20081022
PC Software
Meter and Control
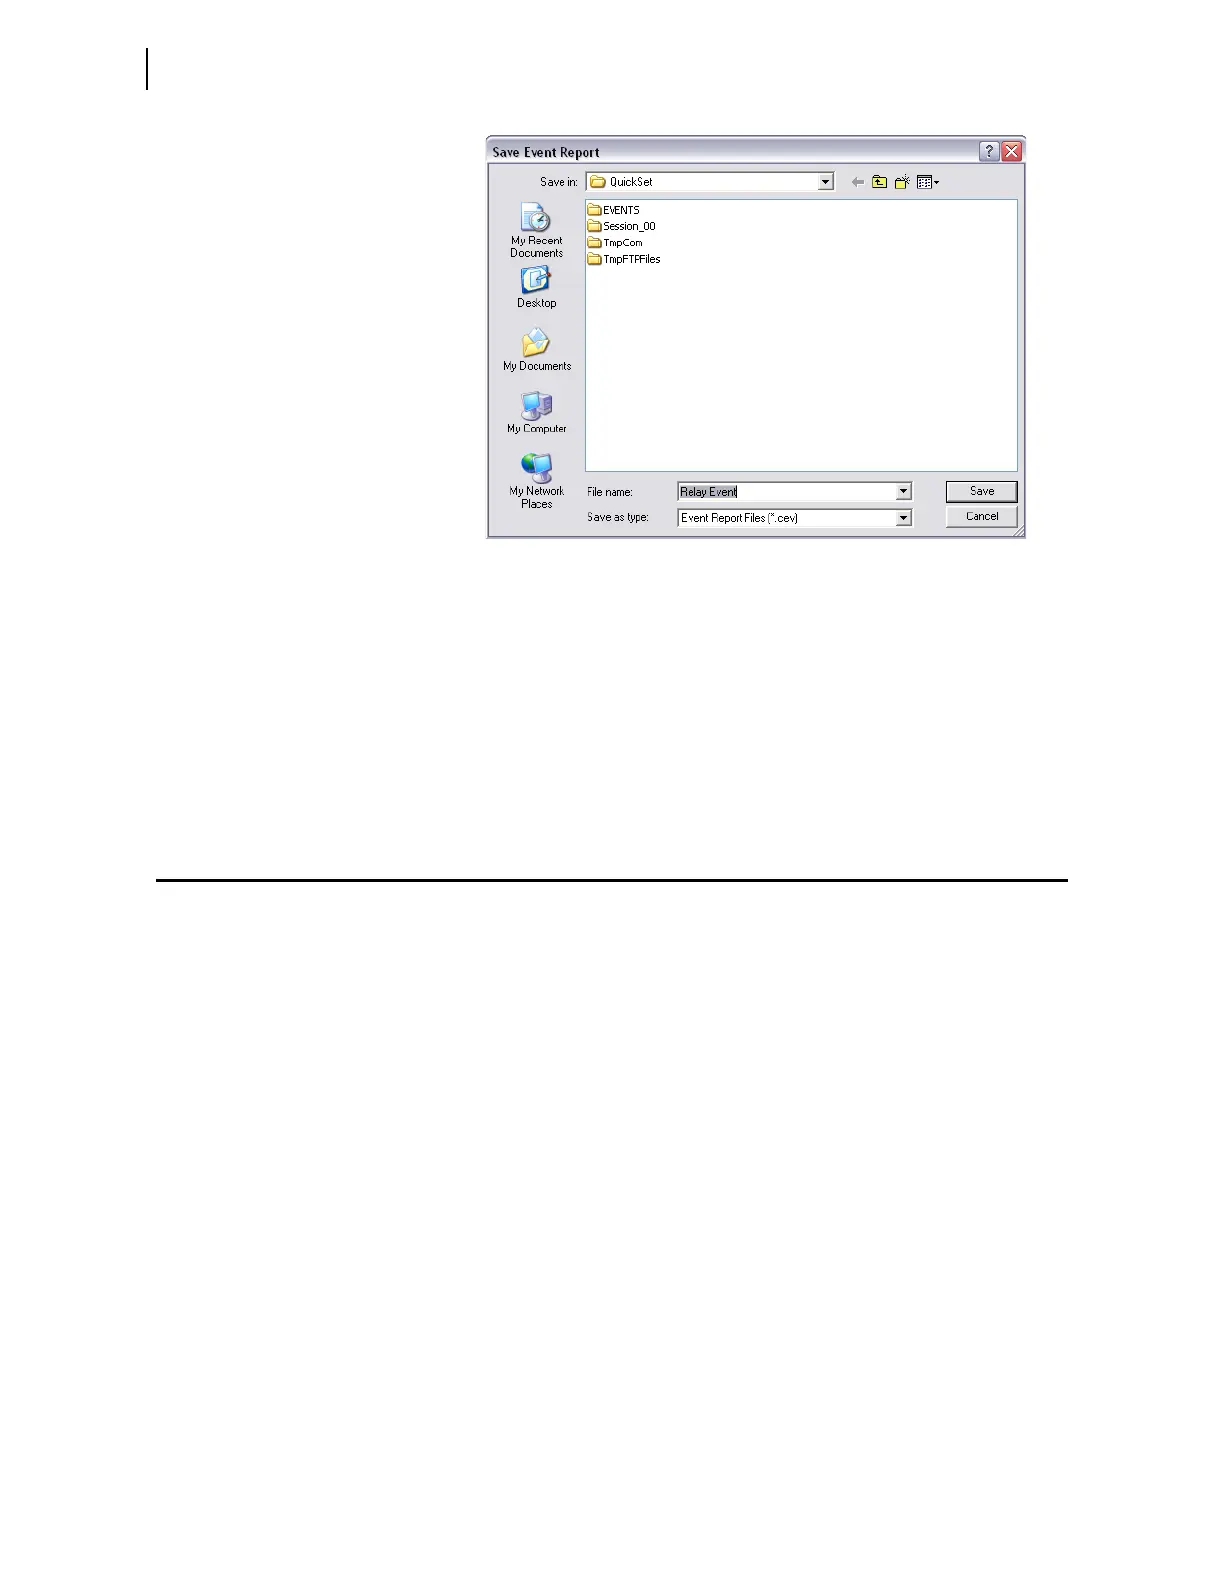
Figure 3.11 Saving the Retrieved Event
Enter a suitable name in the File name text box, and select the appropriate
location where
ACSELERATOR QuickSet should save the event record.
View Event Files
To view the saved events, you need the SEL-5601 software package. Use the
View Event Files function from the Tools > Events menu to select the event
you want to view (
ACSELERATOR QuickSet remembers the location where
you stored the previous event record). Use View Combined Event Files to
simultaneously view as many as three separate events.
Meter and Control
Click on Tools > Meter & Control to bring up the screen shown in
Figure 3.12. The HMI tree view shows all the functions available from the
HMI function. Unlike the self-configuration of the device, the HMI tree
remains the same regardless of the type of cards installed. For example, if no
Analog Input card is installed, the Analog Input function is still available, but
the device responds as follows:
No Analog Input Card Present.
Device Overview
The device overview screen provides an overview of the device. The Contact
I/O portion of the window displays the status of the two inputs and three
outputs of the main board. You cannot change these assignments.
You can assign any Relay Word bit to the 16 user-defined target LEDs. To
change the present assignment, double-click on the text above the square you
want to change. After double-clicking on the text, a box with available Relay
Word bits appears in the lower left corner of the screen. Select the appropriate
Relay Word bit, and click the Update button to assign the Relay Word bit to
the LED. To change the color of the LED, click in the square and make your
selection from the color palette.
The front-panel LEDs display the status of the 16 front-panel LEDs. Use the
front-panel settings to change the front-panel LED assignment.